Do you have a question about the Ender 3 S1 and is the answer not in the manual?
Troubleshooting nozzle kit shaking after installation.
Resolving print platform shaking post-installation.
Printer's maximum build volume (length/width/height).
Details on printing precision and nozzle specs.
List of supported filaments like PLA, TPU, PETG, ABS.
Printer voltage settings (115V, 230V).
Maximum temperature the nozzle can reach.
Maximum temperature the hot bed can reach.
Information on the recommended and fastest printing speeds for the machine.
Correct procedure for powering on the printer.
Steps and methods for leveling the 3D printer.
Procedure to heat nozzle and hot bed to desired temperatures.
Detailed instructions for loading filament into the printer.
Instructions for replacing filament during or after printing.
Guidance on replacing the nozzle with different orifice sizes.
Specific ambient temperature needs for ABS printing.
How to check and adjust drive belt tension.
Controlling X, Y, Z, E axes individually via screen.
File formats like STL, OBJ, AMF supported by slicer.
Recommended parameter settings for slicing and printing.
Optimal print temperature settings for PLA filament.
Methods to prevent or fix print warping.
Steps to diagnose and fix filament extrusion problems.
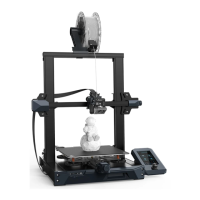
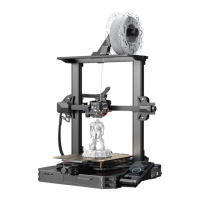
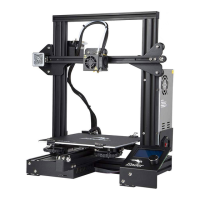
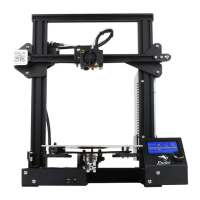
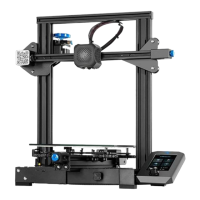
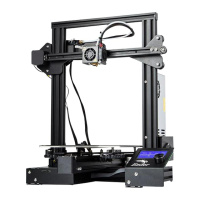
The Ender-3 S1 is a 3D printer designed for ease of use and reliable performance, with a focus on pre-assembly and user-friendly operation.
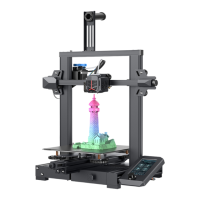
The Ender-3 S1 is primarily a Fused Deposition Modeling (FDM) 3D printer, capable of creating three-dimensional objects from digital designs. It supports printing with various filament types, including PLA, TPU, and PETG, and can also print ABS in a constant temperature environment. The printer features a single printhead construction. It is equipped with a 32-bit silent motherboard and fan, contributing to a quieter operation, with noise levels around 55 decibels within 0.5 meters. The machine includes a power-off resume function, allowing prints to continue after an unexpected power interruption. It also integrates a filament sensor, which can detect when the filament runs out or breaks, pausing the print to allow for filament replacement. The Ender-3 S1 utilizes a double Z-axis screw structure for stable and precise vertical movement.
Assembly and Setup: The Ender-3 S1 is largely pre-assembled, with 96% of the components already in place, allowing for quick setup, typically within 5-20 minutes. The consumables rack is mounted vertically on top of the gantry and secured with screws. Before powering on, users should confirm that the printer's power supply voltage is adjusted to the local voltage (either 115V or 230V, with 50/60Hz frequency and 24V DC output) to prevent damage.
Printing Process: The printer supports both SD card printing and inline printing, though SD card printing is recommended to avoid potential failures due to network signal problems. The fastest printing speed is 150mm/s, with an optimal range of 50-100mm/s recommended for best results. The default nozzle aperture is 0.4mm, but it can be replaced with other sizes (e.g., 0.2mm, 0.6mm, 0.8mm). When changing nozzles, the layer height and wall thickness in the slicing software must also be adjusted. The printer comes standard with a 0.4mm nozzle and can achieve an accuracy range of 0.1-0.4mm.
Temperature Control: The nozzle can reach a maximum temperature of 260 degrees Celsius, and the hot bed can reach up to 100 degrees Celsius. For PLA preheating, users can select the PLA preheat option or manually set the printhead temperature to 260 degrees and the hotbed to 100 degrees. For PLA consumables, recommended print temperatures are 200-210 degrees for the nozzle and 45-55 degrees for the hot bed.
Filament Management: Loading filament involves turning on the machine, setting the nozzle temperature to 200 degrees, cutting the filament end at a 45-degree angle, and feeding it into the Teflon tube until it emerges from the nozzle. To replace filament, the nozzle should be heated to 200 degrees, the extrusion clamp pinched, the old filament pushed slightly forward, and then quickly pulled out before inserting the new filament. The printer only supports 1.75mm diameter consumables.
Leveling and Adjustment: The machine supports automatic leveling. For manual adjustments, if the nozzle kit shakes, the eccentric nut on its back plate should be tightened. If the platform is shaky, the eccentric nut at the V-wheel of the hot bed needs adjustment. For Z-axis movement lag, the screw nut needs to be adjusted to ensure smooth, consistent movement. If the X-axis movement gets stuck, the V-wheel should be checked and adjusted until it moves smoothly.
Screen Operation: The screen is operated by turning a knob to select items and pressing the knob to confirm. The interface allows for language switching between Chinese and English by selecting the "Language" option under the "prepare" menu.
Slicing Software: The printer is compatible with slicing software such as Cura and Simplify. Model files recognized by the printer are in Gcode format, while the software supports STL, OBJ, and AMF formats for models. The slicing software can be downloaded from the official website. Common settings for slicing and printing parameters include a layer height of 0.15mm, wall thickness of 1.2mm, top/bottom layer thickness of 1.2mm, filling of 15%-25%, printing speed of 50-60mm/s, nozzle temperature of 200-210 degrees, hot bed temperature of 45-55 degrees, and all support types with a bottom grid platform attachment. Partial support adds support only between the model and the hot bed, while full support adds it between model parts as well; full support is generally recommended.
Model Manipulation in Slicing Software: Models can be imported by dragging them directly into the software or using the open/import function. Model size can be modified by selecting the model and using the size modification icon; clicking "Unlock" allows for single-direction scaling, while locking scales proportionally. Model angles can be adjusted by selecting the model and using the rotation icon. Users can zoom in/out by scrolling the mouse wheel and drag the view by pressing and holding the wheel. Rotating the view to see the model from multiple angles is done by pressing and holding the right mouse button.
Safety: The nozzle heats to high temperatures, so children and the elderly should use the machine under guidance to avoid burns.
General Maintenance: Regular maintenance includes cleaning the fan blade, lubricating the filament rod, and performing throat cleaning every 3-6 months.
Warranty: The machine has a one-year warranty, with the nozzle kit and other wearing parts covered for three months.
| Build Volume | 220 x 220 x 270 mm |
|---|---|
| Nozzle Diameter | 0.4 mm |
| Filament Diameter | 1.75 mm |
| Max Nozzle Temperature | 260°C |
| Max Bed Temperature | 100°C |
| Connectivity | USB, SD Card |
| Printer Dimensions | 487 x 453 x 622 mm |
| Weight | 9.1 kg |
| Frame Material | Aluminum |
| Bed Leveling | Automatic |
| Feeder System | Direct Drive |
| Display | 4.3-inch Color Touch Screen |
| Power Supply | 350W |
| Supported Materials | PLA, ABS, TPU, PETG |
| Printing Speed | 150 mm/s |