Fastlane
®
Pro Swim Unit Installation
If the distance between the wall mount bracket and the hydraulic power unit is greater than 25ft (7,6m)
then a junction box and additional ex pipe must be employed. In this case, the ex pipe between the wall
mount bracket and the junction box must be 24ft 6in (7,5m). This will allow the hydraulic hose attached to
the Fastlane Pro to terminate just inside the junction box. Refer to section 5 for additional information.
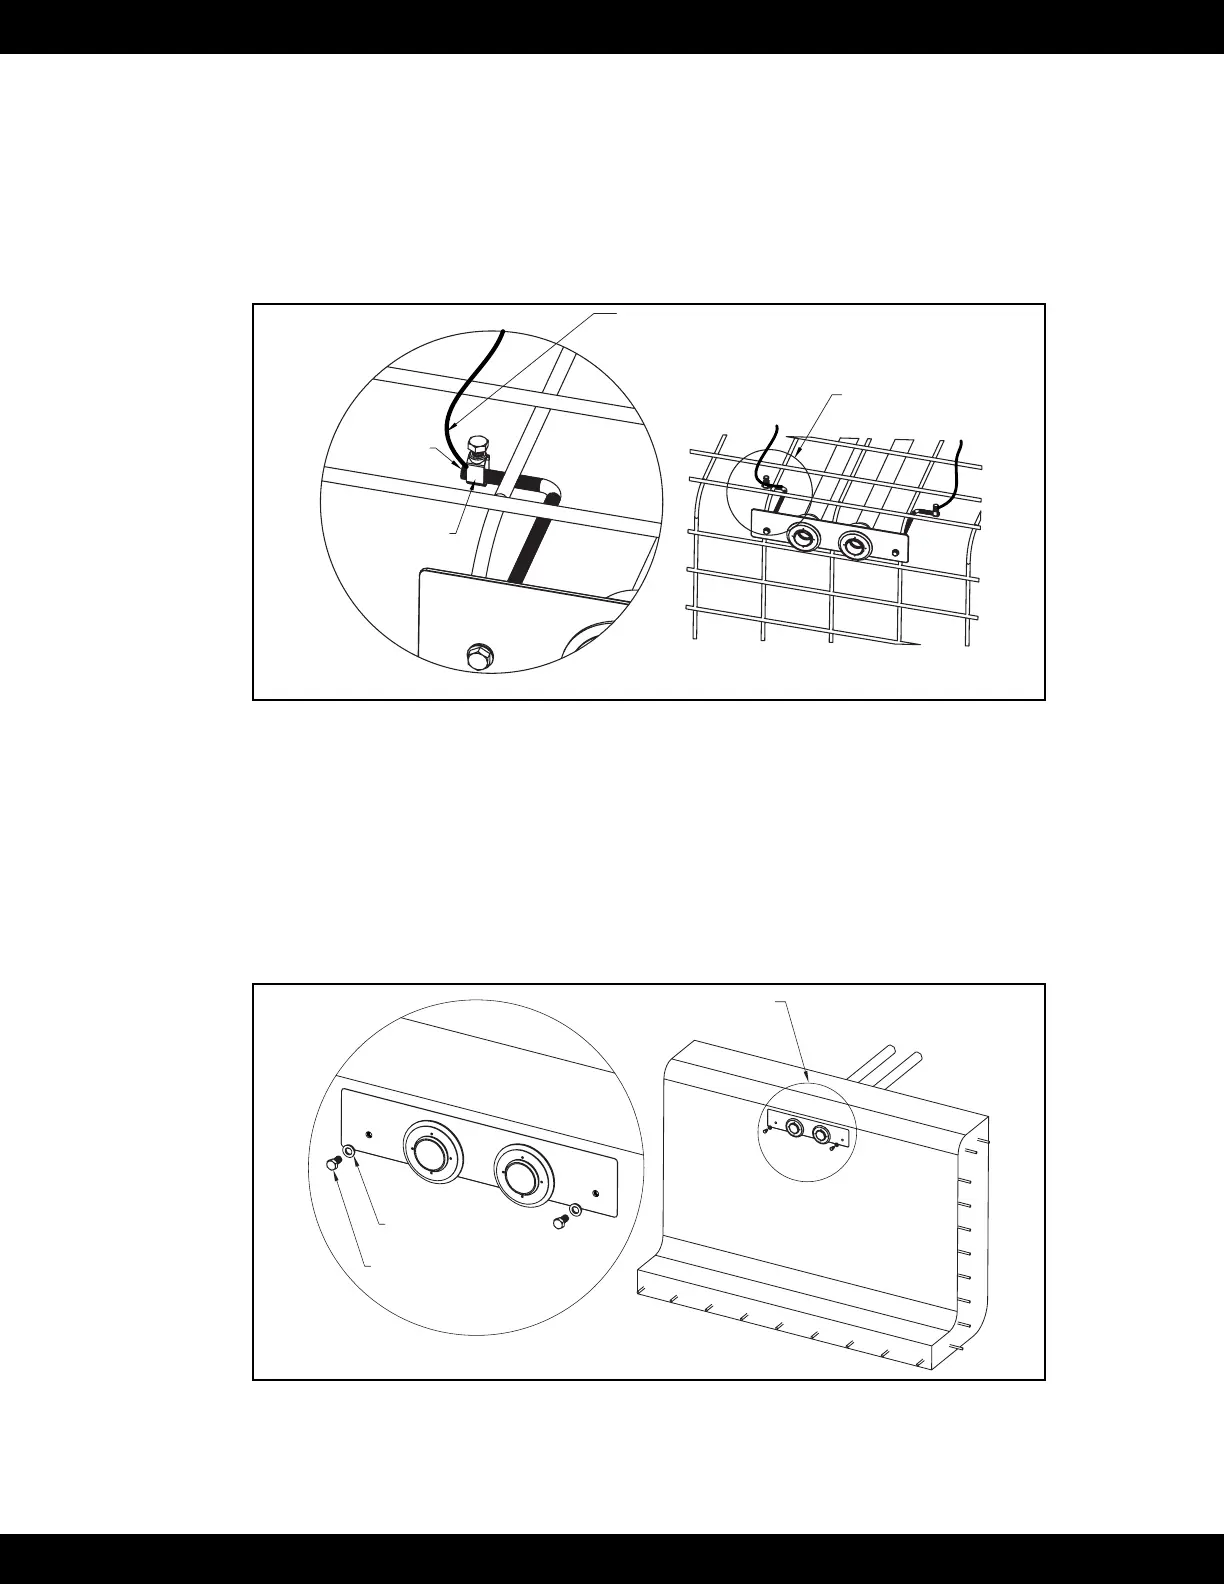
The threaded rods must be tied into the pools bonding grid. Secure a bonding clamp to each threaded
rod. Attach a #8 solid copper wire to each bonding clamp. These wires MUST be attached to a bonding
connection that’s incorporated into the pools bonding grid. In most cases this will be a connection at the
rebar. Verify ALL bonding connections are tight before shooting gunite (Fig 4.20).
Bonding Clamp
(See Detail A)
Bonding Clamp
Threaded Rod
DETAIL A
#8 Solid Copper Wire
MUST BE ATTACHED TO
POOL BONDING GRID
Fig. 4.20
Prior to shooting gunite, it is critical that the opening of each thru-wall and the sacricial bolt be covered.
No gunite can be embedded in these areas.
After verifying the bracket is positioned, bonding connections are secure, and thru-wall openings/sacricial
bolts are covered, gunite can be shot.
After the concrete has cured remove the sacricial 3/8” (9,5mm) washers and bolts and install the pool
liner. Before beginning the liner installation, be sure to note the orientation of the star thru-wall holes at the
12, 3, 6, and 9 (clock positions) as they will be hidden once the liner is installed (Fig 4.21).
Sacrificial Hardware
(See Detail A)
Sacrificial Washer
Sacrificial Bolt
DETAIL A
Fig. 4.21
21