13
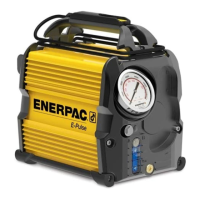
Figure 9, Pump Operating Positions - NOT ALLOWED
7.3 Air Removal
When hydraulic components are connected for the first time, air
may be trapped in the system. To ensure smooth, safe operation,
run the cylinder or tool through several complete advance-retract
cycles before placing the pump into service. Do this with no load
on the cylinder or tool and with the pump positioned higher than
the cylinder or tool.
When the cylinder or tool advances and retracts smoothly and
without hesitation, the air has been vented from the system.
If cylinder or tool fails to operate smoothly after being
cycled, perform the pump priming/air purging procedure. Refer
to Section 10.5.
7.4 Operating Precautions
WARNING
Failure to observe the following precautions and instructions
may result in death or serious personal injury
• Keep persons away from area under load during lifting,
lowering and whenever the control valve lever is moved.
• Continuously monitor the cylinder or tool being operated.
Be prepared to stop the pump immediately if a problem or
potentially dangerous situation occurs.
• Whenever possible, the pump speed should be set before
the pump is operated. Speed adjustments during operation
should be minimized so that the operator's complete attention
is focused on the lifting or lowering operation being performed.
• Never leave the pump running and unattended while it is being
operated in latched mode. When in latched mode, pump will
continue to run until stopped by the user or the 5 minute
automatic shut-o timer is activated.
• Because the time for the motor to stop can vary depending on
load conditions, the cylinder or tool may not stop advancing
immediately when the user releases the pendant jog button.
There may be a small continued movement of the cylinder or
tool while the motor is stopping.
• Avoid continuing to pressurize the cylinder or tool after it has
reached its maximum stroke.
7.5 Operation - EP3204J Models
Refer to Sections 6.3 and 6.6 of this manual for
detailed descriptions of the pendant controls and control valve
functions.
7.5.1 Advance - EP3204J Models
1. Be sure that the control valve lever is in the “A” position.
2. Start the pump. The cylinder or tool will begin advancing
immediately.
3. When the cylinder or tool has advanced the desired amount,
stop the pump. The cylinder or tool will stop advancing.
7.5.2 Release - EP3204J Models
1. Be sure that the pump is turned-o.
2. Slowly move the control valve lever to the “T” position to
retract the cylinder or tool. Moving the lever slowly will
reduce the risk of a lifted load dropping too rapidly.
• As needed, position the control valve lever in the flow metering
range to provide added control during the retract stroke
• Additional flow control devices (optional accessories - refer to
Enerpac catalog) may be required to more precisely control
the rate of retraction.
• Single-acting cylinders or tools not equipped with a return
spring may need to be manually retracted after all hydraulic
pressure is relieved.
7.6 Operation - EP3404J Models
WARNING
Under some conditions, the load could drop if
the control valve lever is moved between the “A” and “N” or
“B” and “N” positions while a load is present.
During lifting and lowering procedures, leave` the valve lever
in the “A” or “B” position so that the load is held when the
pump stops. Do not move the valve lever until the load is
removed or mechanically supported by stands, blocking,
hoist or other suitable means.
Refer to Sections 6.3 and 6.7 of this manual for
detailed descriptions of the pendant controls and control valve
functions.
7.6.1 Advance - EP3404J Models
1. Move the control valve lever to the “A” position
2. Start the pump to begin advancing the cylinder or tool.
3. When the cylinder or tool has advanced the desired amount,
stop the pump. The cylinder or tool will stop advancing.
4. Mechanically support the lifted load. Refer to Section 7.7.
5. Move the control valve lever to the “N” position.
7.6.2 Retract - EP3404J Models
1. Move the control valve lever to the “B” position.
2. Start the pump to begin retracting the cylinder or tool.
3. When the cylinder or tool has retracted the desired amount,
stop the pump. The cylinder or tool will stop retracting.

 Loading...