9.
DISMANTLING AND STORAGE
Once easyWallbox has reached the end of its technical and operational
life, it must be deactivated or taken out of service.
9.1.
Disconnection from the power supply – Mode 3 or Modo 2 with
Power upgrade
2.
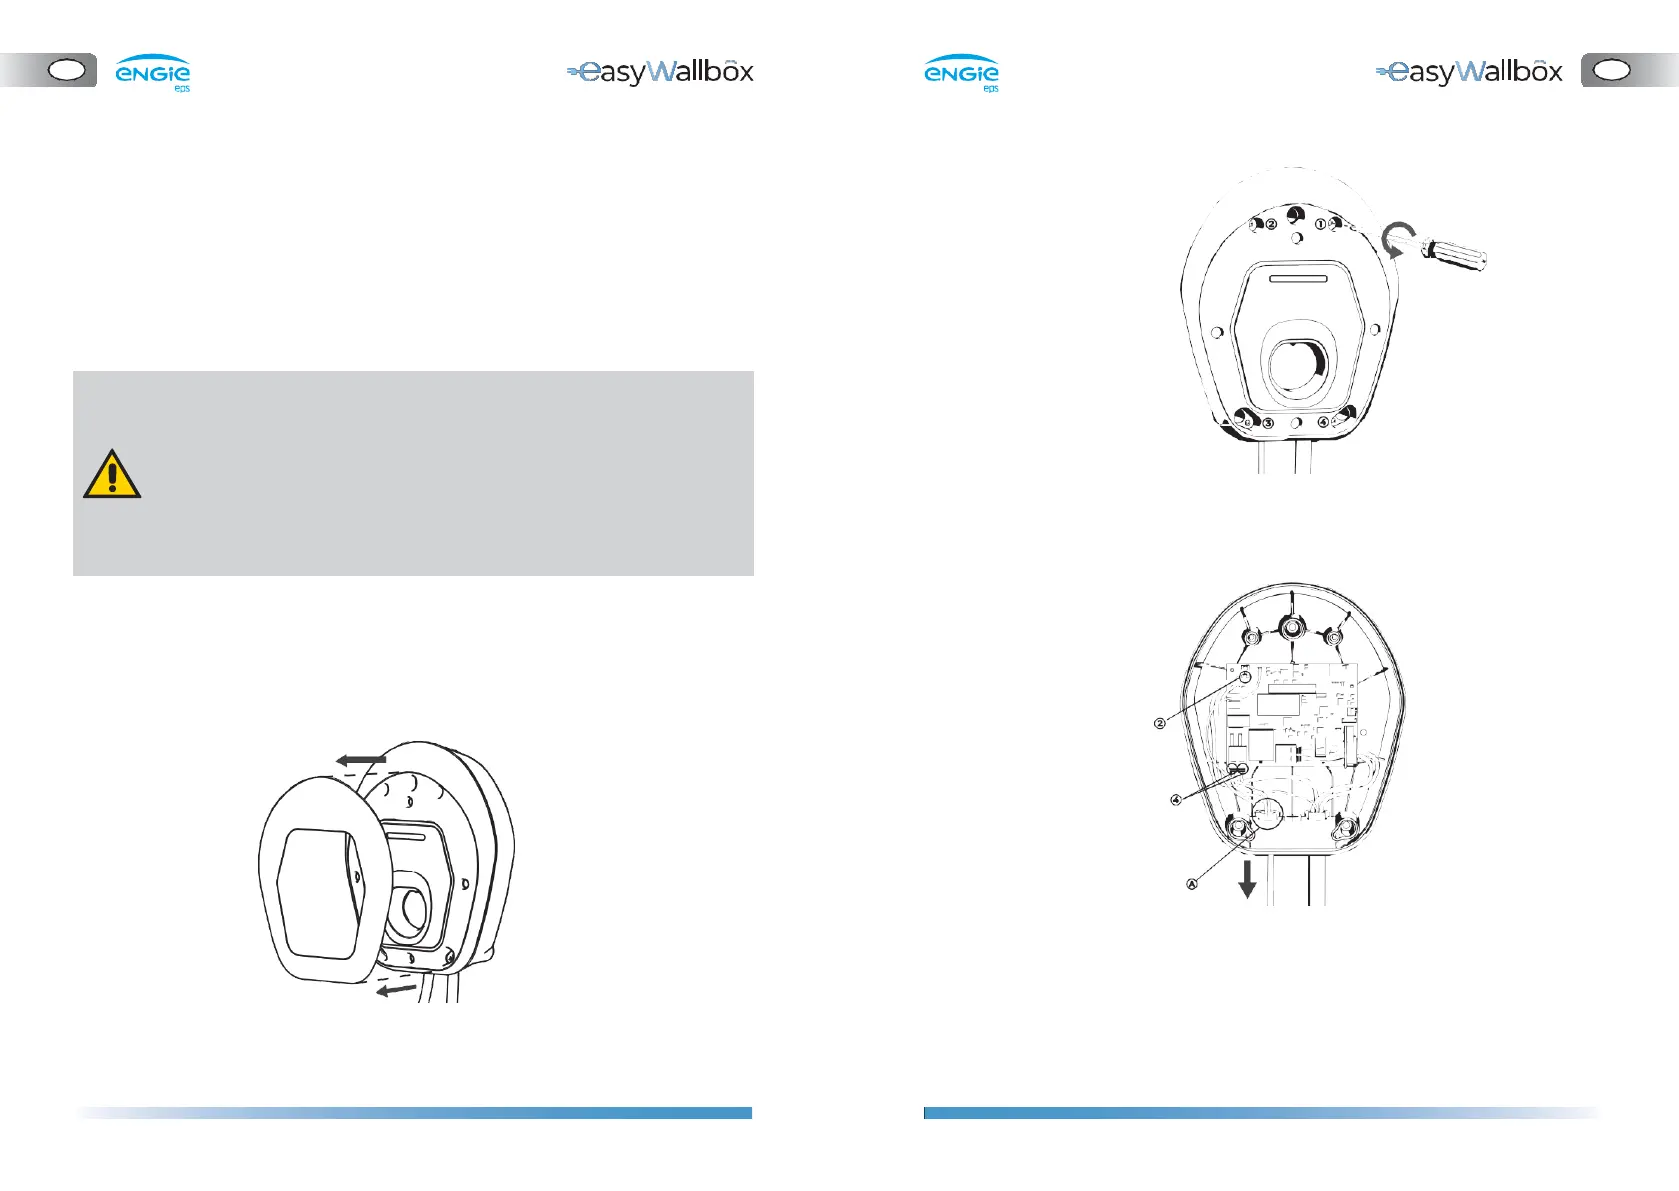
Remove the front panel of
easyWallbox
9.2.
Removal of the device from the wall
Follow the steps below to remove easyWallbox from the wall where it is
installed:
1.
Remove the aesthetic cover (if you don
’
t need to remove the power
supply cable and the current sensor is not installed, proceed to step 4)
3.
Remove the power supply cables (if preferred)
⚫
Disconnect the wires connected to the J1 tool-free ‘push-lock’
terminals (4).
⚫
Disconnect the earthing wire connected to the J3 ‘Faston’
terminal (2).
⚫
Remove the power cable from the cable gland (A).
Risk of electric shock.
Before starting dismantling, be sure that the easyWallbox is not
connected to any power supply. Any operation of installation,
maintenance and dismantling should only be done when the
power supply is switched off on your service panel and the
industrial connector in Modo 2 is removed.
The intervention of qualified personnel is strongly recommended to
dismantle easyWallbox.