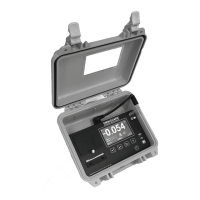
Page 18
Omniguard Cellular™ Owner’s Manual
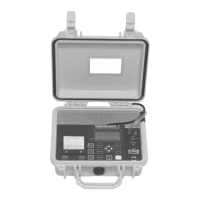
Page 19
Engineering Solutions Inc
To change the Passcode --
1. From the Passcode Protection screen, touch the
****
to go to
the passcode entry screen.
2. Type in the current passcode followed by
, to be allowed to
create a new passcode.
3. Type in the new passcode using the alpha-numeric keypad an
press
when done.
4. Re-enter the passcode and press to confirm it.
Note : In case the passcode is lost or forgotten, it can be changed
using the Master passcode.
Erase Job Logs
This function will completely erase all Job Logs, the Passcode is
required to use this function.
To Erase Job Logs --
1. From the Home screen, touch to go to the Main menu.
2. From the Main menu, touch Erase Job Logs.
3. Touch Clear Log Now and enter the Passcode (required).
4. Screen shows Clearing job logs..., then Done when completed.
5. Touch
to return to the Main menu.
Restore Factory Defaults
This function will completely erase all Job Logs and restore all settings
to the factory defaults (except Time & Date), including the Passcode.
The Passcode is required to use this function.
To Restore Factory Defaults --
1. From the Home screen, touch to go to the Main menu.
2. From the Main menu, touch Restore Factory Defaults.
3. Touch Factory Default and enter the Passcode (required).
4. Screen goes blank, then shows Omniguard and Initializing (the
power on screen).
5. Touchscreen calibration is required. A white box with an X in the
middle of it will appear. With the tip of the finger or by pressing
gently with a stylus, touch the X. The closer to touching the center
of X, the better.
6. Repeat this process 3 more times, until the Omniguard shows the
calibration is completed.
Note: The Alarm 1 & 2 settings are displayed in
yellow on the Home screen until they have been
changed from factory defaults.
Using Help
To obtain help for a specifi c screen --
1. If the screen has an icon in the corner, the touch the icon to
see Help about the current screen.
2. Touch
to return to the previous screen.
To go to the general Help menu --
1. If the screen has an icon in the corner, the touch the icon to
see Help about the current screen. Touch the
icon again to go
to the general Help menu.
3. Use the arrows to scroll thru the Help topics.
4. Touch the topic title to view detailed Help about it.
5. Touch
to return to the previous screen.
USB Ports
The Omniguard has two USB ports located by the icon. A chart
showing all of the USB device icons is on page 6.
The top port supports the following devices:
• USB Flash Drive
• Remote Auxiliary Alarm (requires USB Port Adapter)
• Telephone Autodialer (requires USB Port Adapter)
• Cellular Wireless Modem (requires a USB Port Adapter)
The bottom port, is used to communicate between a PC and the
Omniguard.
Communication
The Omniguard has a built-in USB port to connect to a PC. Before a
PC can communicate with an Omniguard, download and install the
Windows® compatible Omniguard Communication software from our
web site at www.Omniguard.com. Detailed instructions for installation
and operation of the software are included with the download.
Plug the flat rectangular end of the USB cable into a PC and the
square end into the bottom USB port of the Omniguard.
Once connected, you can --
• Transfer the current Job Log or all Job Logs to the PC.
• Configure and set up multiple Omniguards, using the software to
upload configuration settings
Transferring a Job Log to a PC
The Job Logs stored in the Omniguard’s memory can be transferred
to a PC for permanent storage, statistical analysis and summary
report generation. Job Logs transferred to a PC can be reviewed and
reprinted any number of times.