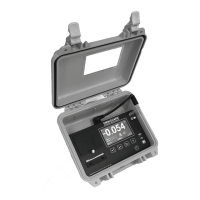
Page 12
Omniguard Cellular™ Owner’s Manual
Page 13
Engineering Solutions Inc
armed. If the containment pressure rises or falls outside the operating
window, the following will occur:
1. Internal alarm and the Remote Auxiliary Alarm (if present) will
sound and will remain active until the alarm is muted by touching
the
icon on the Home screen. The icon will change to to
indicate it is muted. Once the alarm condition is over and the
Omniguard returns to Normal operation the alarm will automatically
re-arm.
2. Any other accessory devices (Telephone Autodialer or Cellular
Wireless Modem) will also activate and will remain active until
the containment pressure is restored and the Omniguard returns
to Normal operation.
3. As the containment pressure nears the alarm settings, the
Omniguard will indicate that it is nearing an alarm condition. The
border around the screen will change from green to yellow, and
the status will change to APPROACHING ALARM.
4. As the pressure continues to move outside the operating window
(Alarm settings), the alarm will sound and a red border will appear
around the screen and the status will change to >>ALARM<<.
5. The Omniguard will log & print which Alarm, 1 or 2 was exceeded.
The Log Rate will increase to the Alarm Condition rate. Pressure
readings will be time-stamped as they are saved and printed.
When the containment pressure returns to within the normal operating
window, the Omniguard will log and print NORMAL OP with a time-
stamp. The alarm and accessories (if present) will turn off (or re-arm
if they have been muted), also a Normal Operation status message
will be sent to off-site personnel if the Cellular Wireless Modem is
present. The screen border will change back to green and the status
will indicate NORMAL.
Audible Alarm Mute, Disable & Re-arming
The speaker icon on the Home screen indicates if the internal audible
alarm (and optional Remote Auxiliary Alarm if present) is armed,
disabled or muted. The audible alarm is automatically armed when the
Omniguard is turned On. Touch the speaker icon to change between
armed and disabled, and to mute during an ALARM condition.
Audible Alarm Armed (and Remote Auxiliary Alarm)
Armed, speaker sounds during an ALARM condition.
Audible Alarm Disabled (and Remote Auxiliary Alarm)
Disabled, speaker will not sound during an ALARM condition.
Audible Alarm Muted (and Remote Auxiliary Alarm)
Muted during the ALARM condition, automatically re-arms
when containment pressure returns to operating window, status
NORMAL.
Alarm 1: Upper limit of operating window. (default is -0.025” WC)
Alarm 2: Lower limit of operating window. (default is -0.050” WC)
The Omniguard can be used in both positive and negative pressure
monitoring applications.
Negative Pressure Application -- Asbestos or lead abatement
Example settings: Alarm 1 @ -0.020” WC
Alarm 2 @ -0.050” WC
Positive Pressure Application -- Clean room or HVAC system
Example settings: Alarm 1 @ +0.050” WC
Alarm 2 @ +0.025” WC
Alarm Settings & Operating Window
This is an example of a setting for negative containment with an
operating window of -0.020” to -0.050” WC (Alarm 1 & 2 settings).
-0.050"
Alarm 2
-0.020"
0.000"
NORMAL OPERATING WINDOW
Alarm 1
INCREASING
VACUUM LEVEL
Negative Pressure
(containment)
Application
Pressure Units: (default is Inches WC)
• Choices are Inches WC (“ WC), millimeters WC (mmWC) or
Pascals (Pa).
Response Rate: (default is Medium)
• Choices are Slow, Medium, Fast.
• Determines how quickly the Omniguard will react to pressure
changes. Reduce this setting if the job site conditions are
fluctuating rapidly and can cause false alarms, such as high
wind.
To ch ang e the se tti ng s - -
1. To change the Pressure Units or the Response Rate, tap the
current setting to scroll through the choices until the desired setting
is shown.
2. To change the Alarm 1 or Alarm 2 settings, touch the arrows
beneath the appropriate setting. Hold the arrow to go faster. New
values are automatically saved.
To uch to return to the Main Menu.
Once the containment pressure reaches the operating window, the
status will indicate NORMAL and logging will begin.
Alarm Condition
Once the containment pressure reaches the operating window, the
Omniguard status will indicate NORMAL and the alarms will be