Component Maintenance Manual
12037 N Highway 99
Seminole, OK 74868
Phone (405) 382-0731
Fax (405) 382-0737
http://www.enviro-ok.com
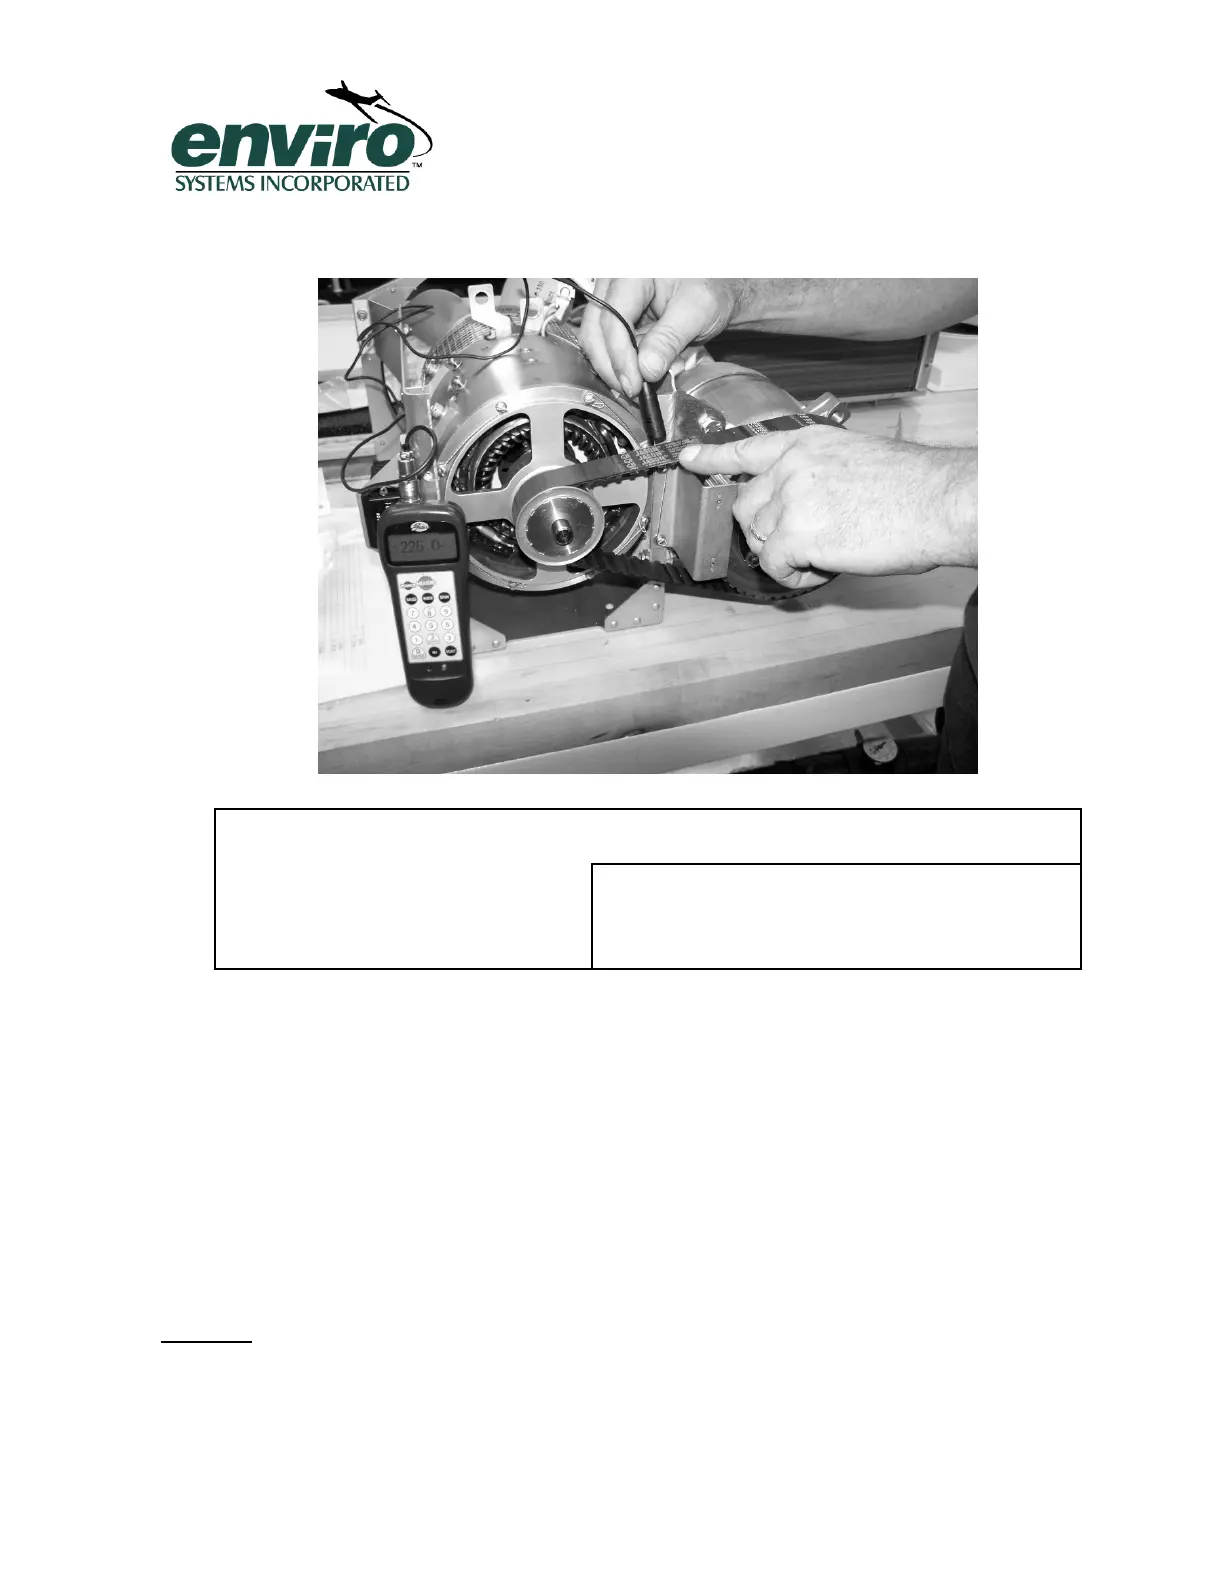
Figure 4 Belt Tensioning Reference
Tensioning Information: (Sonic Tension Meter 508C, www.gates.com)
Table 4 Gates Sonic Tension Meter Data
9.2.5 Assembly of Belt Cover
9.2.5.1 Position belt cover on assembly and attach 2 fasteners at lower cover, attach 2
fasteners at upper mid cover just inside belt cover opening. Install 2 mounting bolts
on side of assembly used to secure drive motor (refer to table 1, section 1.3 for
torque specifications).
9.2.6 Assembly of Fan Shroud
9.2.6.1 After insuring that the shroud/coil mating surfaces have been cleaned in accordance
with section 6, apply a 1/8 inch bead of RTV to fan/outlet shroud/coil mating surface.
CAUTION: DO NOT TIGHTEN FAN SHROUD MOUNTING SCREWS UNTIL MOTOR AND FAN HAVE
BEEN INSTALLED. TIGHTEN ONLY AFTER INSURING THAT THERE IS MINIMUM 0.050” BLADE TIP
CLEARANCE BETWEEN THE BLADE AND THE SHROUD AROUND THE ENTIRE CIRCUMFERENCE.
9.2.6.2 Install receiver dryer mounting bracket prior to tightening shroud mounting bolts.