not horizontal to the X-beam the laser will lose focus as the carriage head moves across the flashlight.
This causes the engraving quality on the right-hand side to suer dramatically.
Setting Focus with the Rotary Attachment
With your cylinder in place on the Rotary Attachment, select the
Jog menu and move the lens carriage above the cylinder. Check
your focus with the Manual Focus Gauge, or by using the plunger
to focus by pressing the Auto Focus button on the Jog menu.
To check that the focus is even across the entire suace, use the
focus gauge while jogging the carriage back and forth across
your cylinder.
When you are finished focusing, press the Reset key on the Touch
Screen. Pressing Reset will send the lens carriage back to its
standard Home Position at the front of the black bumper. You are
now ready to start the job.
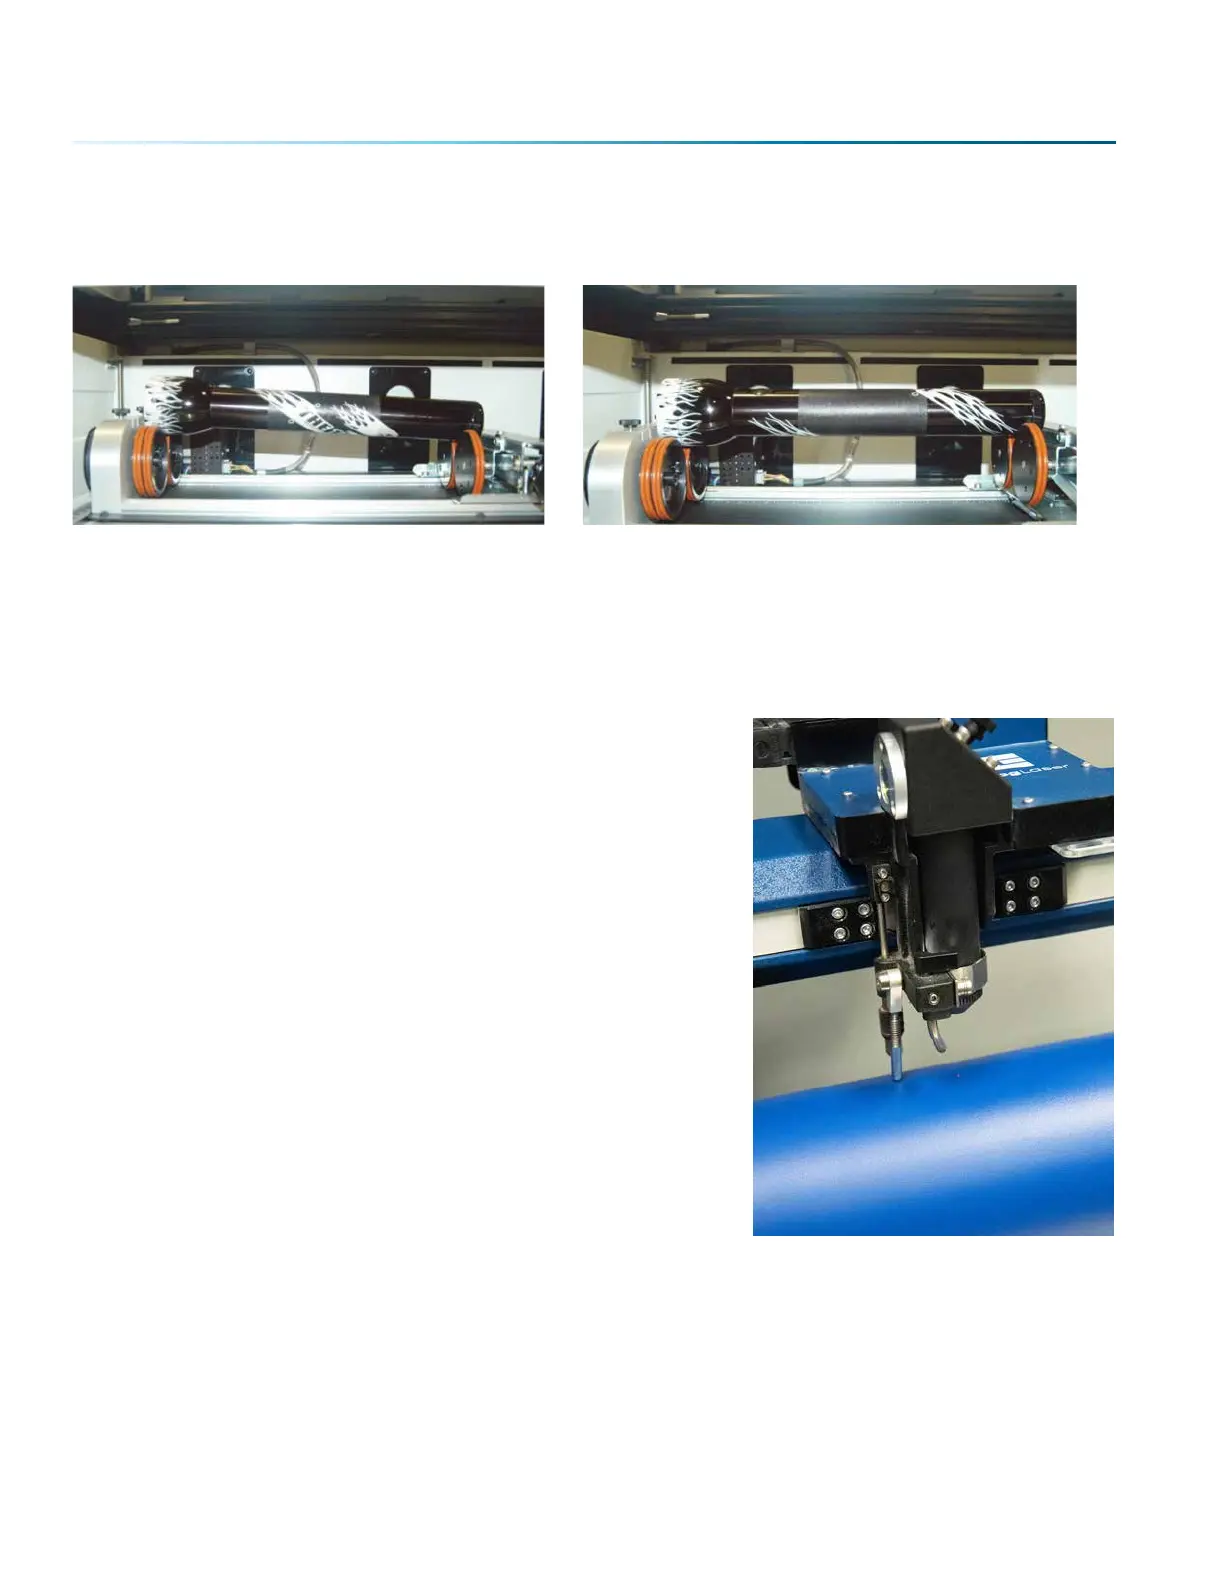
Incorrect Setup: The flashlight is not
horizontal. Raise the right side of the flashlight
by turning the jack screw.
Correct Setup: The flashlight is horizontal to the
X-beam
- 130 -
SECTION 9: OPTIONAL FEATURES
 Loading...


