2. Crop the Photograph: Select the photograph,
then select from the menu bar Eects,
PowerClip, and Place Inside Container. Click
the outline of the photo placeholder to place
the photo inside the box.
3. To resize or move the photograph in the
powerclip box, right click the photo and
select Edit Powerclip. When you are finished
adjusting the image, right click and select
Finish Editing this Level.
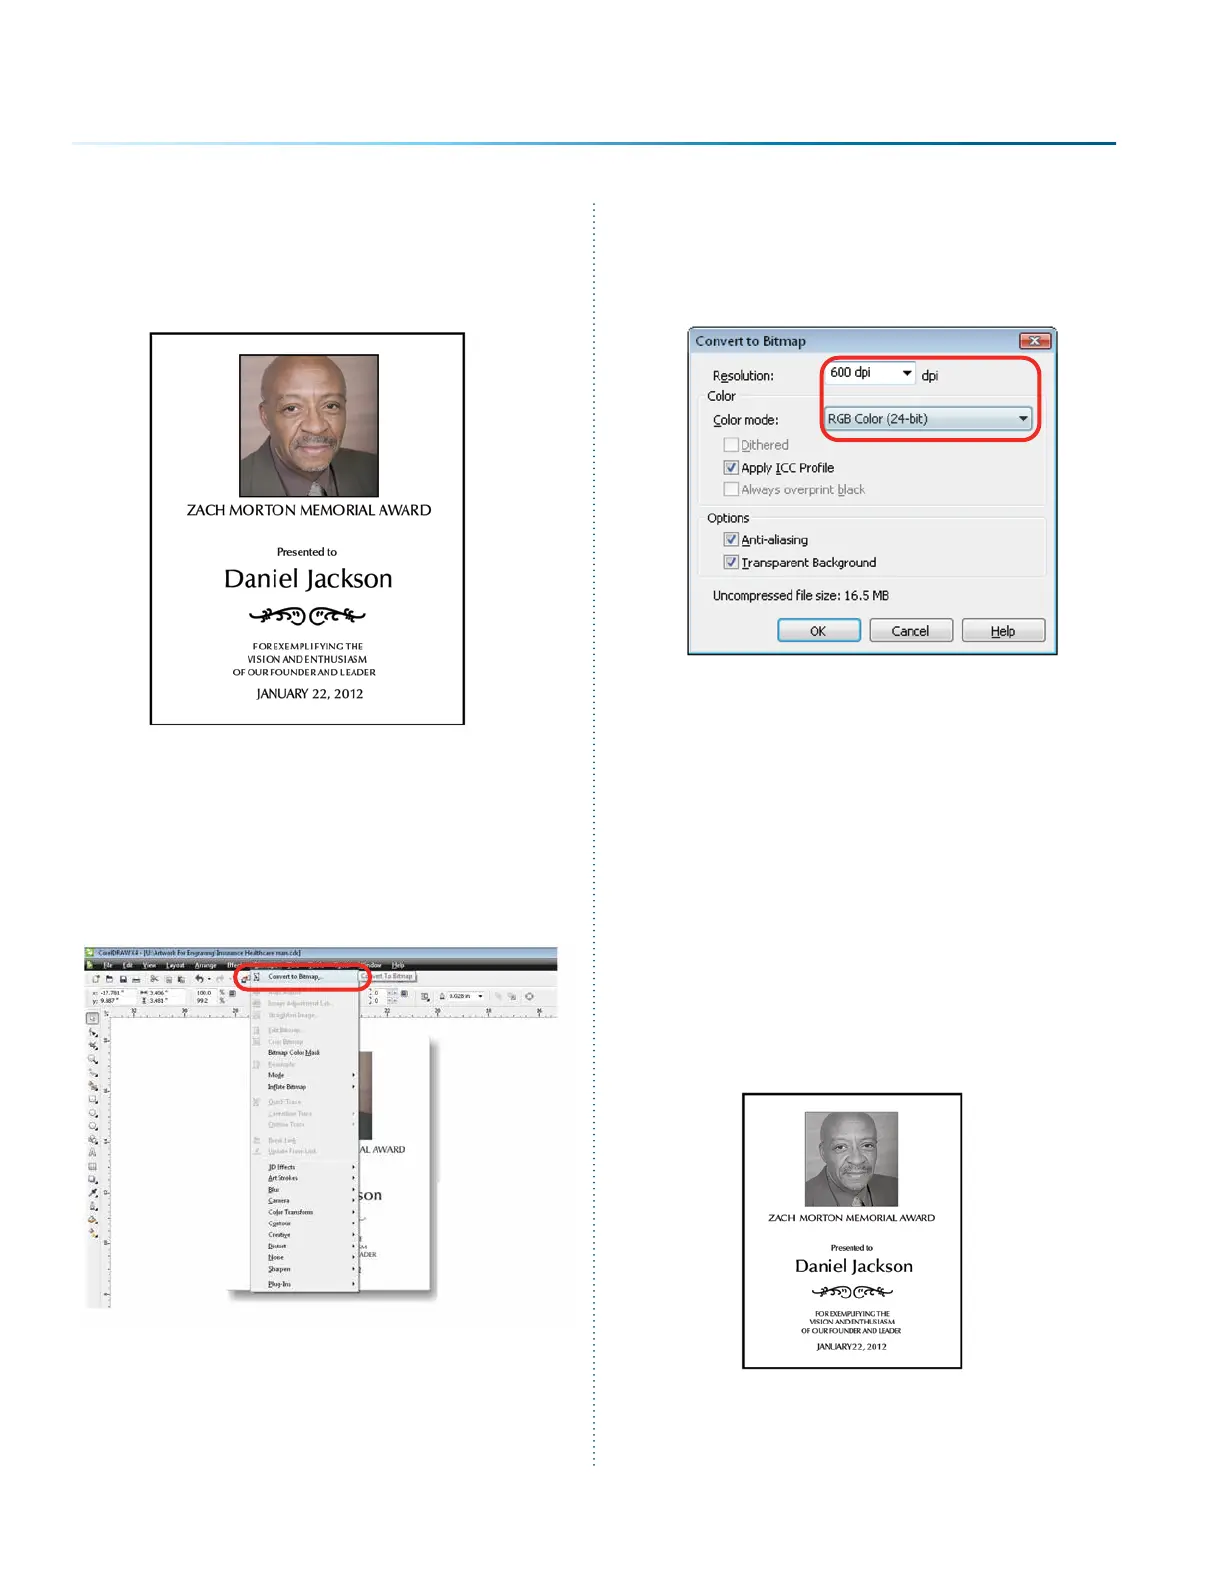
4. Convert to Bitmap: With the photo selected
click Bitmaps, then Convert to Bitmap.
5. Set the resolution to match your engraving
resolution. This is usually 300 or 600 DPi. Set
the color mode to either RGB, CMYK, or
Grayscale (it doesn’t matter which one).
6. Copy the photo in Corel by selecting Edit,
then Copy.
7. Open PLP and paste the image anywhere on
the page by selecting Edit, then Paste.
8. Transform the photo by following steps 6
through 9 in the previous section.
9. Aer the transformed image is prepared,
select File then Export Image. Export the file
as a .bmp. Make note of where you saved the
transformed file.
10. In CorelDRAW select File then Import and
select your transformed file. Place the photo
in the designated space without resizing the
image.
11. Print the file from CorelDRAW as you normally
would, using the same resolution that you
selected in step 5.
- 152 -
SECTION 9: OPTIONAL FEATURES
 Loading...


