EasyManuals Logo

Epilog Laser Fusion Pro 32 User Manual

Epilog Laser Fusion Pro 32
242 pages
To Next Page IconTo Next Page
To Previous Page IconTo Previous Page
Page #167 background imageLoading...
Page #167 background image
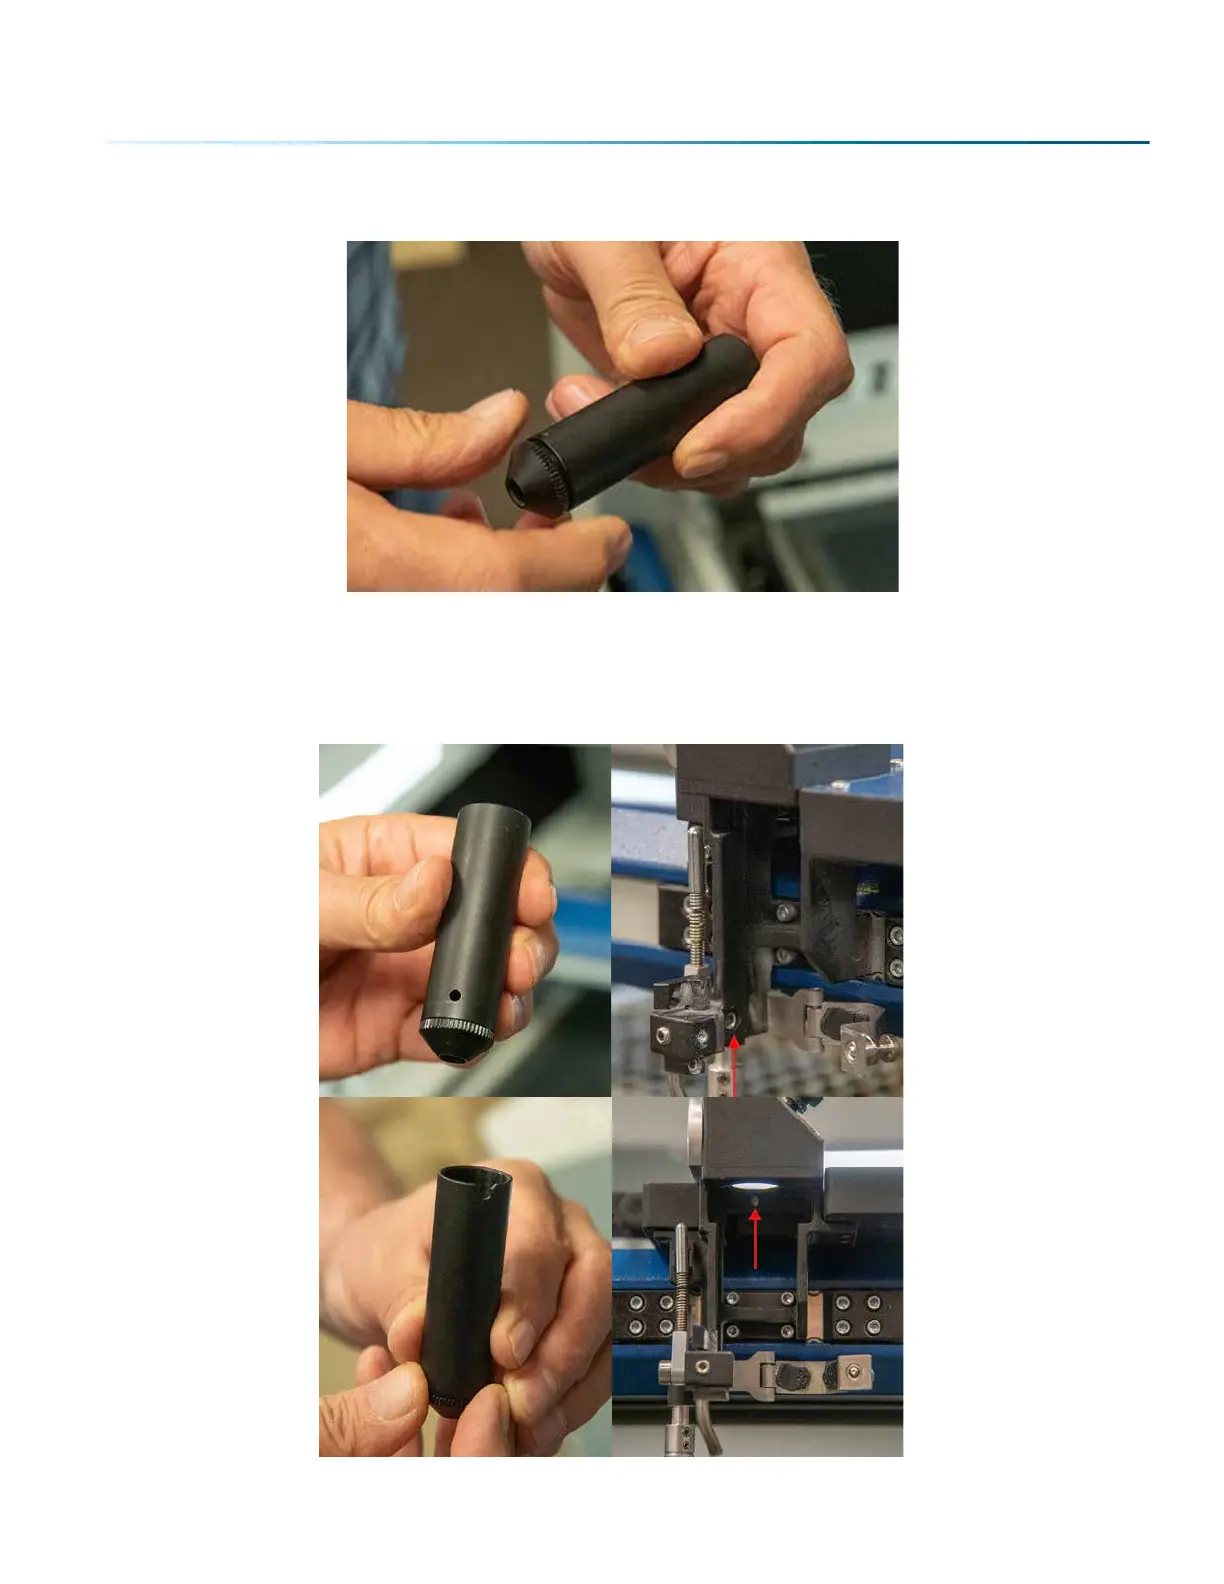
Allow the optics to dry, then twist the cone piece securely back on to the bottom of the lens tube.
When placing the lens tube back into the assembly, make sure that the hole near the bottom of the tube
lines up with the air assist hole on the assembly. Make sure the notch at the top of the lens tube lines up
with the insert on the assembly as well. When the tube is in place it should only shi slightly when twisted
side to side. Wrap the clamp back around the tube and tighten the captive screw.
- 161 -
SECTION 10: SYSTEM MAINTENANCE

Table of Contents

Other manuals for Epilog Laser Fusion Pro 32

Questions and Answers:

Question and Answer IconNeed help?

Do you have a question about the Epilog Laser Fusion Pro 32 and is the answer not in the manual?

Epilog Laser Fusion Pro 32 Specifications

General IconGeneral
BrandEpilog Laser
ModelFusion Pro 32
CategoryEngraver
LanguageEnglish

Related product manuals