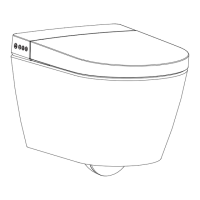
14
Equipped with
three-way angle
valve
Check the threaded connection for leaks to ensure complete sealing. Turn the three-way
angle valve counterclockwise to the full open position.
(Note: The three-way angle valve opens with a large torque for the first time.)
Preparation
Power Connection
Plug in the leakage protection plug to a power socket, press the reset switch, plug
indicator lights up, indicating that the power is on.
Note:
Press the test button prior to usage, the reset
switch pops up indicating that the leakage
protection function is normal.
Press the TEST button (then RESET button)
every month to assure proper operation.
* Only for models with leakage protection plug.
* Please refer to the actual product.
Current detection
test button
Reset switch
Indicator light
Turn on the three-way angle valve1.
2.
Self-inspection
The buzzer of the main unit makes a beep, the indicator light of the function icon and the
light of the knob are on, and the self-test starts.
The buzzer of the main unit beeps again, and the self-test is completed, and the indicator
lights of the function icons and the knob lights work as normal.
The function mode is turned on and used normally.
3.
Activate the Foam shield function
Before starting the foam shield for the first time, the foam
agent needs to be pumped into the foam shield by using
the "pump liquid" command.
After executing the "pumping liquid" command, there may
be a large amount of foam when using the foam shield for
the first time, which is a normal phenomenon.
This operation is only used when the toilet is just installed
or when the foam agent is used up to replace the foam
agent, and the use of the rest of the time will cause foam
agent waste.
Tips:
1.
2.
4.
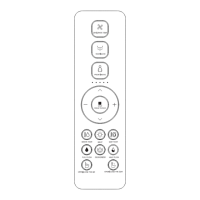
Long press "FOAM SHIELD"
button on the remote control
until the foam comes out and
then release it to complete
the "pumping" action