10
Preparation
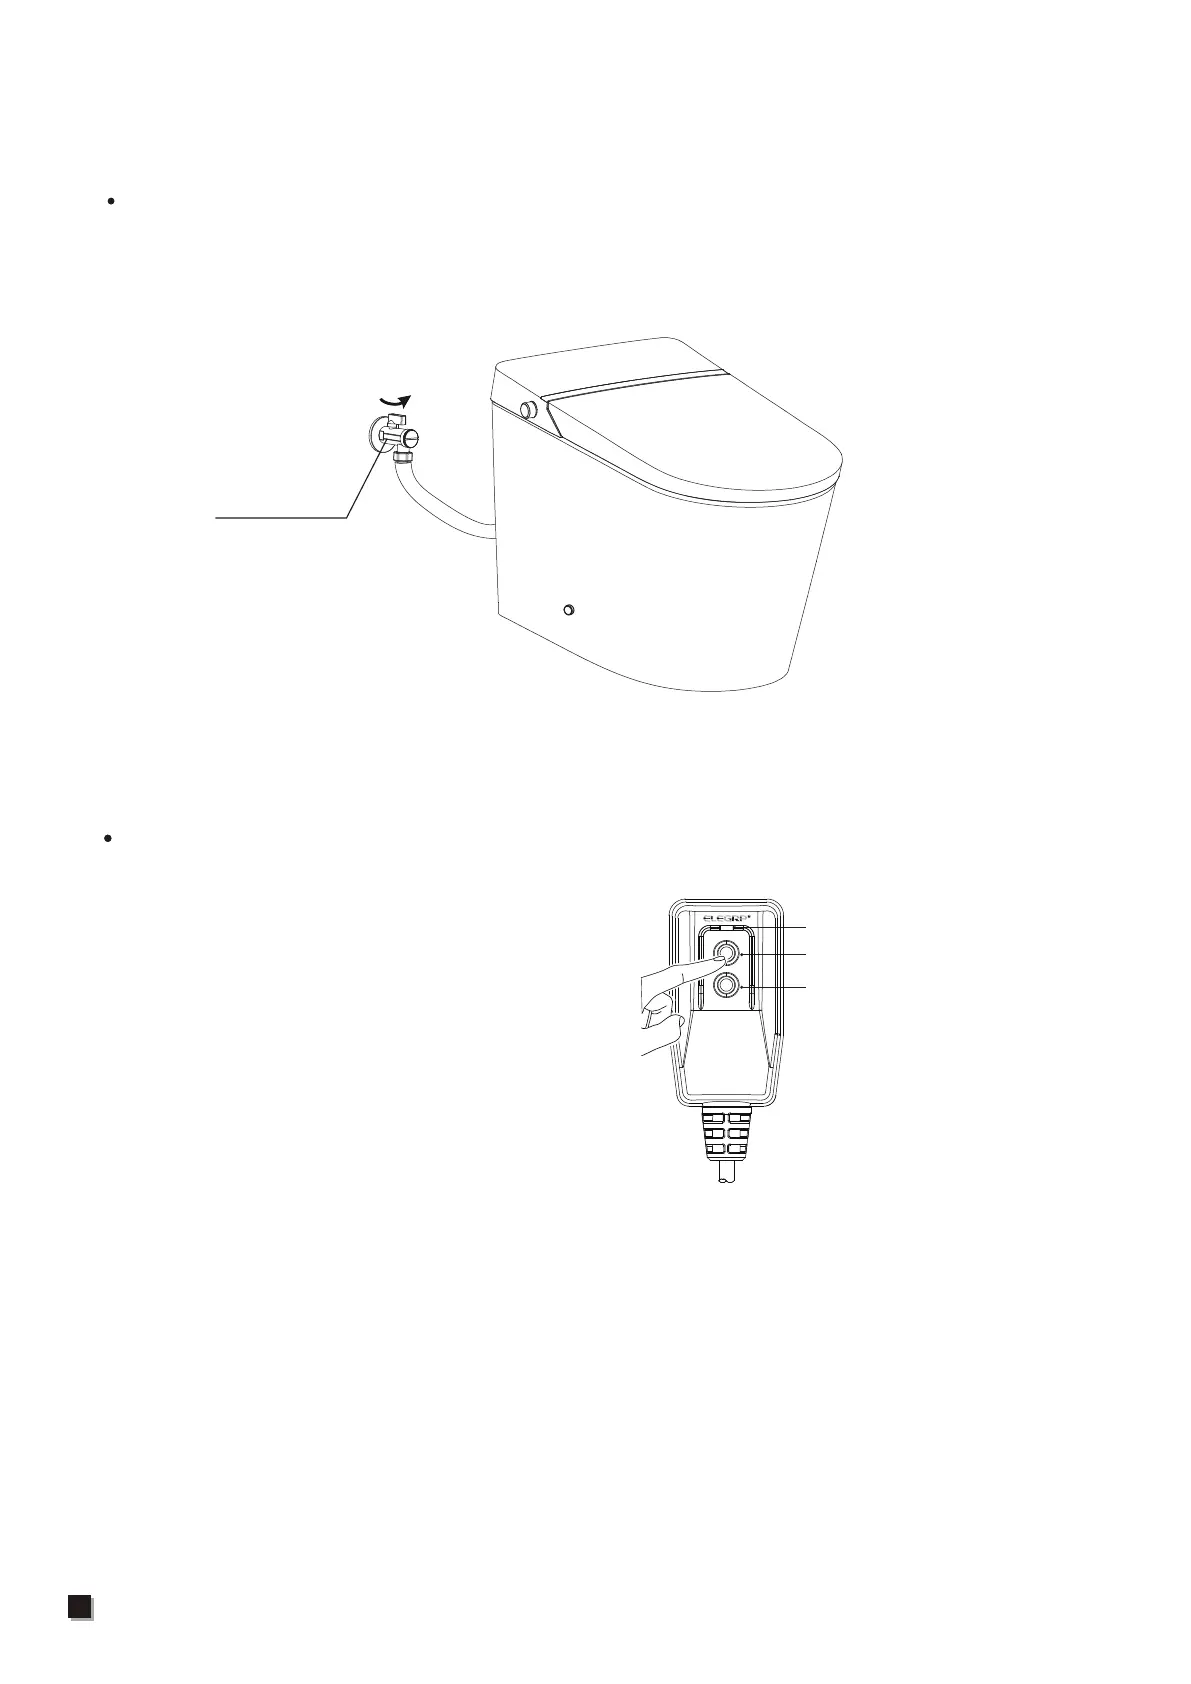
1. Turn on the angle valve
Check the threaded connection for leaks to ensure complete sealing. Turn the angle valve
counterclockwise to the full open position.
(Note: The angle valve opens with a large torque for the first time.)
Angle valve
3. Self-inspection
1. Once power is connected, the buzzer beeps. The knob lights up in blue, and the
self-inspection starts.
2. The buzzer beeps again, then the self-inspection completes, and the knob lights up in red.
3. The product is ready to use.
2. Power Connection
Insert the leakage protection plug into a power socket, press the reset switch, plug indicator
lights up, indicating that the power is on.
Note:
Press the test button prior to usage, the
reset switch pops up indicating that the
leakage protection function is normal.
* Only for models with leakage protection plug.
* Please refer to the actual product.
Current detection
test button
Reset switch
Indicator light
RESET
REMETTRE
TEST
TEST BEFORE EACH USE
1. PLUG INTO RECEPTACLE
2. PRESS RESET BUTTON:
VISUAL INDICATOR APPEARS.
3. PRESS TEST BUTTON:
VISUAL INDICATOR DISAPPEARS.
4. PRESS RESET FOR USE.
DO NOT USE IF ABOVE TEST FAILS.
WARNING: