Installation
Concentrator plus/Vacufuge® plus
English (EN)
28
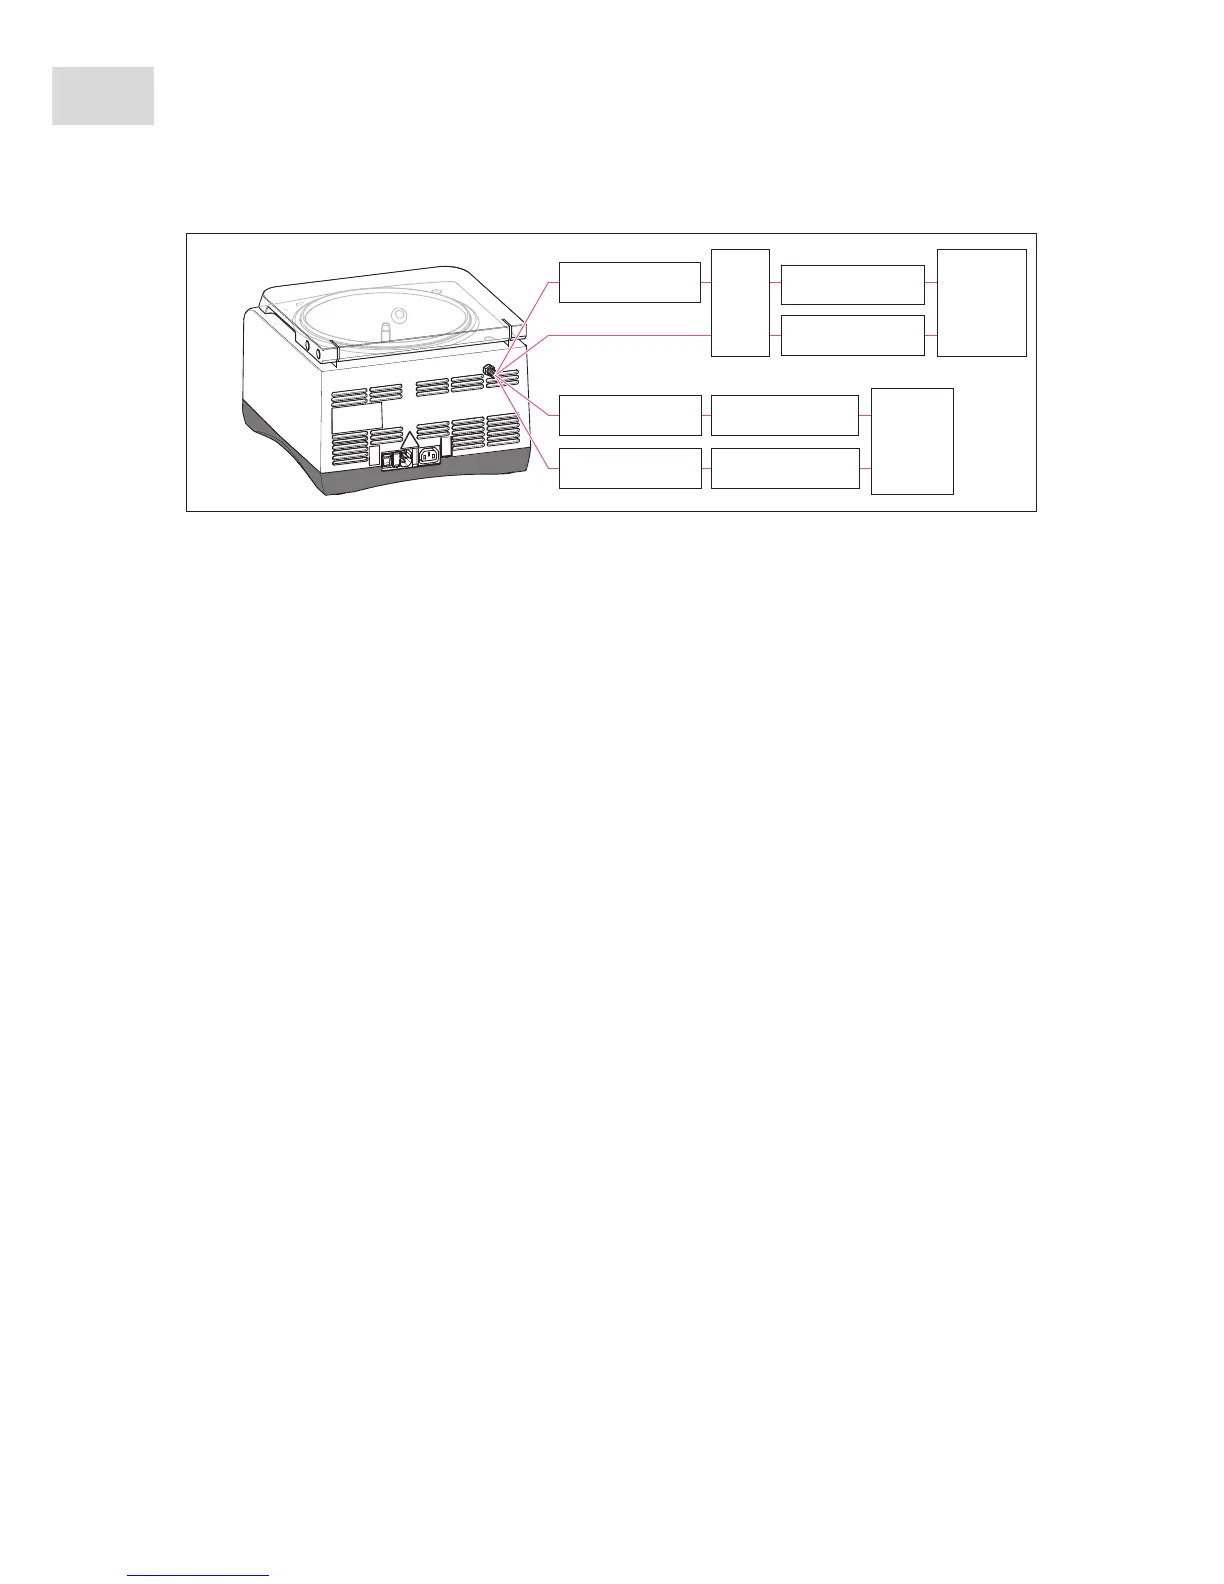
Abb. 4-3: Connection options of the basic device
Fig. 4-3: Connection options of the basic device
Perform the following steps in the sequence described.
1. Place the device on a suitable lab bench.
2. Allow the device to warm up to ambient temperature for at least 3 hours to prevent damage to electronic
components from condensation.
3. Connect the components according to your chosen configuration. Please note the relevant instructions
in the following chapters.
•Complete system: Connecting the emission condenser (see p. 29).
•Complete system: Connecting the gel dryer (see p. 30).
•Basic device: Connecting the vacuum pump (see p. 30).
4. Check that the mains/power supply voltage and frequency match the requirements on the device name
plate.
5. Connect the device to the power supply and switch on with the mains/power switch on the right side of
the device (basic device: on the rear of the device) (refer to front fold-out page).
•The display is active.
•The lid is unlocked (lid indicator light lights up).
•You can now open the lid.