5
English
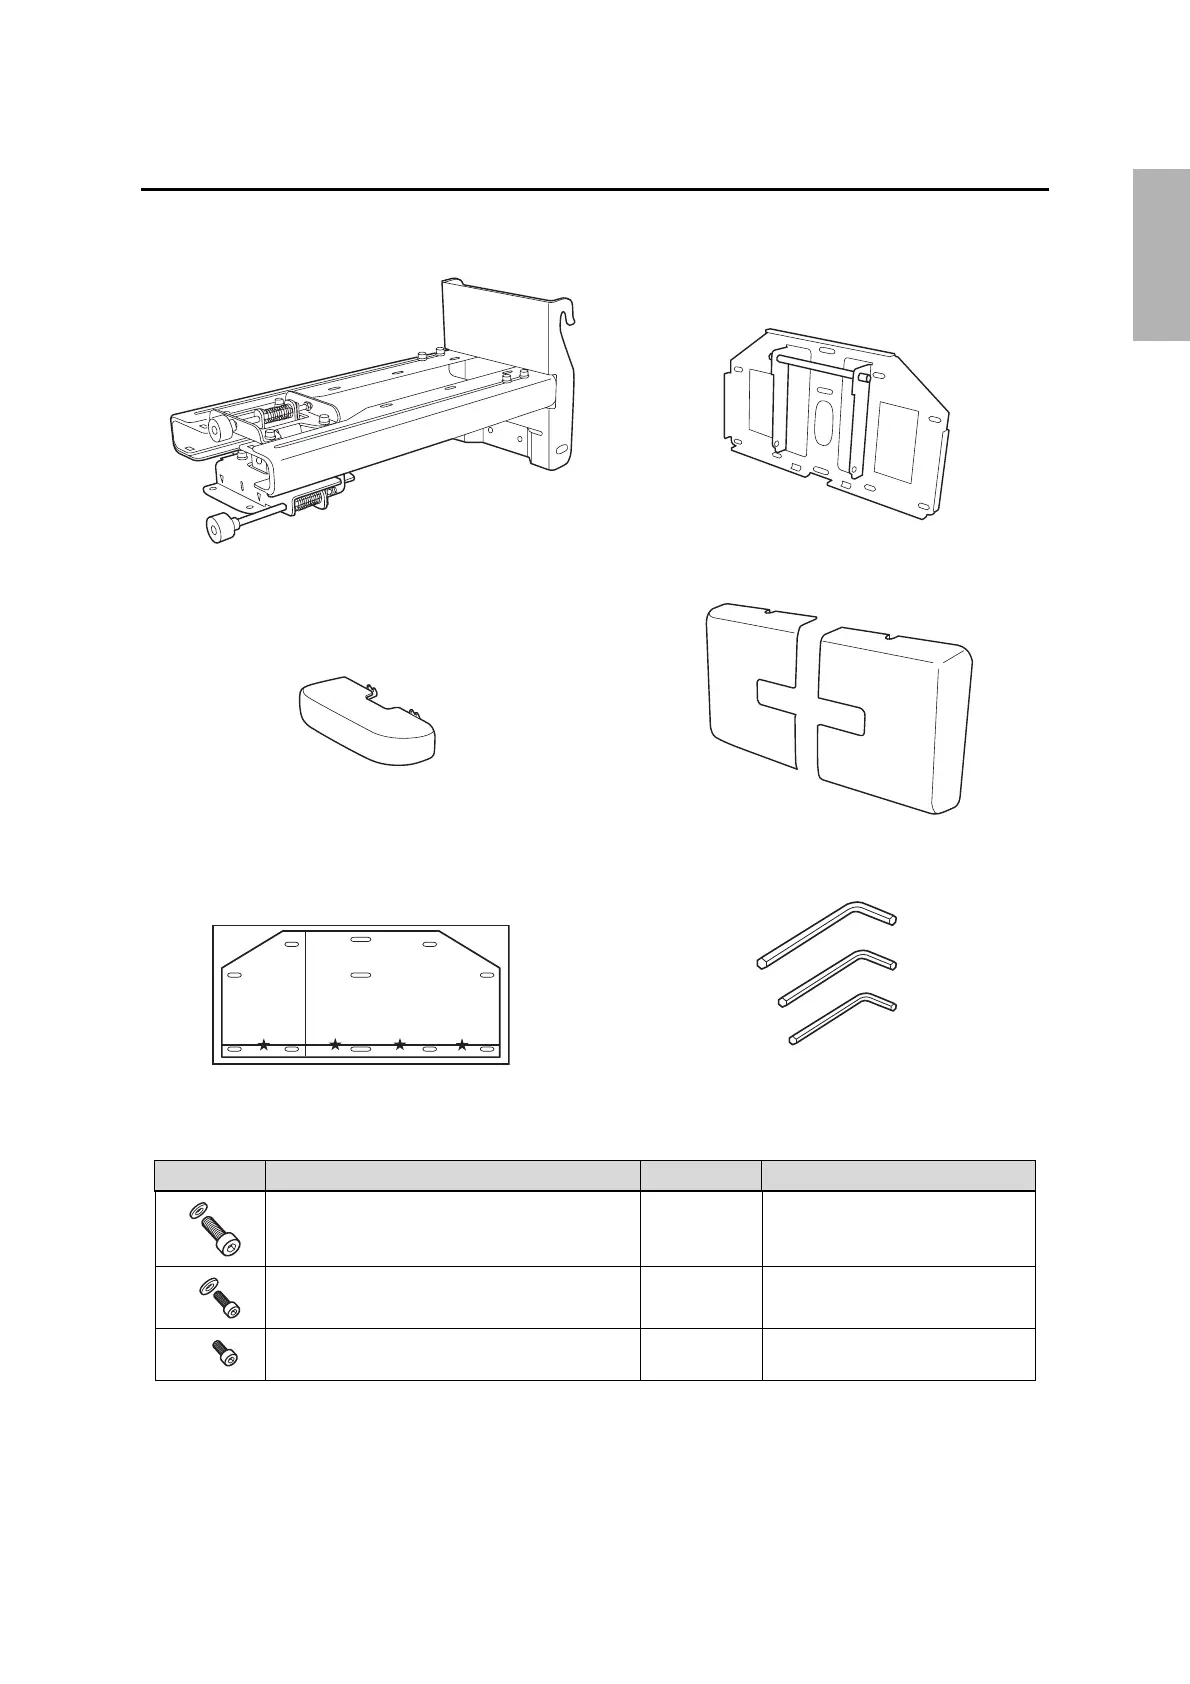
1. Package Contents
Mounting hardware
• Use the bolts supplied with the setting plate to install it, as directed in this guide. Do not substitute these
bolts with any other types.
• Use commercially available M8 x 50 mm anchors (at least 3) or 8 x 80 mm lag bolts (at least 3) to attach the
wall plate to the wall.
• Gather the tools and parts you need before you begin installation.
Shape Name Quantity Application
M8 x 15 mm hexagon socket head cap bolt with
washer
2 For installing setting plate
M5 x 12 mm hexagon socket head cap bolt with
washer
2 For securing projector
M4 x 12 mm hexagon socket head cap bolt without
washer
2 For installing wall plate cover
Hexagon wrenches (for M4, M5, and M8)
Wall plate cover
Setting plate (wall mount)
Template sheet
(for installing the wall plate)
End cap
Wall plate

 Loading...