EB-S01/W01/X14G/S11/X11/S02/S02H/X02/W02/S12/S12H/X12/W12/X14 EH-TW480
Disassembly and Assembly CONFIDENTIAL
SEIKO EPSON 113 Revision C
REPLACING THE MA BOARD (WHEN BACKUP SUCCEEDED)
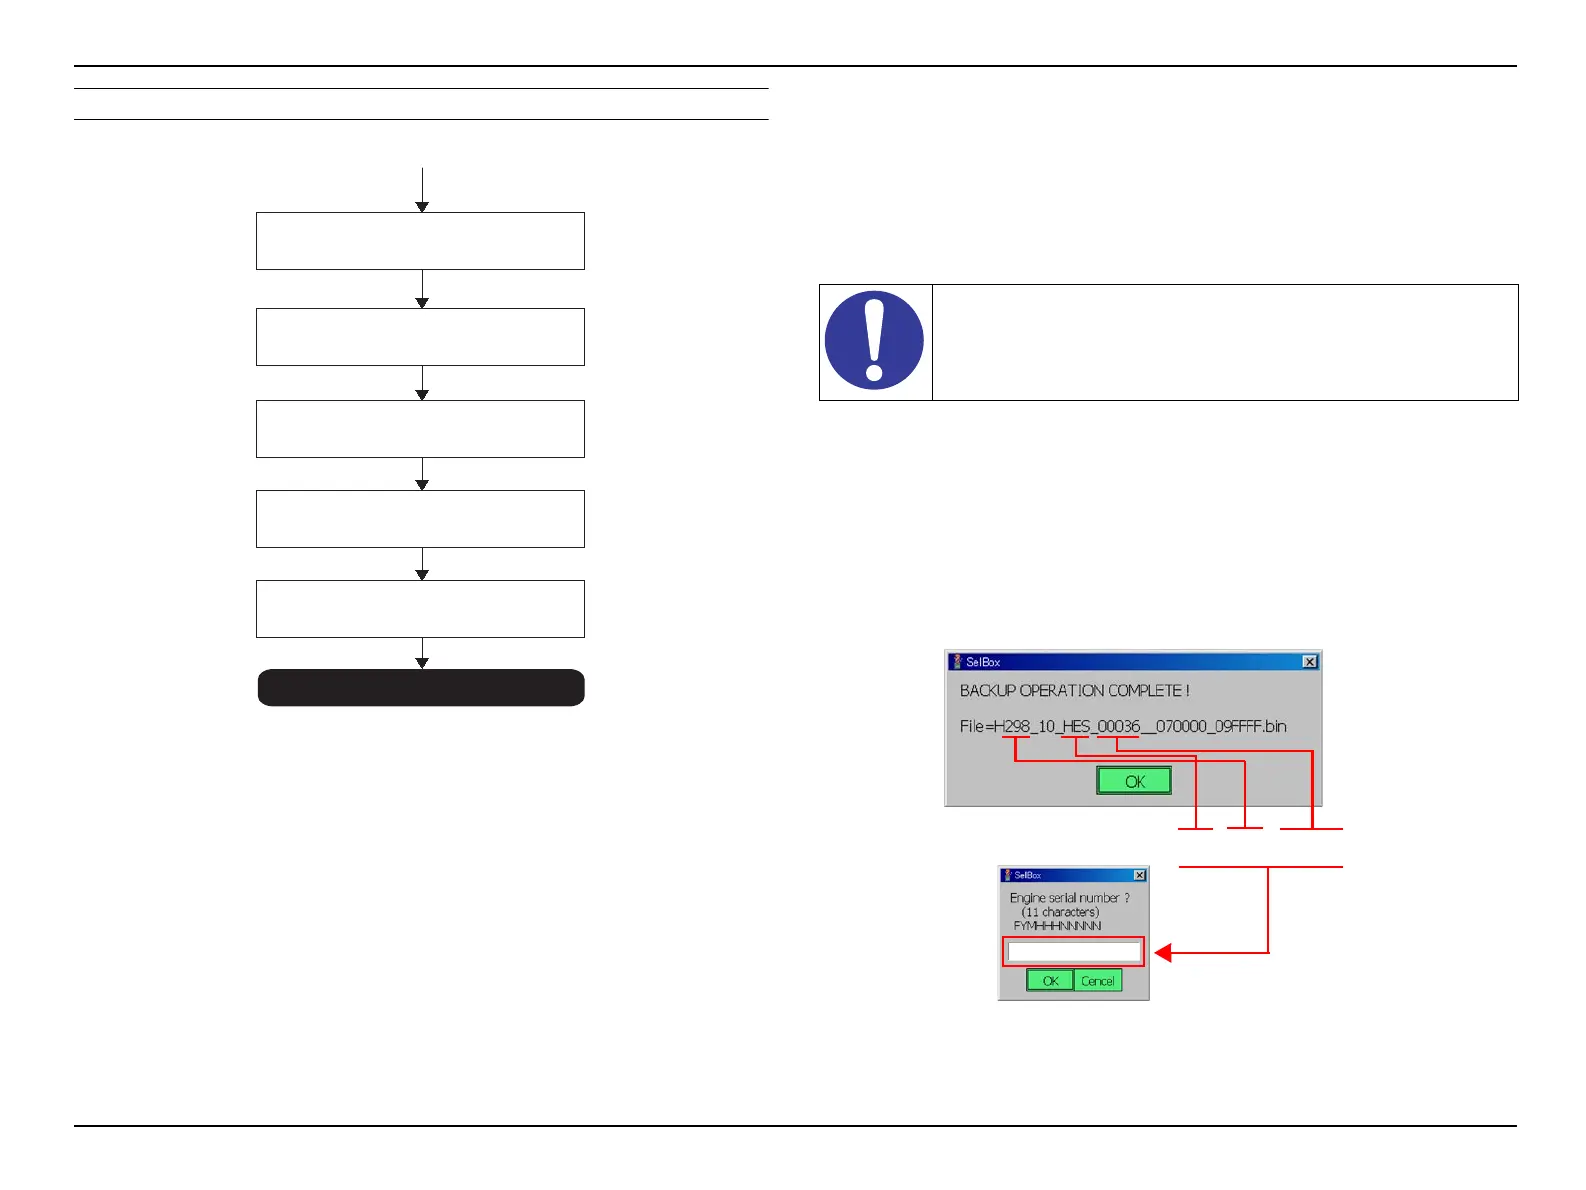
Figure 3-47. MA Board replacement workflow (when BACKUP succeeded)
Replacing it with a good MA Board
1. Prepare a good MA Board belonging to the same model group, and replace
the boards.
Turning on the projector
2. Turn the projector ON.
Connect the projector to the PC
3. Connect the projector to the PC using an RS-232C cable.
Writing the DR data
4. Start up the CAT.
5. Select the group from [SETUP] - [SELECT MODEL] menu, by referring to
the number; *** and sax, that can be found in a file name;
“H***_xx_yyy_zzzzz_zzzzzz_zzzzzz.bin” of the DR data that stored in
C:\IRIS\DRDATA folder.
6. When BACKUP is complete, the completion message including file name is
displayed. Recompose the file name as follows and enter the 11digits. And
then, execute RESTORE.
(Continued to the next page)
END
Turning on the projector
BACKUP succeeded
Writing the DR data
Connect the projector to the PC
Replacing the MA Board
(when BACKUP succeeded)
Image/Operation check
Refer to the user’s manual for communication configuration.
HES 2 9 8 0 0 0 3 6
FYM HHH NNNNN
 Loading...