30
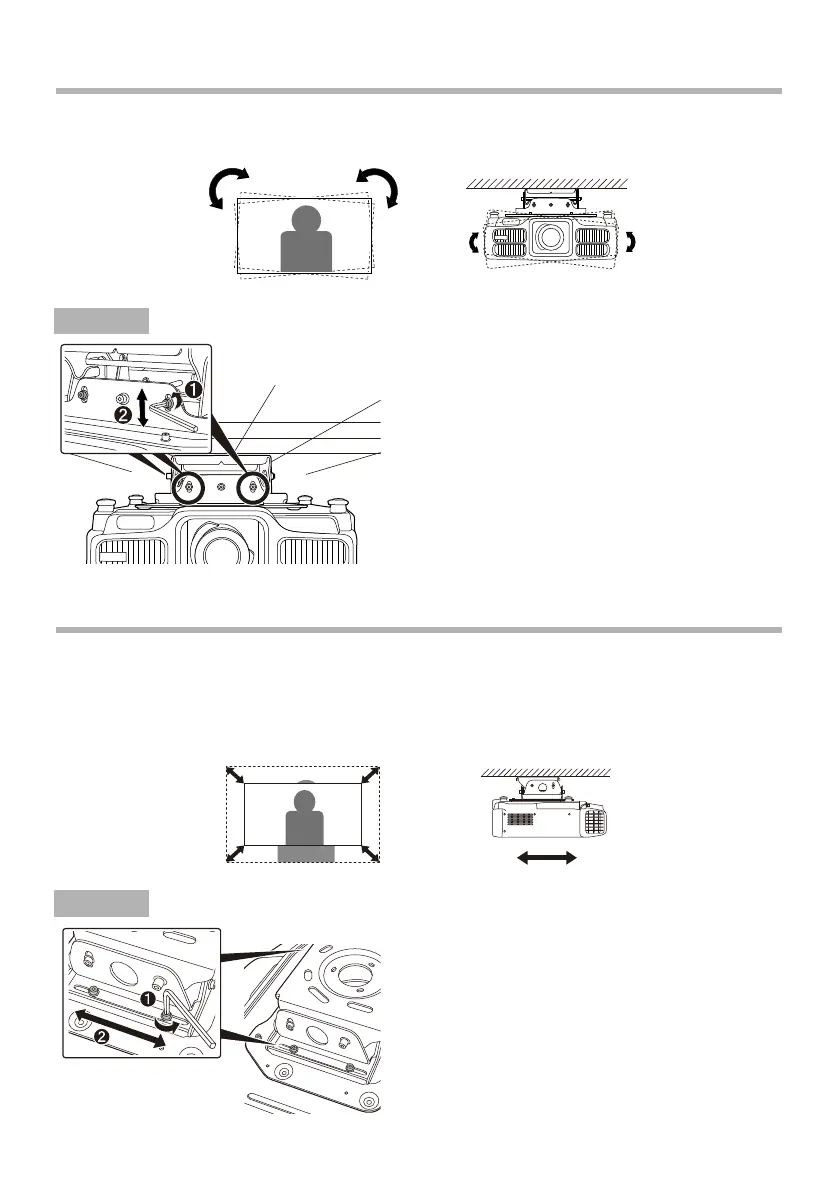
Tilting the Projected Images to the Right or Left
When the projected image is tilted to the right or left compared to the screen,
tilt the projector ±5 degrees to adjust the projection position.
A Loosen the four screws for the horizontal roll
adjustment points at the front and rear using
the supplied M8 hexagon wrench.
B Tilt the projector to the left or right to adjust
the angle until the position of the projected
images fits the screen.
C After adjusting the angle, secure the screws
on both sides using the M8 hexagon wrench.
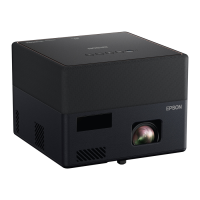
Adjusting the Size of the Projected Images
When the projected images are too big or too small for the screen, try adjusting the size of the
image on the projector first. For details on adjusting the size of the image, see the "User's Guide"
supplied with the projector.
To adjust the size of the image, you can slide the projector forward or backward by ±30 mm by
following the steps below.
A Loosen the four screws for the front/rear slide
adjustment points on the left and right using
the supplied M8 hexagon wrench.
B Slide the projector forward or backward to
adjust the projected image until it fits the
screen.
C After adjusting the position, secure the
screws using the M8 hexagon wrench.
Procedure
Procedure