26
Mounting to a Concrete Ceiling
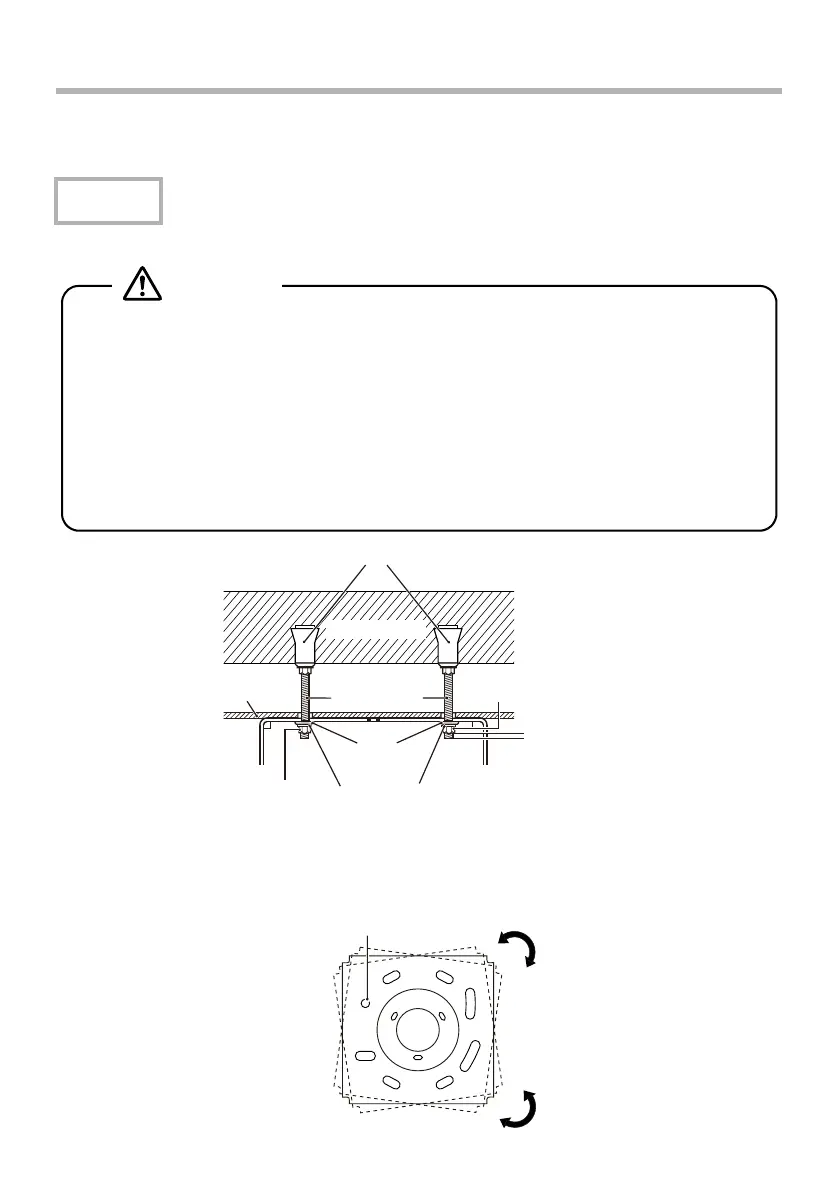
When installing the ceiling mount on a concrete ceiling, use 4 anchor bolts (M12). You need to
purchase commercially available anchor bolts.
Before installing the ceiling plate, check that the projector is facing in the correct direction.
The ceiling plate can be horizontally rotated at ±5 degree. Adjust the direction of the projector
using four bolts secured loosely. After adjusting the direction, tighten the hexagon nuts securely.
Caution
v Make sure in advance that the concrete on which this product is installed can hold the
weight and lateral movement of the projector and ceiling mount. If the concrete is not
strong enough or has deteriorated, fortify it with reinforcing bars or something similar.
v Install the anchor bolts according to the specifications and methods of the
manufacturer of the materials so they do not come out, become loose, or shift.
v Tighten the screws firmly during installation or after adjusting the angles.
After tightening the screws, retighten them firmly and make sure that they are not loose.
v Epson accepts no responsibility for any damage or injury caused by lack of wall
strength or inadequate installation.
Warning
Female type anchors
Concrete
Hanger bolts
Flat washers
Hexagon nut
At least 3 threads
Ceiling
Spring
washers
Hexagon nut
The center of rotation when
adjusting the direction