25
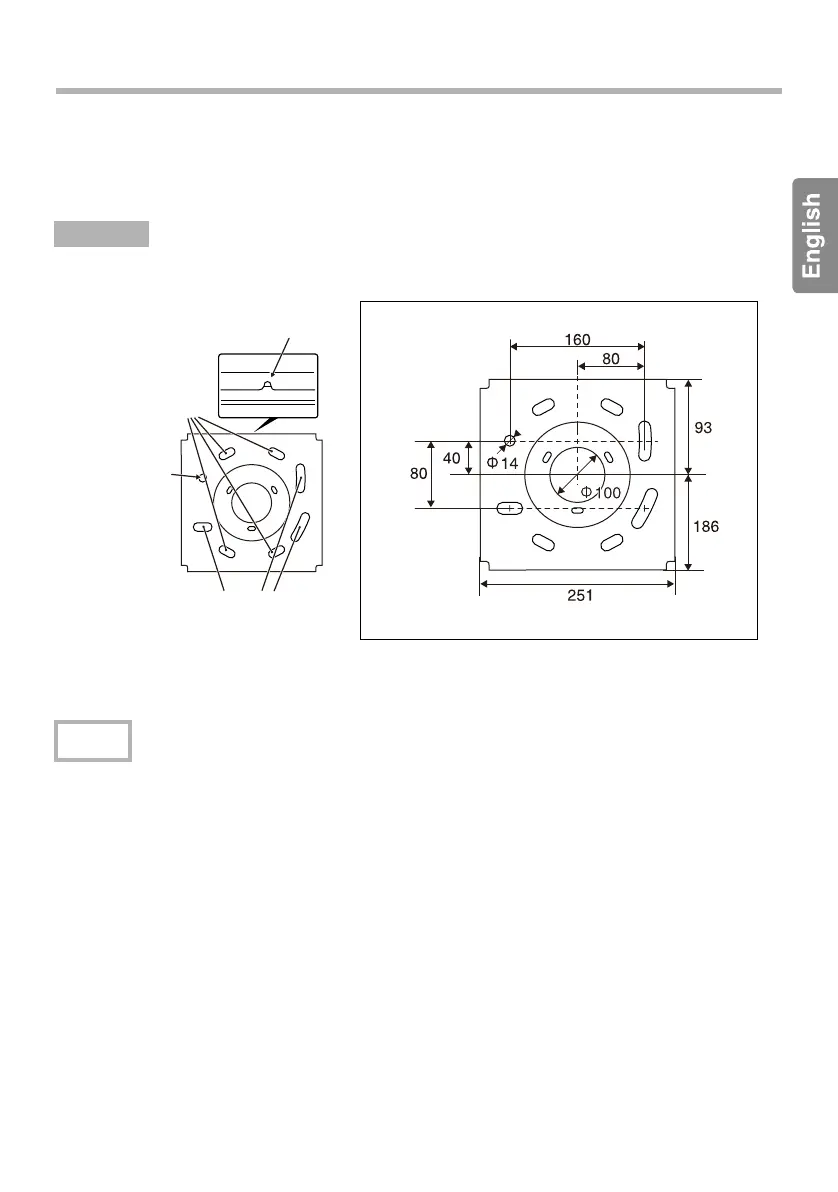
Installing the Ceiling Plate to the Ceiling
Determine the distance to the screen and locate the mounting position before mounting the
ceiling plate.
The distance varies according to the type of the lens unit installed on the projector. See the
"User's Guide" supplied with the projector.
Refer to the ceiling template below to cut the bolt-mounting holes into the ceiling.
When installing this product after uninstalling the ELPMB22, you can use the mounting holes that
are already in the ceiling as they are.
After installing, you cannot rotate the projector beyond ±5
° to the left or right. Check that the
projector is facing in the correct direction before installing.
Procedure
Note
Ceiling template (units: mm)
Turn the side of this
cutout to the screen.
The center of
rotation when
adjusting
horizontally
Holes for horizontal rotation
adjustment
The direction of the projector
can be adjusted at up to ±5
degrees by rotating it.
When installing this
product after
uninstalling the
ELPMB22, use these
holes.