27
Fitting the Projector Plate to the Projector
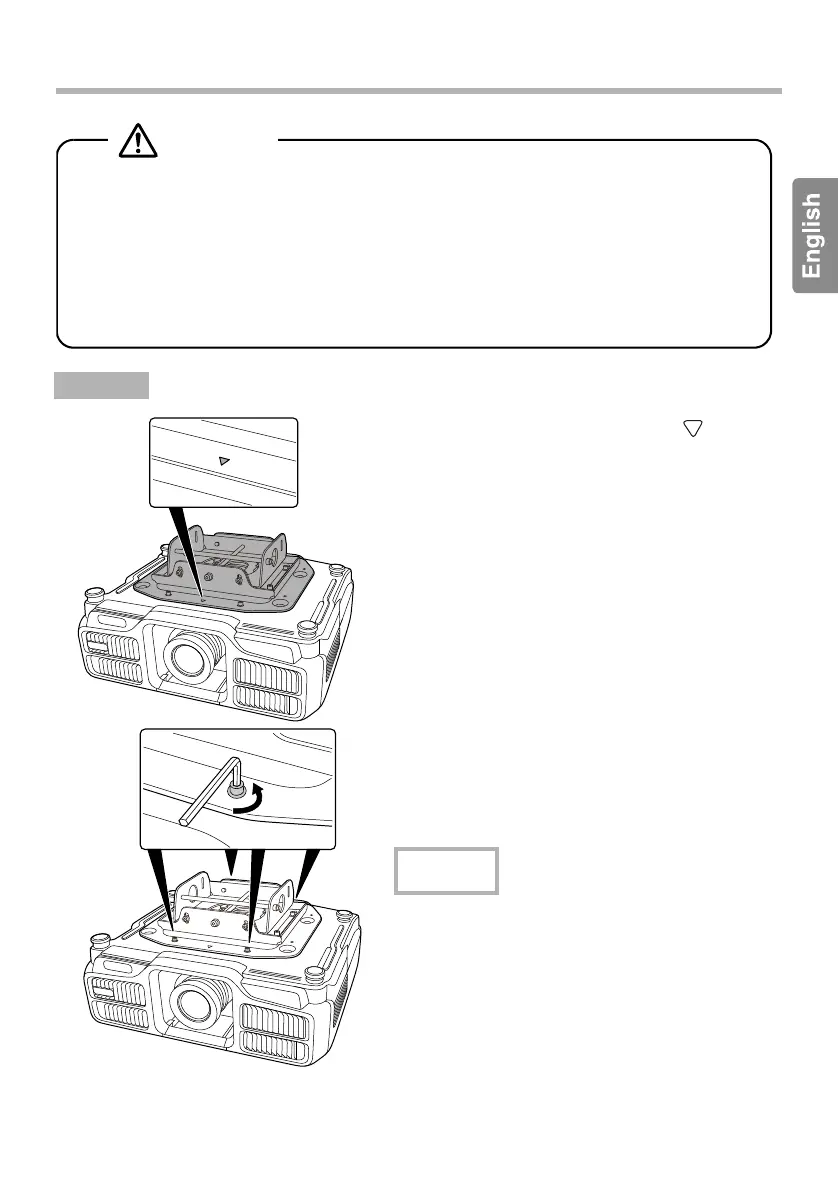
A
Attach the projector so that the on the
projector plate is on the same side as the
projector's lens.
Align the screw holes for the ceiling mount fixing
points with the holes for the projector plate. See
the "User's Guide" supplied with the projector for
details on the position of the projector's ceiling
mount fixing points.
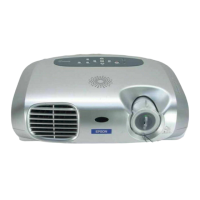
B Tighten the supplied four screws (M6 x 16) in
the screw holes of the projector plate using
the supplied M6 hexagonal wrench.
Tighten and secure the three remaining screws.
When attaching the projector plate to the projector,
make sure you use the screws supplied.
Procedure
Caution
v Tighten the screws firmly.
After tightening the screws, retighten them firmly and make sure that they are not loose.
v Install the supplied safety wire to prevent the projector from falling. sp.31
v Applying a screw-locking adhesive, lubricant, oil or other substance to the points at
which the projector is fixed to the ceiling mount can make the case crack and the
projector fall, leading to damage or injury. Do not use any sort of adhesive, lubricant
or oil when installing or adjusting the ceiling mount.
Warning