EPSON GT-30000
6 -
EPSON GT-30000
3/01
If you are scanning multiple pages using the ADF, you do
not need to Preview the document unless you want to
scan only a portion of a document.
5. Choose your scan settings.
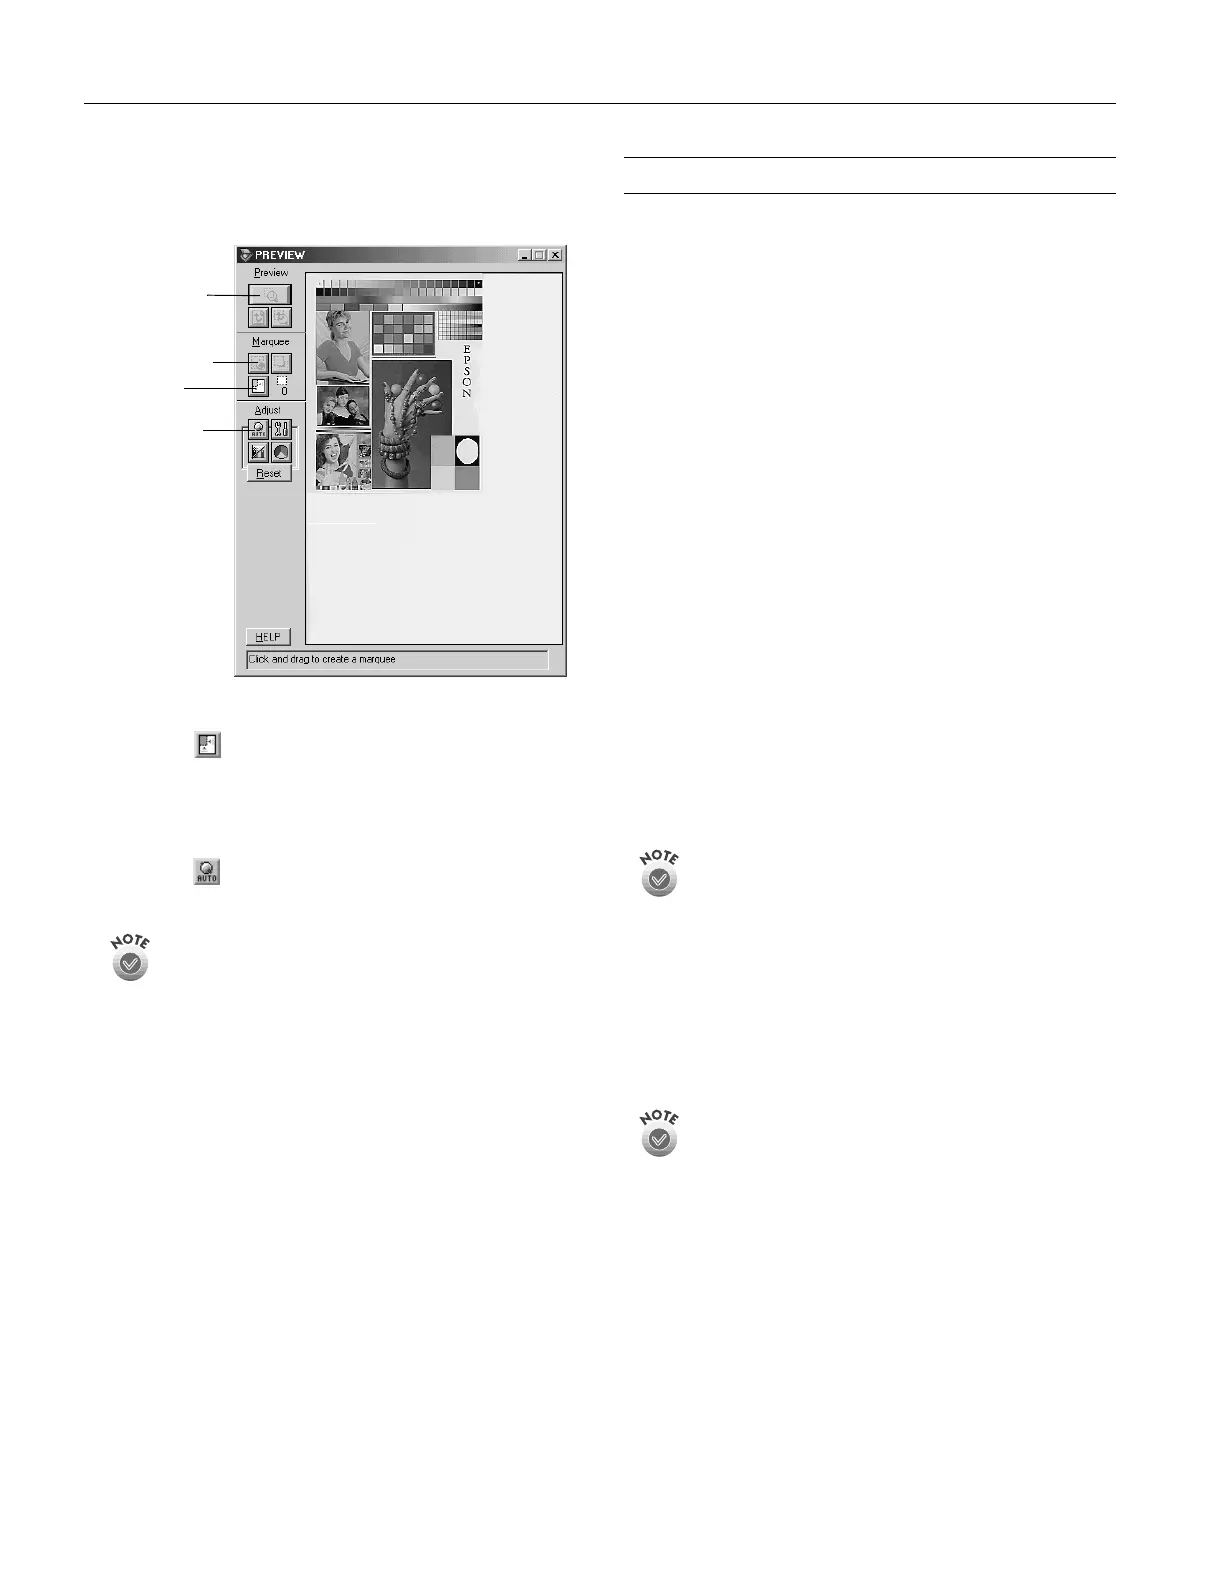
Click the
Auto Locate
button to automatically define
the scan area around the edges of your image. You can
also adjust the scan area by positioning the mouse pointer
over the dotted line around the marquee’s edge and
dragging the box to resize the marquee.
Click the
Auto Exposure
button to automatically set
the highlight and shadow exposures.
Generally it’s a good idea to use the Auto Exposure button to
obtain the best settings for your scan. See your electronic
EPSON GT-30000 Reference Guide for more information
about choosing settings.
If you need to remove color cast from your image, use the
Gray Balance Intensity feature.
6. When you’ve finished making adjustments, click the
Scan
button.
The
READY
light on the front of the scanner flashes while
it’s scanning. In a few moments, a scanned image is
imported into your host application’s window.
(If the
READY
light continues to blink, it may indicate an
error condition. See page 4
for more information.)
7. Click
Close
to close the EPSON TWAIN HS or EPSON
TWAIN HS Network window and return to your
application.
8. If you want, save your image using the
Save
or
Save As
options from the
File
menu of your host application.
Using a Network Scanner
Network scanning involves the following steps:
❏ Two or more computers must be connected on the same
network segment running TCP/IP protocol.
❏ The scanner server must be turned on and running
EPSON Scan Server.
❏ From the client computer, start EPSON TWAIN HS
Network to establish a connection to the scanner server.
Only one client computer at a time can connect to the
scanner server. (See “Starting EPSON TWAIN HS
Network” on page 7 for instructions.)
❏ Choose your settings, and then place your document on
the scanner or in the automatic document feeder.
❏ Start the scan. Although this can be done from EPSON
TWAIN HS Network on the client computer, it may be
more convenient to press the scanner’s
Start button or
to start the scan from the scanner server. A progress meter
appears on both the scanner server and client computer as
the image is pre-scanned, then scanned.
❏ If you want to scan more than one image, place your
second image on the document table and press the
scanner’s
Start button again. Repeat this step for every
image you want to scan. (The settings you chose for the
first image apply to these images too.)
The
Start button is only available when you use EPSON
TWAIN HS to access a scanner connected to your computer and
you are running Windows Me, Windows 2000, or Windows 98.
If you are running Windows 95 or Windows NT, the
Start
button is disabled.
❏ When you return to the client computer, your scanned
images appear in the host application’s window. Close
EPSON TWAIN HS Network to end your connection to
the scanner server and allow other client computers to use
the scanner.
When you press the
Start button, some applications
automatically close the client computer’s connection to the
scanner server when the scan is finished. You can’t use the
Start button to scan multiple images if you’re using these
applications.
Preview button
Marquee button
Auto Locate
button
Auto Exposure
button
 Loading...