HTTP://BBS.FIXCLUB.COM.CN
EPSON LQ-300+ Revision C
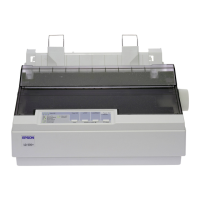
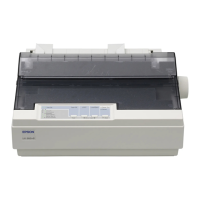
Product Description OPERATOR CONTROLS 19
1.4.2 Panel Functions
1.4.2.1 Usual Operation
Pause
-This switch alternates printer activity between printing and non-printing.
-By holding it down for over 3 seconds when the printer is in the stand by state,
the Micro Adjust function is enabled. By pressing it again, this function is
disabled.
Load/Eject
-Pressing it loads out sheet or continuous paper when the printer is out of paper.
-Pressing it ejects out sheet to the stacker or continuous paper to the paper park.
LF/FF
-Pressing it shortly executes line feed.
-Holding it down for a few seconds executes form feed when continuous paper is
used, or ejects cut sheet to the stacker when cut sheet is used.
Tear Off
-When continuous paper is used, pressing it moves a page to the Tear-Off position.
Pressing it again moves a next page to the TOF position.
Font
-Pressing it selects one of the following fonts when the Micro Adjust is enabled;
Draft, Draft Condensed, Roman, Sans serif, Courtier, Prestige, Script and others.
NOTE: “Others” refers to the fonts selected in the Default Setting Mode.
Micro Adjust
-Micro Adjust
↓ / ↑
switches are effective when the Micro Adjust function is
enabled by the Pause switch.
-Pressing the Micro Adjust
↓ / ↑
switches executes micro feed backward and
forward by 0.141 mm (1/180 inch).
-The TOF adjustment is enabled in the TOF position after loading,
and the Tear-off adjustment is enabled in the Tear-off position.
1.4.2.2 Operation at Power-on
Self test
Prints the self test pattern. To cancel it, make the printer pause and turn off the
power.
Default setting
Starts the default setting mode. See 1.4.2.3 "Default Setting".
Data Dump
Starts the data dump mode, in which all the input data are printed as hexadecimal
numbers and corresponding characters.
Clear EEPROM
Resets the printer to the factory default setting, which is not always proper for each
market demand.
(i.e. This function is for emergency.)
Clear Areal EEPROM data except 00H to 1FH.
Clear EEPROM for Driving Line count for ribbon change timing.
Resets the diving Line count for ribbon change timing.
Bi-d adjustment
Starts the Bi-d adjustment mode. See 1.4.2.4 "Bi-d. Adjustment".
Demonstration
Not available.
1.4.2.3 Default Setting
There are some parameters that can be changed by users and will be referred at the time
of initialization of the printer.
Setting mode
1. Enter Default Setting mode.
The method of selecting language for “Usage of this mode” is printed.
2. Select language for “Usage of this mode” with the LF/FF button.
Font LEDs show the language for “Usage of this mode” that is currently selected.
This section will be advanced one by one as the button is pressed and the On/Off/
Blink/2-Blink of those three LEDs will also be changed according to the selection.
3. Press the Tear Off button.
The current setting and the “Usage of this mode” by selected language will be
printed on the paper set in the paper path at that time.
4. Select Menu by the Tear-Off button.
Font LEDs show the menu which is selected at that time. The selection will be
advanced one by one as the button is pressed and the combination of those three
LEDs status of On/Off/Blink/2-Blinks will be changed according to the selection.