Note: Your product may look different from the illustrations in this guide, but the instructions are the
same.
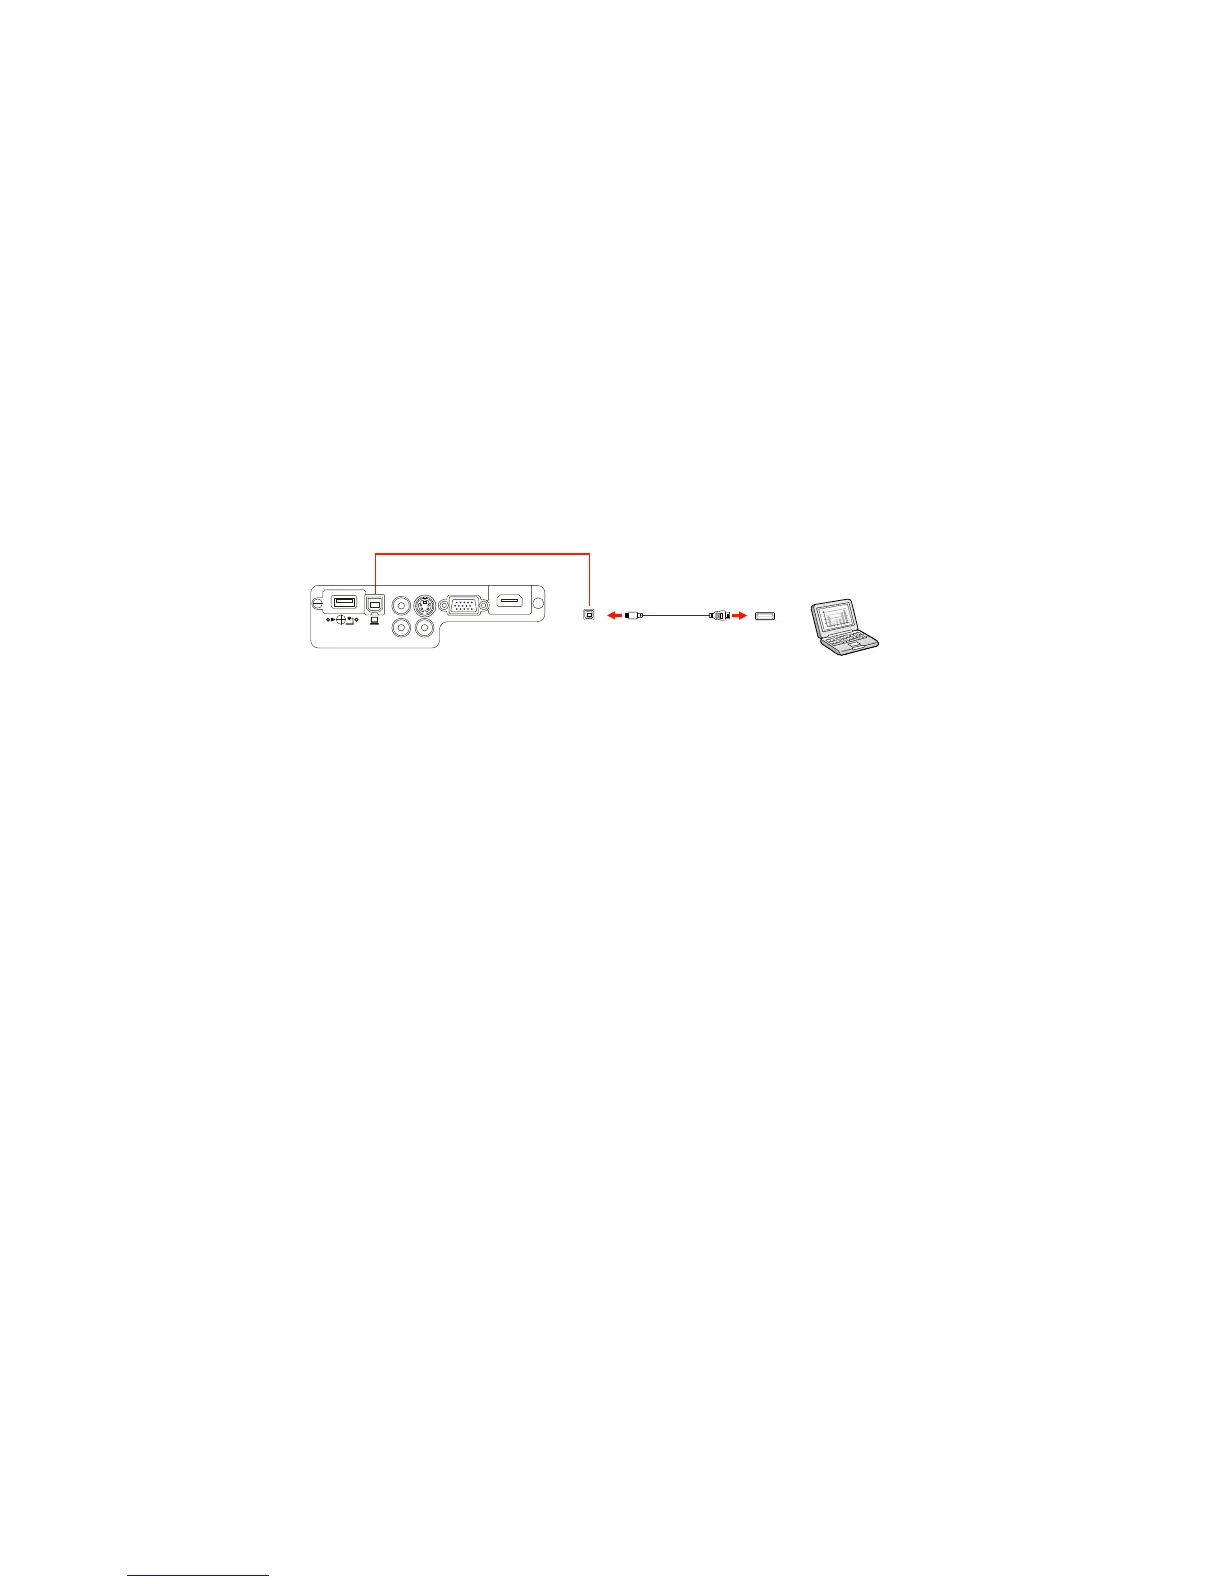
1. In the projector's Extended menu, set the USB Type B setting to USB Display.
2. Turn on your computer.
3. Connect the cable to your projector's USB-B port.
4. Connect the other end to any available USB port on your computer.
5. Do one of the following:
• Windows 8.x: Click EPSON_PJ_UD in the upper right-corner, then select Run EMP_UDSE.EXE
in the dialog box that appears to install the Epson USB Display software.
• Windows 7/Windows Vista: Select Run EMP_UDSE.EXE in the dialog box that appears to
install the Epson USB Display software.
• Windows XP: Wait as messages appear on your computer screen and the projector installs the
Epson USB Display software on your computer.
• Windows 2000: Select Computer, EPSON_PJ_UD, and EMP_UDSE.EXE to install the Epson
USB Display software.
• OS X: The USB Display setup folder appears on your screen. Select USB Display Installer and
follow the on-screen instructions to install the Epson USB Display software.
Follow any on-screen instructions. You need to install this software only the first time you connect
the projector to the computer.
Note: If you are using Windows XP or Windows 2000 and you see a message asking if you want to
restart your computer, select No.
The projector displays the image from your computer's desktop and outputs sound, if your presentation
contains audio.
Parent topic: Connecting to Computer Sources
29