G
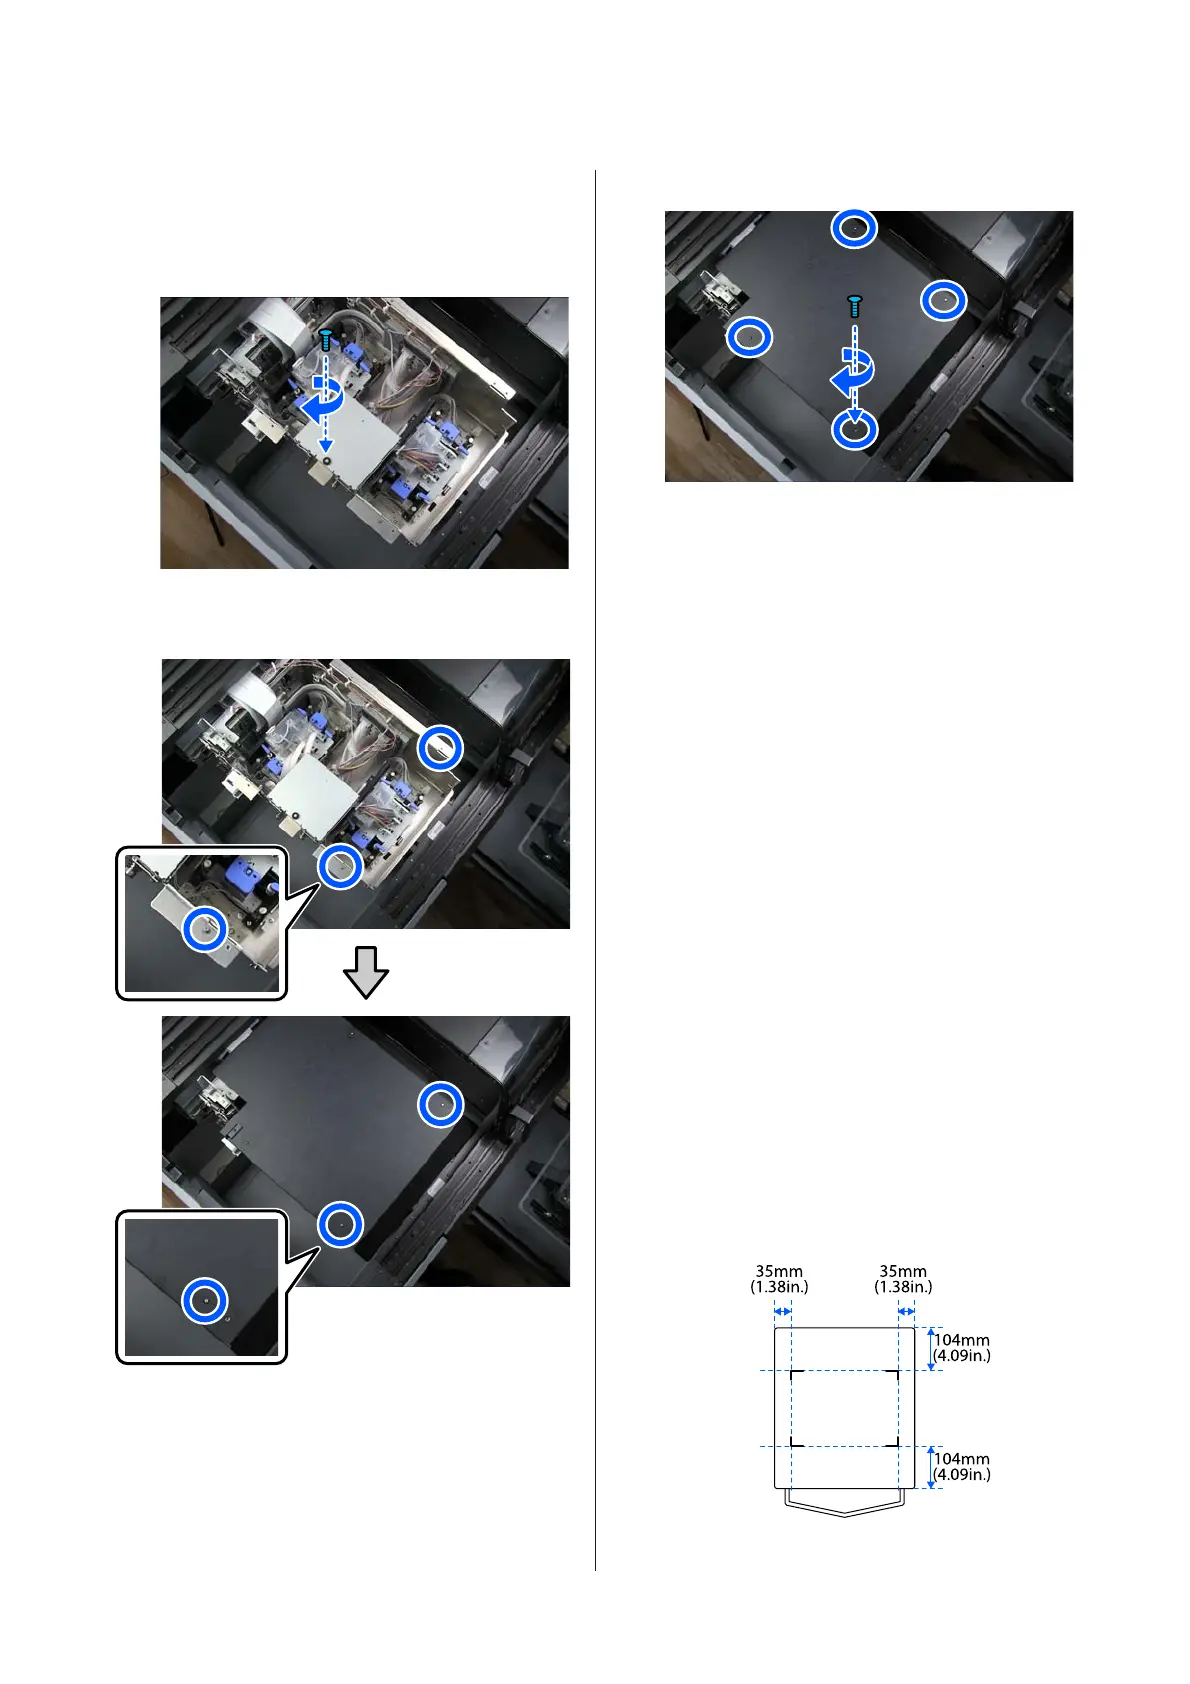
Put the temporary platform back, and secure it
with a screw (1 pc).
Use your fingers to tighten the screw until it stops
turning.
H
Align the carriage cover with the protrusions on
the printer to install it.
Confirm that the protrusions stick out of the
holes near the screw holes.
I
Turn the screws (4 pc) clockwise to secure it.
User your fingers to tighten the screws until they
stop turning.
Tighten the screws in order in a diagonal pattern.
J
Close the left side of the printer cover.
Dispose of any Used Print Heads
U “About Used Print Heads” on page 22
Process after
Replacement
This section explains how to fill a Print Head with ink
and confirm it was replaced correctly.
A
Check that an M size platen without a grip pad is
installed.
There should be nothing on the platen.
B
Connect the power cable to an electrical outlet.
C
Start the printer in User Self Repair Mode.
U “How to Start in User Self Repair Mode” on
page 9
The ink starts filling.
D
Mark guidelines for the position on the platen to
set the film, as shown in the illustration.
SC-F3000 Series How to Replace the Print Head
Replacement Procedure
21
 Loading...


