C
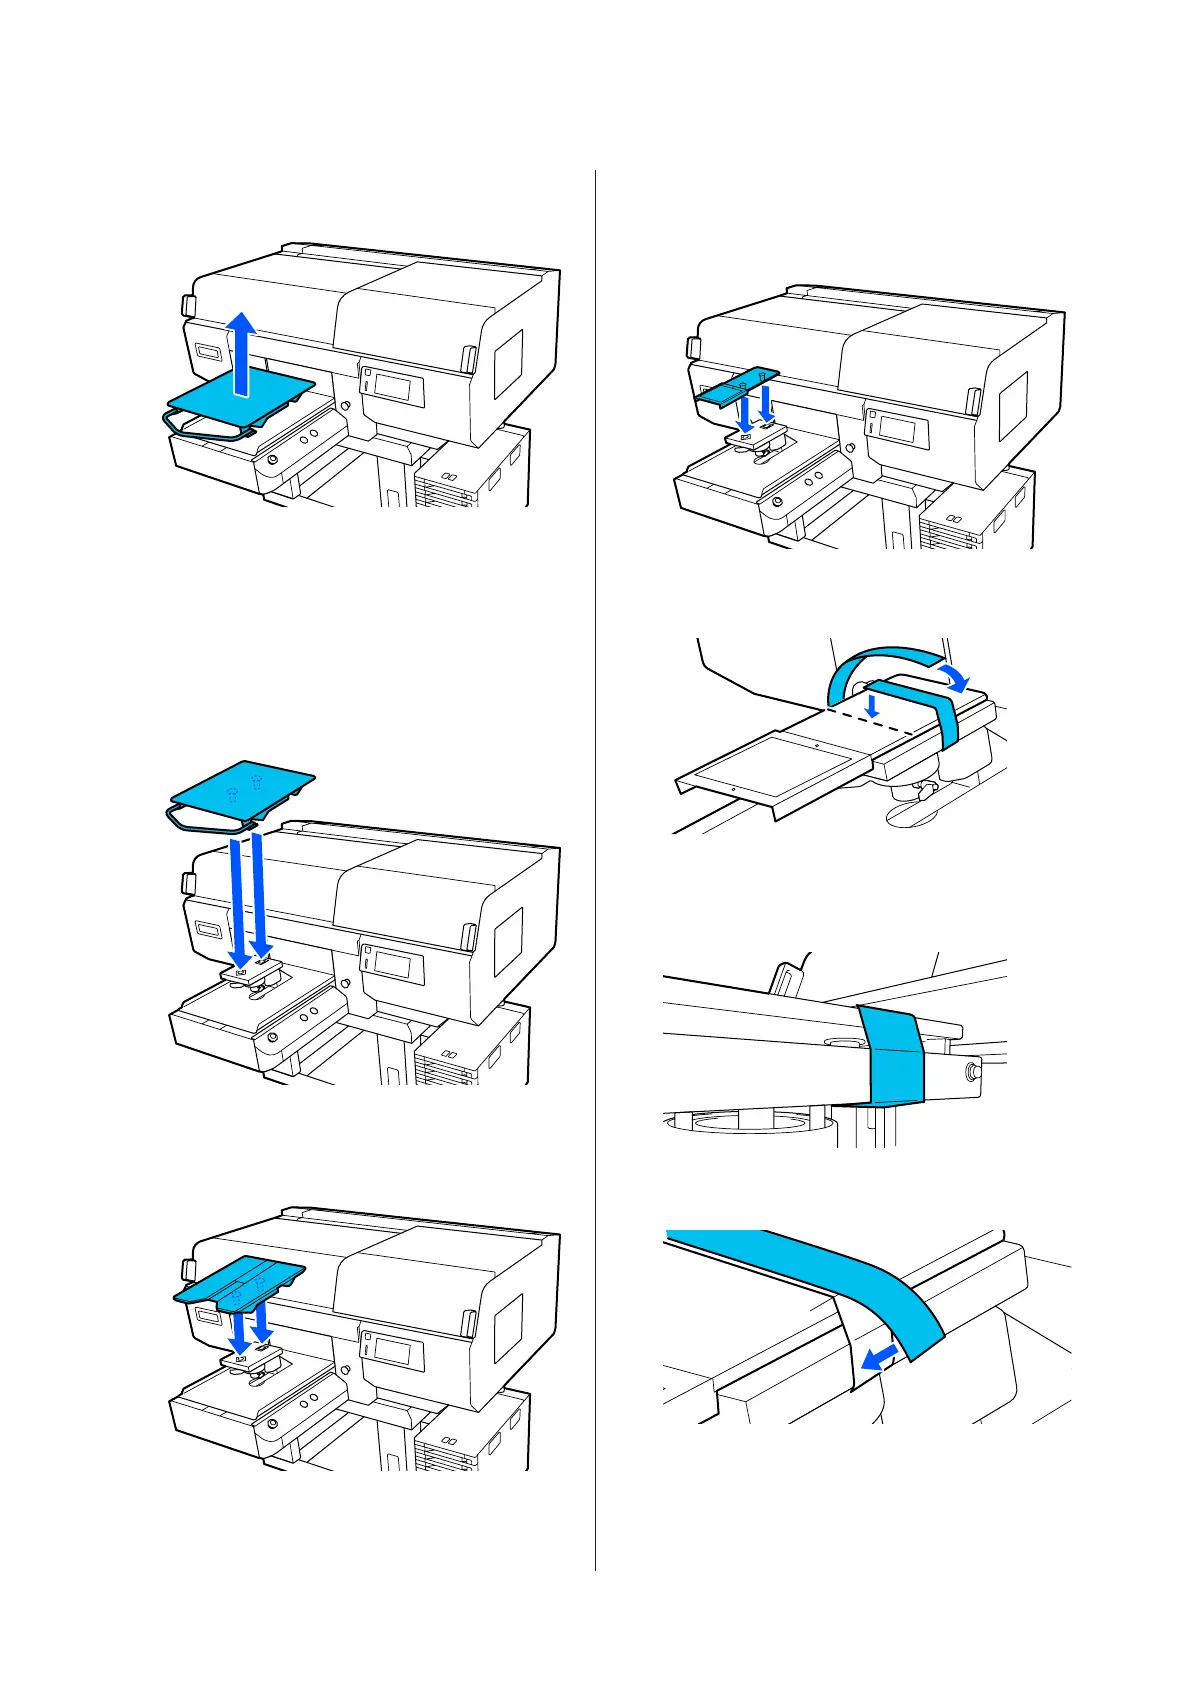
Grip the left and right of the platen, and lift it
straight up to remove it.
D
Make sure the protruding shaft of the
replacement platen fit into the holes.
Installing the L/M/S size hanger platens and XS
size platen
Insert the L/M/S size hanger platens so the
hanger is towards the front. The XS size platen
does not have front and rear orientations.
Installing the medium grooved platen
Install so that the cut out section is at the front.
Installing the sleeve platen
(1) Install the platen in the orientation shown in
the illustration.
(2) Align the fixing band with the groove on the
top of the platen and wind it tightly.
Note the following two points when winding.
❏ Pass the fixing band under the platen
installation plate.
❏ Make sure the end of the fixing band is on the
side of the platen.
SC-F3000 Series User's Guide
Basic Printing
57
 Loading...


