EasyManuals Logo

Epson Stylus Photo R2000 Series Basic Guide

Epson Stylus Photo R2000 Series
60 pages
To Next Page IconTo Next Page
To Previous Page IconTo Previous Page
Page #11 background imageLoading...
Page #11 background image
Loading Paper 11
Note:
Avoid touching the surface of your paper or canvas media.
With canvas media that you have previously loaded, it’s a good idea to cut the edge
straight each time you reload it.
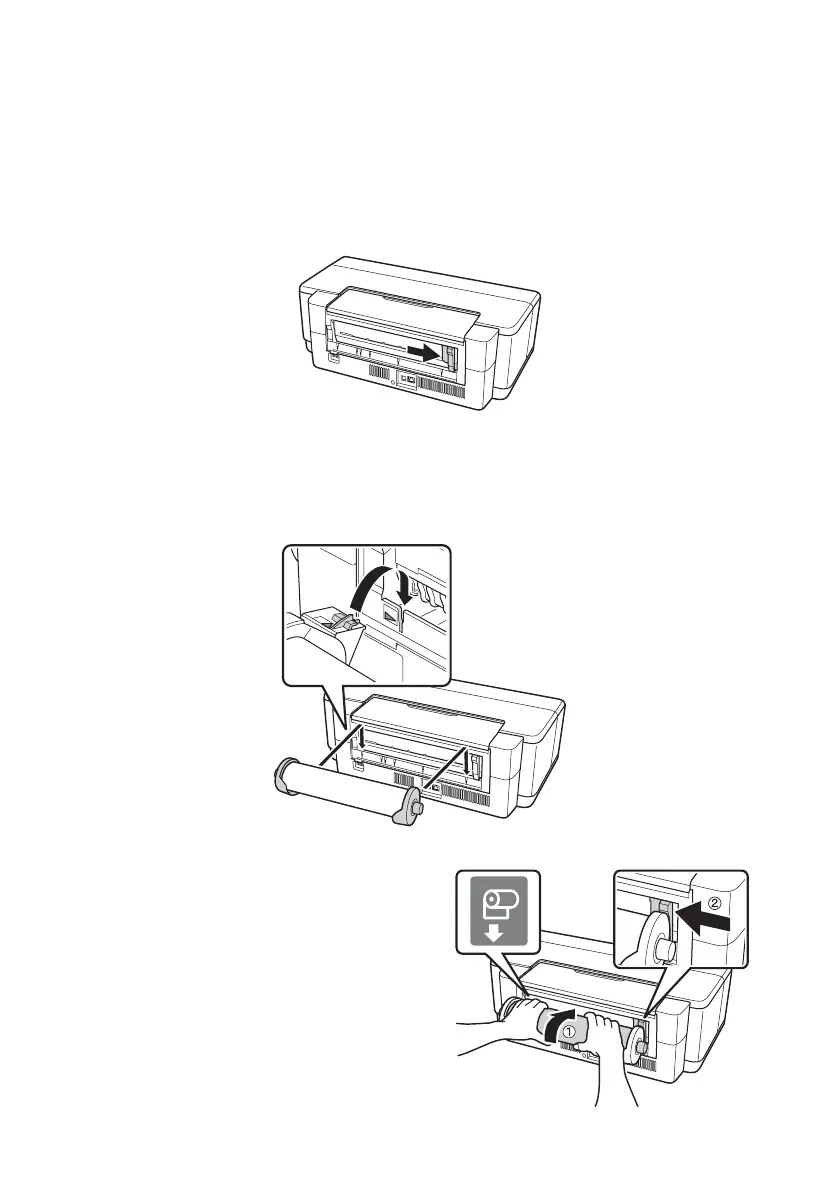
6. Move the roll paper edge guide at the back of the printer all the way to the
right.
7. Insert the left roll paper holder (marked with a triangle) into the far left slot
on the back of the printer (marked with an orange triangle). Then insert the
right roll paper holder in the corresponding slot on the right.
8. Feed the end of the paper into the roll
paper feeder, located behind the roll
and marked with the M roll paper
icon.

Other manuals for Epson Stylus Photo R2000 Series

Questions and Answers:

Question and Answer IconNeed help?

Do you have a question about the Epson Stylus Photo R2000 Series and is the answer not in the manual?

Epson Stylus Photo R2000 Series Specifications

General IconGeneral
Print TechnologyInkjet
Max Print Resolution5760 x 1440 optimized dpi
Number of Ink Colors8
Borderless PrintingYes
Operating SystemsWindows, Mac OS
Ink TypeUltraChrome Hi-Gloss 2
Ink ColorsCyan, Magenta, Yellow, Red, Orange, Matte Black, Photo Black, Gloss Optimizer
Ink Droplet Size1.5 picoliters
ConnectivityUSB, Ethernet, Wi-Fi
Media Sizes Supported4" x 6", 5" x 7", 8" x 10", 11" x 14", 13" x 19"
Media Types SupportedPlain paper, photo paper, fine art paper, canvas
InterfaceUSB, Ethernet

Related product manuals