20
Printing Your First Page
Hold down the
E
load/eject button and press the
P
power button to turn on the EPSON
Stylus Scan. Then release both buttons. The Stylus Scan starts printing a nozzle check
page.
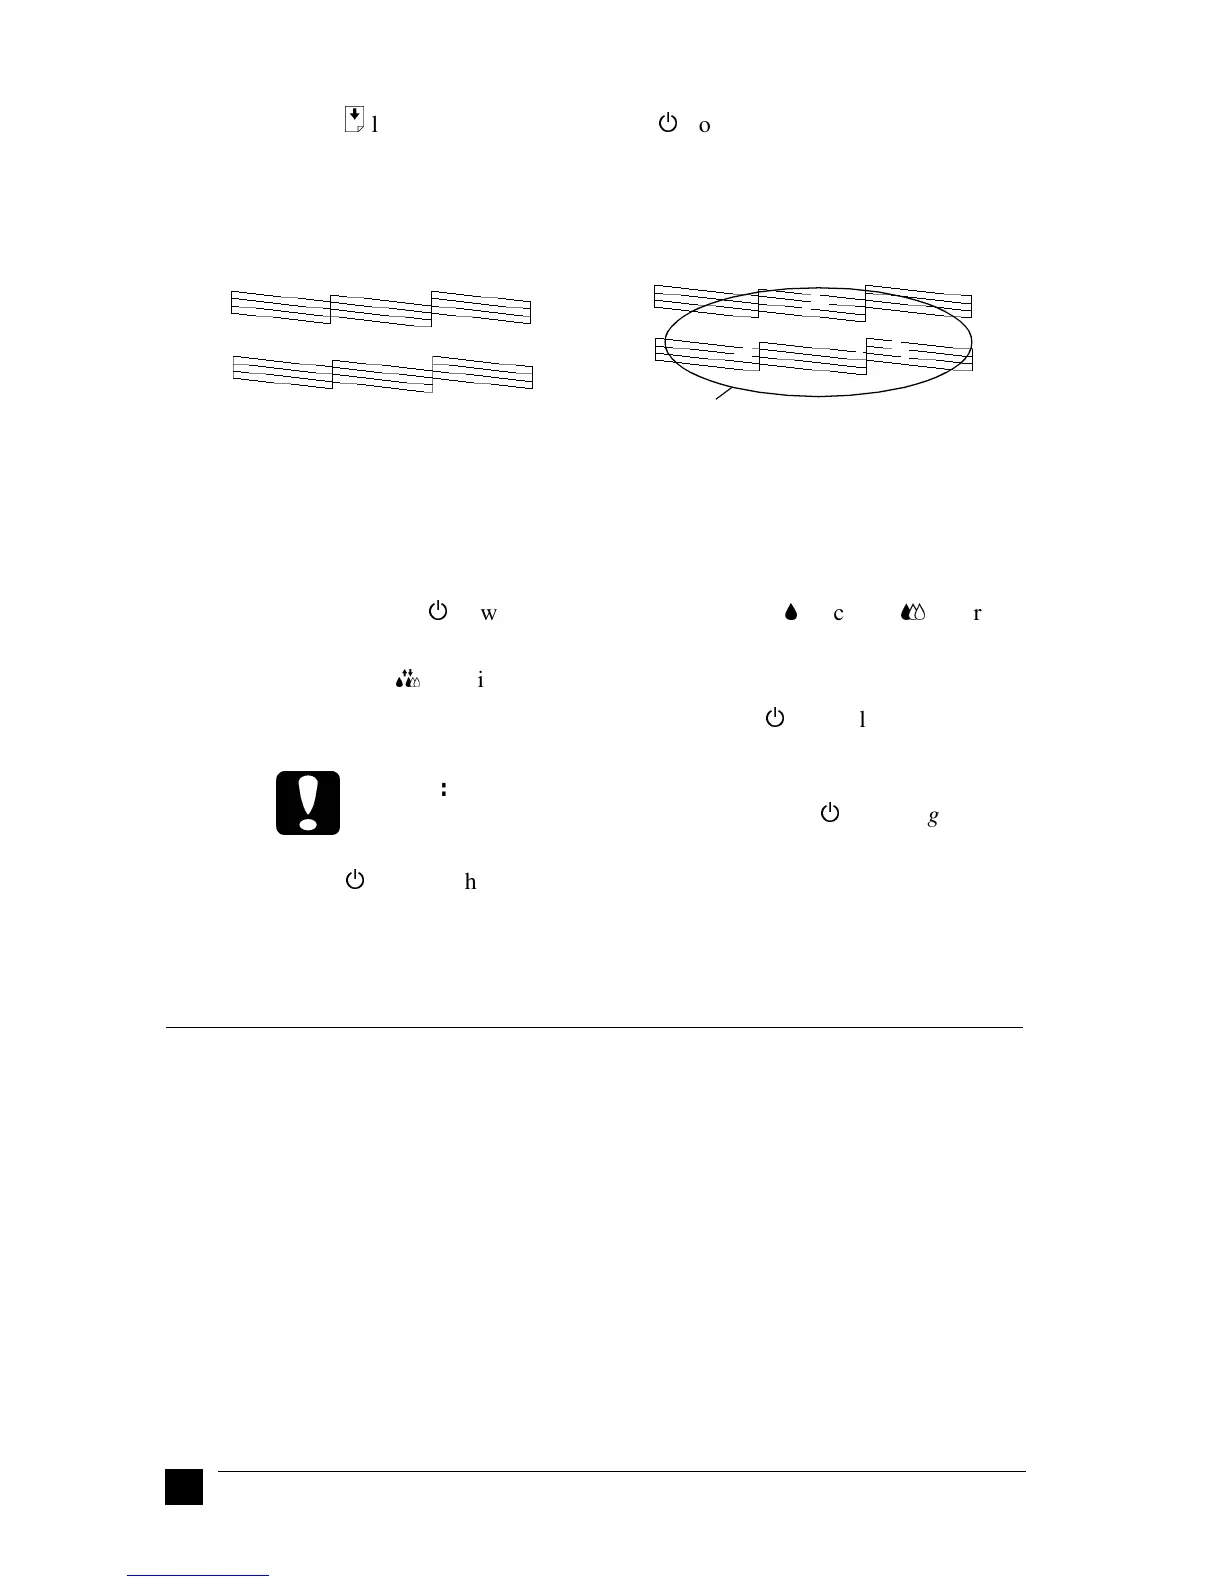
Here are sample printouts.
Good sample Print head needs to be cleaned
If the nozzle check page does not print satisfactorily (for example, if any segment of
the printed lines is missing), then clean the print head as explained below. If the printout
was satisfactory, you are ready to print your first page.
❚ Cleaning the Print Head
1. Make sure that the
P
power light is on and that both the
B
black and
A
color ink
out lights are off.
2. Hold down the
R
cleaning button for three seconds, then release it.
The Stylus Scan starts cleaning the print head and the
P
power light begins
flashing. Print head cleaning takes about one minute to complete.
c
Caution:
Never turn off the EPSON Stylus Scan while the
P
power light is
flashing. Doing so may damage the Stylus Scan.
3. When the
P
power light stops flashing, print a few lines from a document to
confirm that the head is clean and to reset the cleaning cycle.
If the print quality still has not improved after checking the nozzles and cleaning four
or five times, contact your dealer.
■ Printing Your First Page
After making sure your printer is operating correctly, you are ready to print your first
page. To familiarize yourself with the printer software, we recommend printing the
README file provided with your printer software. The README file contains the latest
information about your printer software. Follow the instructions for Windows or
Macintosh in this section.
❚ For Windows
Follow these steps to print the README file.
1. Click Start, point to Programs, point to Epson, and then click EPSON Stylus
Scan 2000 Readme.
2. Click Print on the File menu. The Print dialog box appears.
segments are missing

 Loading...


