4
Control Panel
FEED button
This button feeds paper.
(Power) LED
This LED is on when the printer is on.
ERROR LED
This indicates an error.
PAPER OUT LED
On indicates a paper out, and when
you select to use thermal roll paper
by DIP Switches, also indicates a
paper near end. (For DIP Switch
settings, See Table B on page 7.)
Flashing indicates standby.
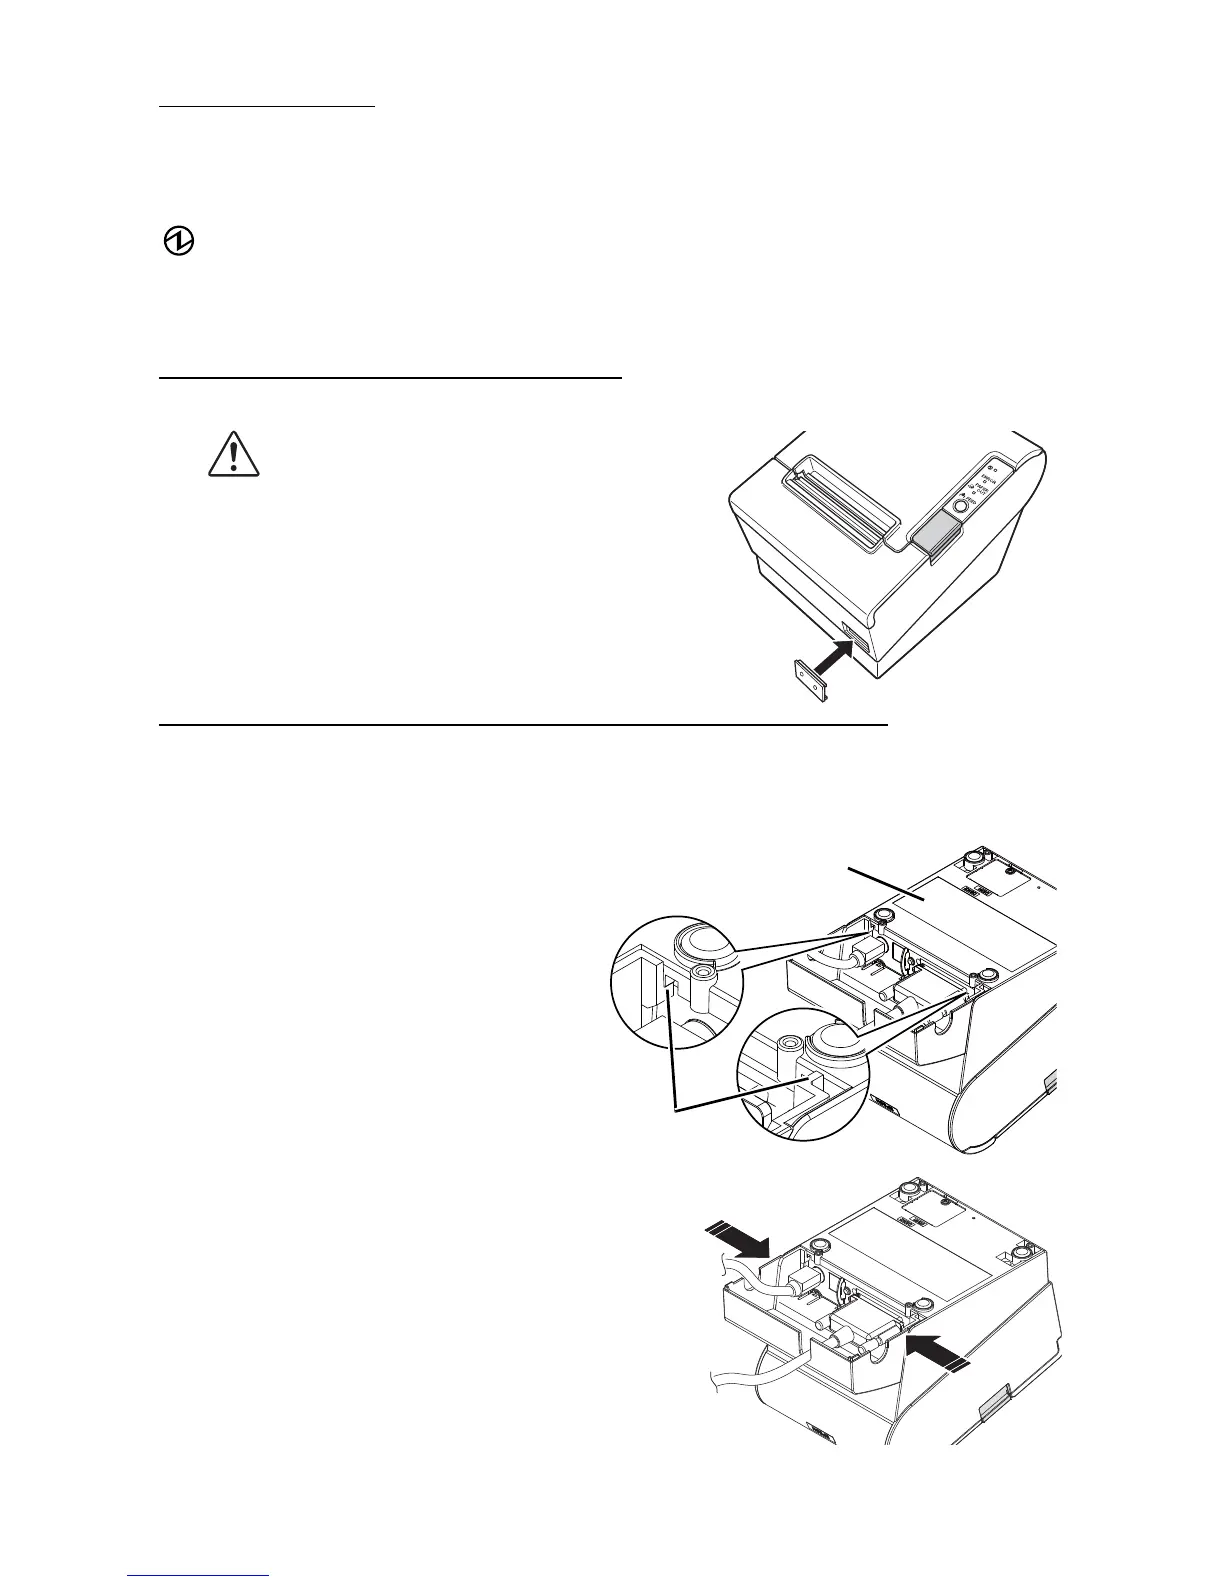
Using the Power Switch Cover
Attaching and Removing the Connector Cover
These instructions apply if a connector cover is packed with your printer to
protect your cables. To attach it, follow the steps below:
WARNING:
If an accident occurs with the power
switch cover attached, unplug the power
cord immediately. Continued use may
cause fire or shock.
The enclosed power switch cover ensures
that the power switch is not pressed
accidentally. To use this cover, install it as
shown in the illustration on the right.
1. First, connect all the cables. The
connector cover has three
possible cable exits: on the right,
left, and back.
2. Position the two hooks on the
connector cover so that they
hook the printer case, as shown
in the illustration on the right.
3. Push the connector cover down
to click onto the printer case
To remove the connector cover, turn
the printer over, and push the
connector cover down while
pushing both sides of the connector
cover inward to detach the hooks
from the printer case.
 Loading...