QX50/QX200/QX2000; (SW Version 6.0.x) 150
QX50/QX200/QX2000 Manual II: Administrator’s Guide
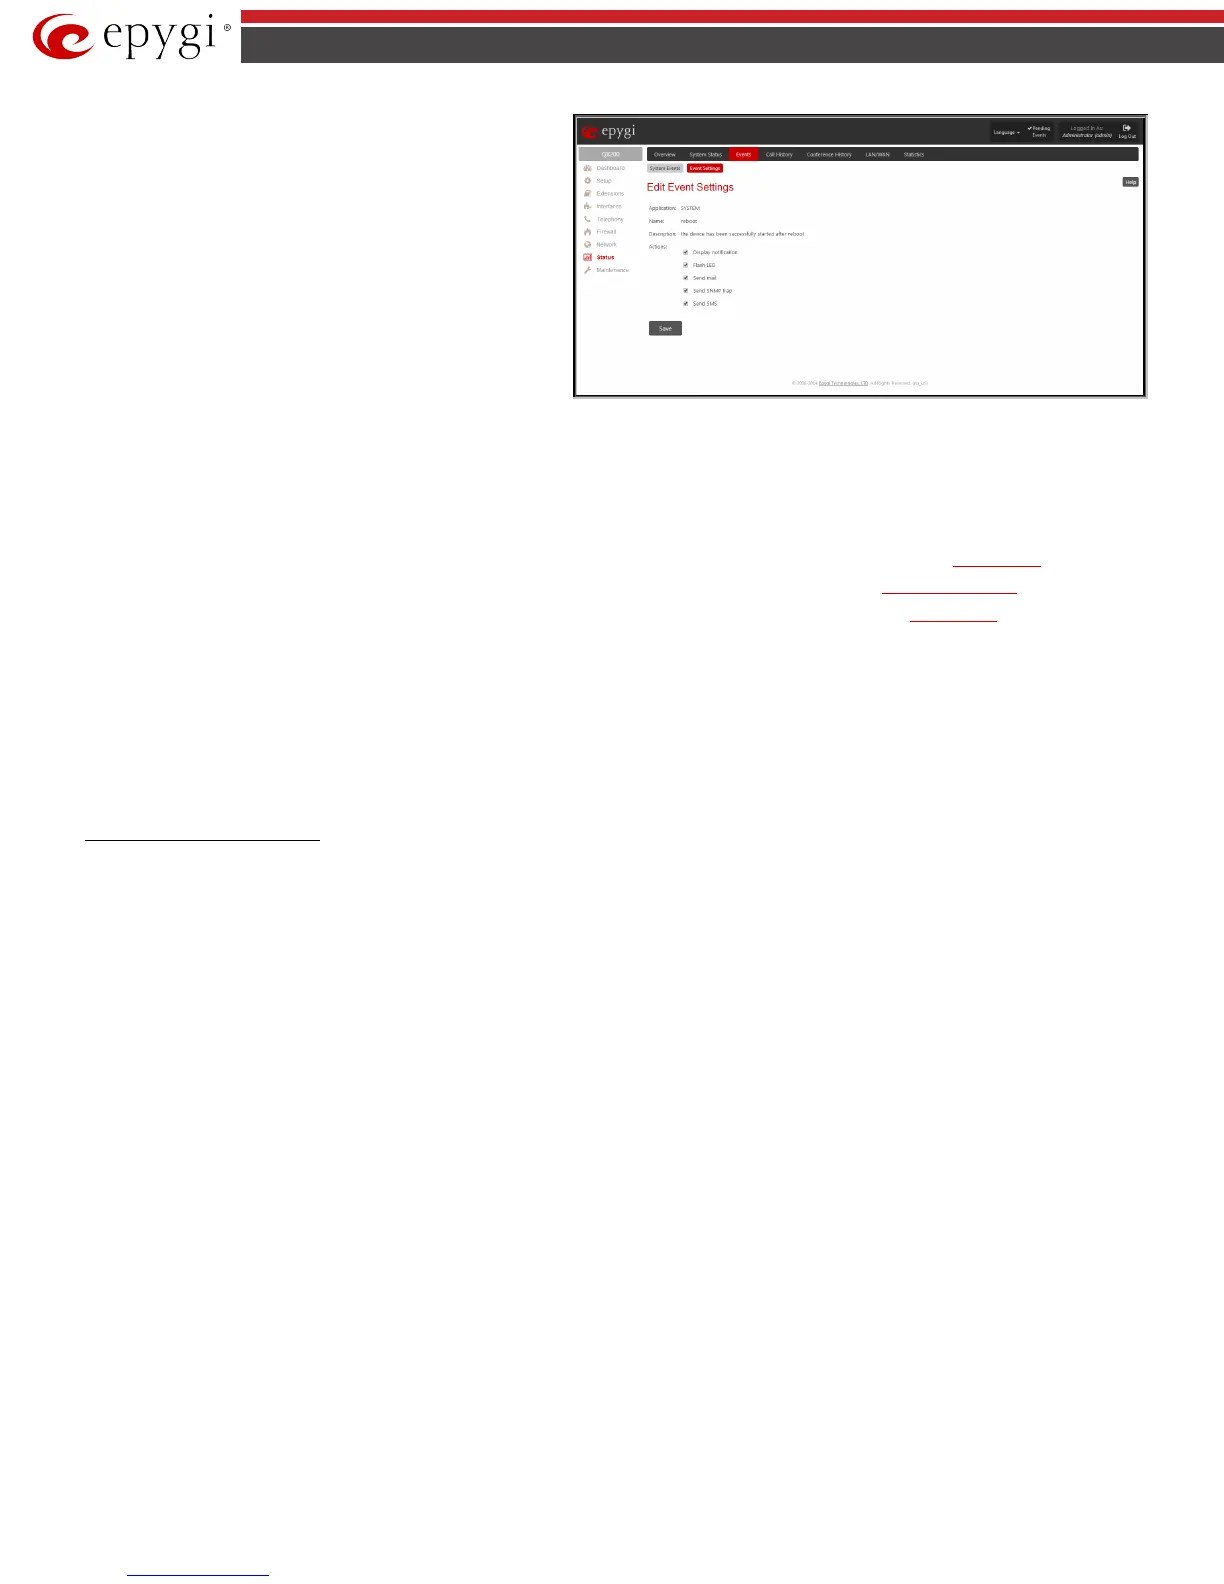
Edit Event Settings
page offers the following input options:
Application displays the application the event refers to. Multiple is
shown here if more than one event has been selected for the action
assignment.
Name displays the name of the event. Multiple is shown here if
more than one event has been selected for the action assignment.
Description displays additional information about the event.
Multiple is shown here if more than one event has been selected for
the action assignment.
Action offers radio buttons to choose one of the actions to notify the
QX IP PBX administrator when an event(s) takes place. The
following actions can be available:
Fig.II- 246: Edit Event Settings page
• Display Notification - A notification link will be displayed on the bottom of all pages and a record is added into the Events table. The notification is
executed as a link “Please Check your pending events!”. The link leads to the System Events page. This action also will take place if Flash LED or Send
Mail has been selected, even if not specifically selected.
• Flash LED (available only for QX50/QX200) - The flash LED (ORANGE) will blink every second and a notification will be displayed on the bottom of
all pages. For some events the LED will start flashing after a delay.
• Send Mail – an e-mail notification about the new event on the QX IP PBX will be sent to the e-mail address specified in the Mail Settings
page.
• Send SNMP Trap – SNMP notification will be sent to the traphost(s) listed in the SNMP Trap Settings table (see SNMP Trap Settings).
• Send SMS – SMS notification about the new event on the QX IP PBX will be sent to the mobile phone specified in the SMS Settings page.
Actions that are not allowed for the selected event (like mail notification if the PPP link is down or the mail server has been configured improperly) are
hidden. For multiple events editing, actions that are not appropriate for least one of the selected events will also be hidden.
Please Note:
In case of an IDS (Intrusion Detection System) intrusion alert, only the first possible intrusion in each 10 minute period will initiate an event.
This helps to avoid flooding the System Events table, and flooding the user with various intrusion alerts that result from each possible Denial of Service
attack. When these events are displayed in the System Events table, the user can receive detailed information about the intrusions through a link to the
IDS log list.
If QX IP PBX cannot receive an IP address from the DHCP or PPP servers, or cannot register an extension on the SIP or Routing servers, or cannot reach an
NTP server, it raises only one event for the entire period the action has failed, but will continue to try. When the required action is successful QX IP PBX
raises an appropriate message.
To Assign an Action to the Event
1. Select the checkbox of one or more events to assign an action to them.
2. Press the Edit button. The Edit Event Settings page appears.
3. Select an action type from the Action radio buttons to notify the administrator about the event.
4. Press the Save button to submit the changes or use Go Back button to abort the selected action.
Call History
The Call History page provides information on Successful, Missed, Unsuccessful Outgoing Calls, Call History Settings, CDR Archive and Archiving Settings.
Call History allows the collecting of call events on the QX IP PBX with their parameters and to search them by various criteria. The selected number of
statistics entries will be displayed in the Call History tables.
The Call History page reports successful, non-successful and missed incoming/ outgoing calls and shows the Call History settings. Only administrator is
allowed to enable or disable the call statistic services.
Successful, Missed and Unsuccessful Calls
The Successful Calls, Missed Calls and Unsuccessful Outgoing Calls pages lists successful, missed and unsuccessful incoming and outgoing calls and
their parameters (Call Start Time, Call Duration, Calling Phone and Called Phone). Each column heading in the tables is created as a link. By clicking on the
column heading, the table will be sorted by the selected column. Upon sorting (ascending, descending) arrows will be displayed close to the column
heading.
 Loading...


