8
Operator's Manual
22200, 25502
|
EVO™ Crossover Ice Shelter
Check for parts online at www.GetEskimo.com or call 800-345-6007 M-F 8-5 CDT
SETUP & TAKEDOWN INSTRUCTIONS
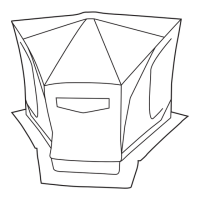
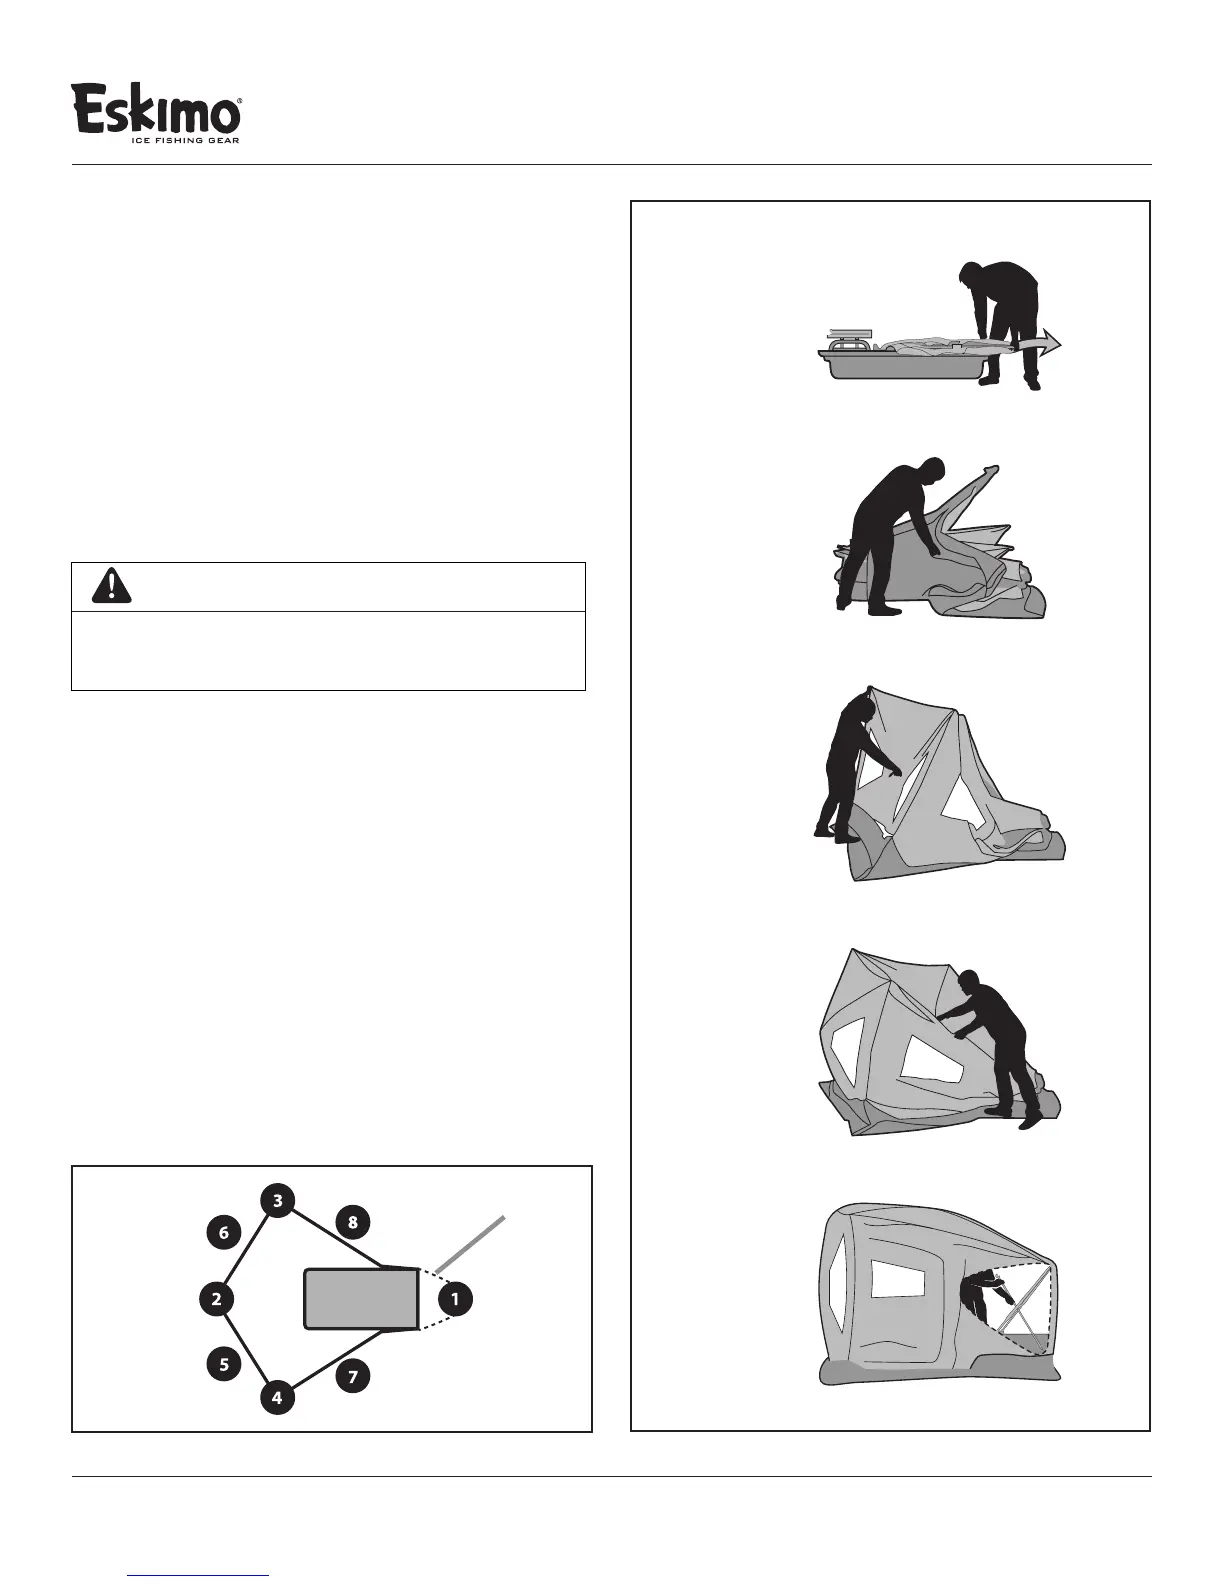
Step 1 • [ FIGURE 16 ]
Pull the shelter skin out and extend the underlying
framework poles. NOTE: An audible “click” will notify
you when the (#21950) pole is fully extended.
Step 2 • [ FIGURE 17 ]
Unfold the shelter skin and locate the front panels.
Step 3 • [ FIGURE 18 ]
Pop-out both front panels by pulling on the straps attached to
each of the hubs.
Step 4 • [ FIGURE 19 ]
Locate the roof hub and pull upwards to pop-out the roof panel.
Step 5 • [ FIGURE 20 ]
Enter the shelter and install the back spreader poles (#22004) to
(#21950) and the sled, as shown in Figure 10 earlier in this manual.
Step 6 • [ OPTIONAL ]
Install high wind poles (#22612) into the front (top and bottom)
corners of the shelter. NOTE: Pockets for the wind poles are
marked with reective patches.
Step 7 • [ FIGURE 21 ]
Anchor the shelter to the ice using provided ice anchors, drilling
them through the grommet sewn into the skirt in the sequence
shown in Figure 18.
FIGURE 21
FIGURE 16
FIGURE 17
FIGURE 18
FIGURE 19
FIGURE 20
TOW ROPE
CAUTION
BE CAREFUL NOT TO SNAG ANY FRAMEWORK DURING
THIS POPOUT PROCESS. FAILURE TO DO SO COULD CAUSE
DAMAGE TO THE SHELTER SKIN.