14
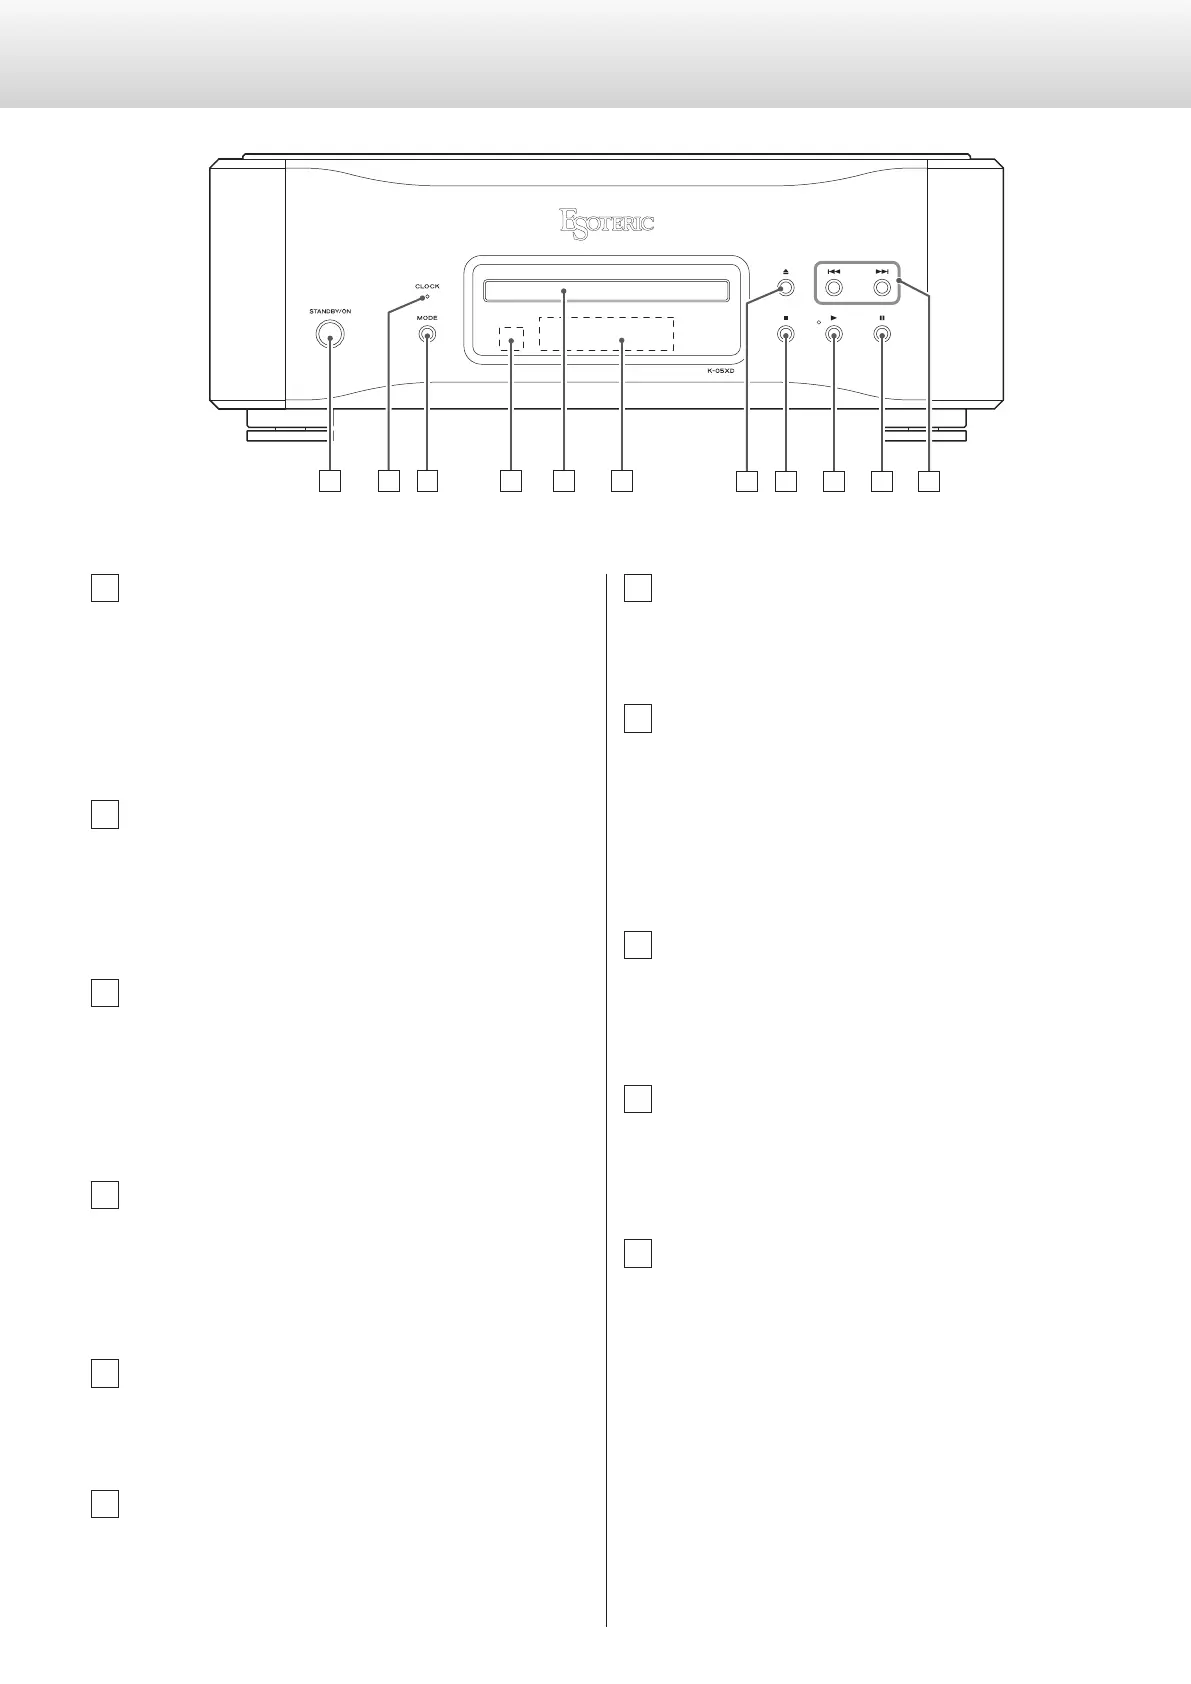
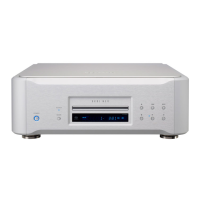
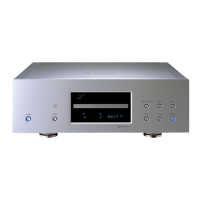
Main unit parts and functions
A STANDBY/ON button
Press this to turn the unit on or put it into standby mode.
When the unit is on, the ring around the button lights.
When the unit is off, it is unlit.
When not using the unit, put it into standby mode.
B CLOCK indicator
This shows the clock synchronization status.
This indicator blinks during clock synchronization and lights
when synchronization completes.
C MODE button
When stopped, press this button to change the input source.
When set to external input, the unit can be used as a D/A con-
verter (page21).
Press and hold this to enter setting mode (page24).
D Remote control signal receiver
This receives signals from the remote control. When using the
remote control, point the end of it toward this receiver panel
(page12).
E Disc tray
Load a disc for playback here (page16).
F Display
This shows the playback time, the number of tracks and other
information (page20).
G Tray open/close (-) button
Press this to open and close the disc tray.
H Stop (8) button
Press this to stop playback (page17).
When stopped, press and hold this to change the playback area
of a Super Audio CD (page17).
Press this when in setting mode to complete changing settings
and return the display to normal (page24).
I Play (7) button
Press this to start disc playback (page16).
During playback, the indicator next to this button lights.
J Pause (9) button
Press this to pause playback (page17).
When paused, the indicator next to the play button blinks.
K Skip (.//) buttons
Use these to skip to the previous or next track.
Press and hold these during playback to search backward/for-
ward. Repeatedly press and hold these to change the backward/
forward search speed (page18).
Use these to change parameters when in setting mode
(page24).