30
Press the Memory/Add switch in case that the progressive zone cannot be detected
because ADD value is small etc. It switches to the measurement screen of the far point.
When “ADD Measure” on the Setup screen is set as “F/N.AT”, it is detected
automatically and the measurement values are stored in memory.
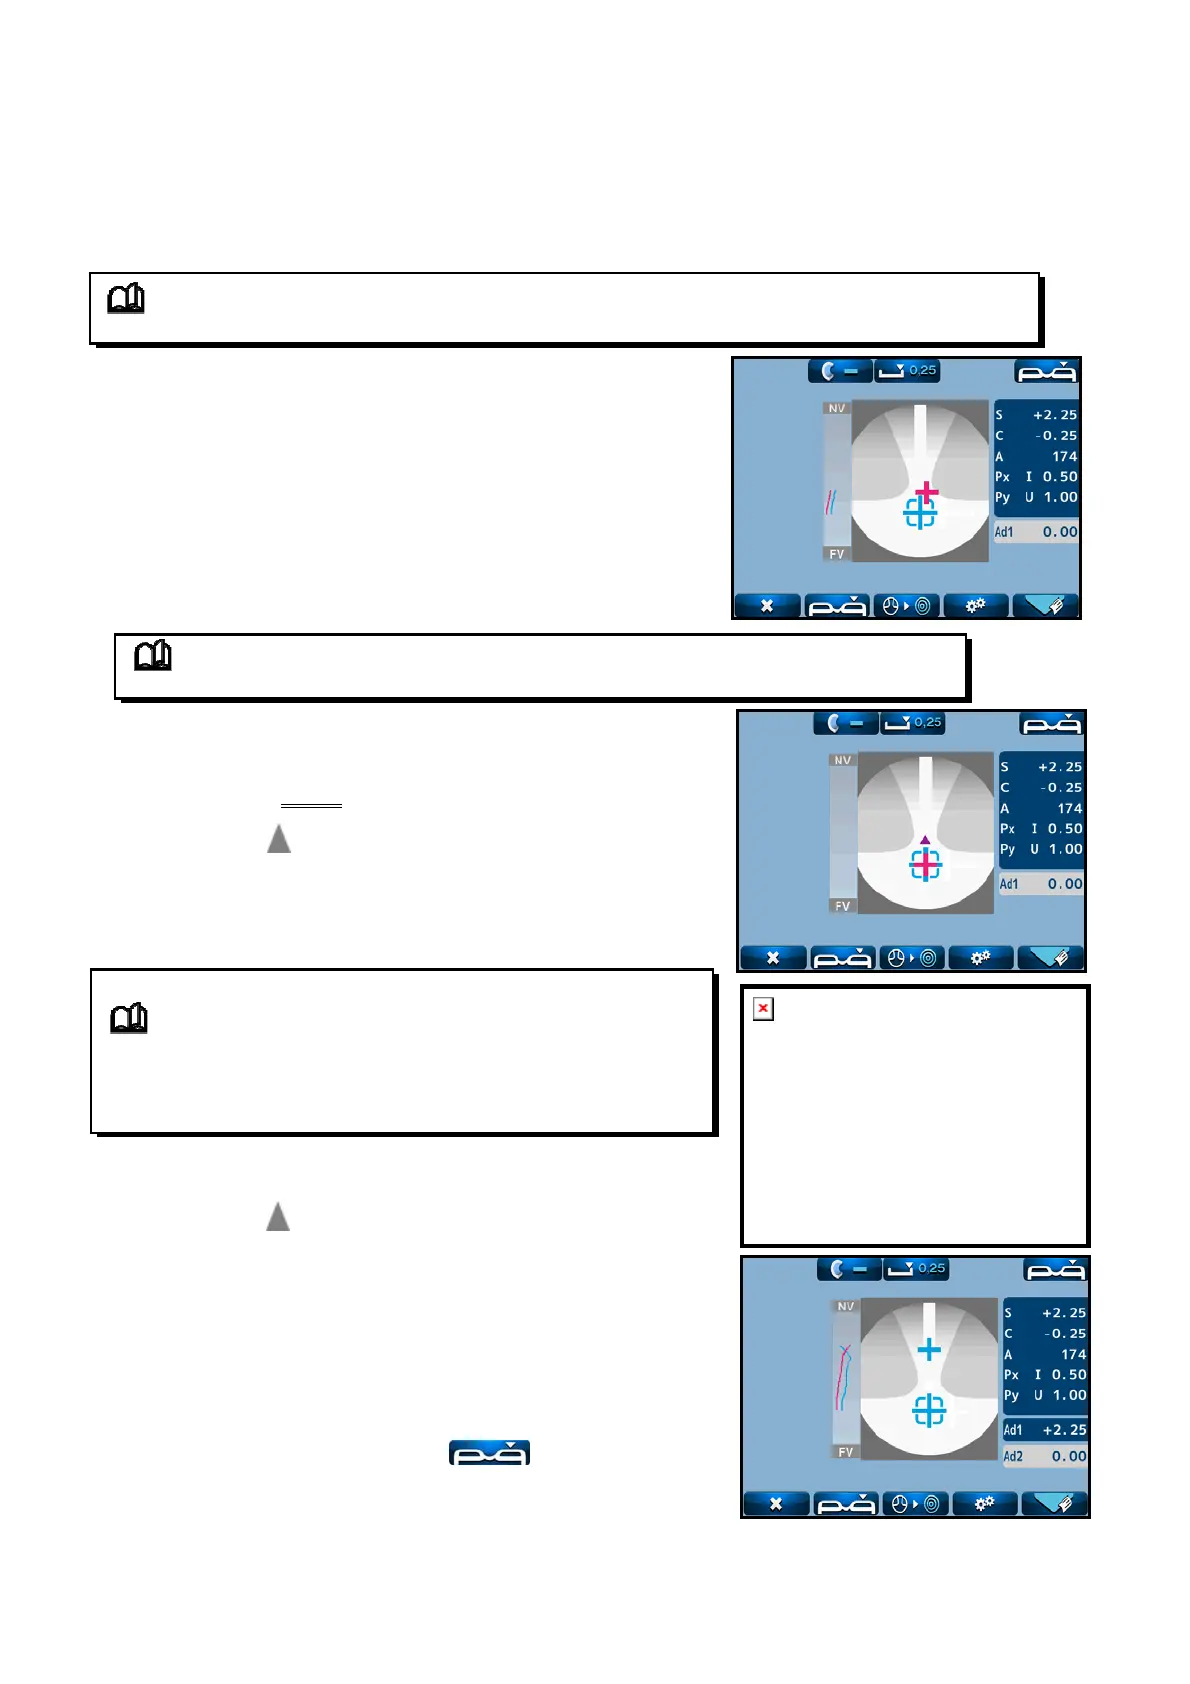
The cross cursor on the screen indicates the actual
measurement position on the lens. For example, if it
goes to the right side of the lens which is out of the
progressive zone at the time of moving from far point
to near point, the cross cursor is displayed on the
right deviated from the progressive zone.
(3) Measuring procedure of progressive lens (when N.AT is selected for ADD Measure)
1) Detection of progressive zone
First, find the progressive zone by moving the lens back and forth, and right and left slowly.
The cross cursor (screen shown below) appears when the progressive zone is found.
2) Measurement of far point
Take a measurement of far point. Move the lens toward the
device so as that the center of the alignment mark overlaps
with the cross cursor.
The color of the cross cursor is changed to blue by pressing
the Memory/Add switch after they overlaps.
At this time, the measurement values of the far point
are stored.
3) Measurement of near point
Take a measurement of near point. As shown on the right,
move the lens slowly
to move the cross cursor (red)
according to
. If it goes out of the progressive zone, the
cross cursor moves right or left. If it goes out of the
progressive zone, bring it back to the zone and move the lens
toward near point.
Perform the alignment carefully when it comes closer to the
near point and
starts blinking. Once the near point is
detected, it blips. The cross cursor is fixed at the near point
and its color changes to blue. When the near point is attained,
the ADD value is stored in memory automatically.
※Another ADD value (Ad2) can be stored in memory anywhere
by pressing the Memory/Add switch after measurement.
The progressive judgment screen appears again by setting
the lens for the left eye and touch
after completing
the measurement. Take a measurement of the left lens in the
same manner as right lent.
※Measurement can be started from either right or left lens.
+2
25
Progressive area
NOTE
NOTE
NOTE
 Loading...