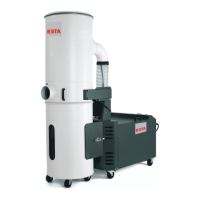
09302-52-00 DUSTOMAT 21-67 H 23
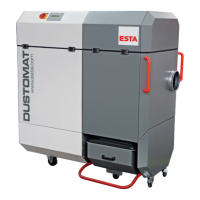
10.5.3 Replacing the pre-filter on a DUSTOMAT -23, -43, -63,
Next loosen the clamping ring that holds the cover plate and remove the cover
plate. Loosening the clamping ring can be easier if the device has been turned on
and the exhaust port closed.
Tilt the upper part backward, and remove the lock nut in the middle of the filter
cartridge. Now remove the six nuts on the filter cartridge, and pull a dust collection
bag from under over the upper part. A second person must hold the filter from
underneath, so that it won’t fall into the dust collection container.
Install the new filter by performing the same process in reverse.
Additionally, the filter cartridge must be sealed at the upper side with
sealing compound. When installing and removing, make sure that the
blower device does not become damaged and it doesn’t drag against the
filter bottom during operation.
10.5.4 Replacing the pre-filter on a DUSTOMAT -27, -47, -67,
First remove the compressed air hose and use the manual cleaning button to
empty the vessel. Next loosen the clamping ring that holds the cover plate and
remove the cover plate.
Loosening the clamping ring can be easier if the device has been turned on and
the exhaust port closed.
Remove the compressed air hose, the connecting plug from the compressed air
vessel to the power cable and both bolts below the compressed air vessel, so that
the compressed air vessel can be removed.
Now the filter cartridge’s three bolts can be removed. Cover the upper part with a
dust collection bag and pull the cartridge out. Do the same with each of the
cartridges.
Install the new filter by performing the same process in reverse. During
installation, make sure to place a new rubber gasket at the bottom of each
cartridge.
Cleaning the filter cartridge in a dismantled state by blowing it out or
beating it is not permissible.