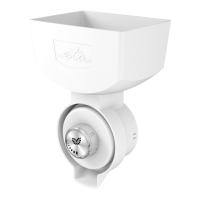
III.1) Food processor (A)
Description (Fig. 1)
A1 – Multifunctional head release lever A6 – Removable cover
A2 – Speed regulating knob A7 – Multifunctional head
A3 – Bottom mount for adapters C1 - C4 A8 – Cover
A4 – Front mount for attachments A9 – Blender cover opening button
(D, M, G, H, J, O, N, Q) A10 – Blender mount F
A5 – Release button A11 – Power cord
B1 – Stainless bowl B3 – Feed tube cover
B2 – Bowl lid
The model you purchased includes the attachments and adaptors specified in the table at
the end of this language version of the manual.
Food processor control
– Tilting the multifunctional head downward/upward (Fig. 2)
Rotating the release lever A1 slightly will lift the head upward. Rotating the lever A1 further
and pushing the unit down will tilt the head downward.
– On/off switching of the food processor
Before you switch on the food processor, plug the A11 power cord into electric socket.
Then switch on the food processor by rotating the speed regulating knob A2. After you finish
working, switch off the food processor by rotating the speed regulating knob to position 0.
– Speed control (Fig. 5)
Speed is controlled by setting the speed regulating knob A2 to the desired position within
the interval MIN - 1 - 2 - 3 - 4 - 5 - 6 - MAX. For short operation time at the maximum
speed, the regulating knob can be set to position “P” (PULSE). The regulating knob must
be held by hand in this position. Releasing the regulating knob will return it to position 0
and stop rotating.
– Multifunctional head attachment security safeguard
In order to disassemble the food processor and to remove the attachments from A4 front
mount for attachments, apply a reverse procedure. Before removing the attachments from
the motor unit head, you first have to push the release button A5.
– Blender security safeguard
The food processor cannot be switched on, if the blender cover A9 is removed,
and the blender is not correctly fixed.
III.2) Whipping, mixing and flexi whisk; kneading hook
Description (Fig. 1)
C1 – Mixing whisk C3 – Kneading hook
Food processing time depends on the volume, type and quality of the processed
ingredients. It usually takes several minutes under normal conditions.
77
GB
 Loading...