19
• Ensure that the fuel tank cap is screwed on tightly.
• The tank must be emptied out of doors (in the open air).
NOTE : In cold weather, the viscosity of diesel increases and paraf-
fin crystals form. This may affect the performance of the engine as its
fuel supply is defective. In this case, use winter quality diesel, which
can be used at temperatures as low as -20°C.
• To avoid the poor running of the engine, after it has been polluted
(condensation water, detritus), the fuel tank must be emptied every
1000 hours or once a year.
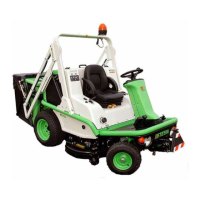
6•4 SEAT ADJUSTMENT
H124DN - H124DX
For a maximum comfort you can adjust the seat position according to
transmission pedals location (items 13 and 14 page 11).
6•4•1 LONGITUDINAL ADJUSTMENT
• To unlock the seat, lift the lever (item 27 page 10).
• Move the seat to the desired position.
• Release the lever and check that the seat is correctly blocked.
6•4•2 ADJUSTMENT OF THE SEAT BACK ANGLE
• To unlock the seat back, push the lever backward (item 15 page 10).
• Tip the back into the desired position.
6•4•3 ADJUSTMENT OF SEAT PAN
• To unblock the saucer, lift the lever (item 25 page 10). Swing the
seat to the desired position.
6•4•4 ADJUSTMENT OF THE SUSPENSION
• To unlock the suspension, pull and then lift the lever (item 26 page 10).
• Push the lever to the left to increase the tension of the suspension or
to the right to decrease the tension (the tighter the suspension, the
harder it is).
• Check that the lever is in a blocking notch, then release it.
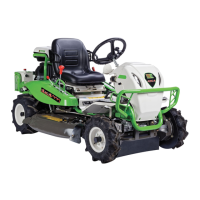
H124DL
For a maximum comfort you can adjust the seat position according to
transmission pedals location (items 13 and 14 page 11).
6•4•5 LONGITUDINAL ADJUSTMENT
• To unlock the seat, lift the lever (item 27 page 10).
• Move the seat to the desired position.
• Release the lever and check that the seat is correctly blocked.
6•4•6 ADJUSTMENT OF THE SUSPENSION
• To unlock the suspension, pull and then lift the lever (item 26 page 10).
• Push the lever to the left to increase the tension of the suspension or
to the right to decrease the tension (the tighter the suspension, the
harder it is).
• Check that the lever is in a blocking notch, then release it.
6•5 ADJUSTMENT OF THE STEERING
CONSOLE
• Should preferably be adjusted after the seat.
6•5•1 ANGULAR ADJUSTMENT
• Release the hand lever (item 21 page 11) on the left side of the
console.
• Move the console to the desired position, then block by tightening
the hand lever.
6•5•2 HEIGHT ADJUSTMENT
• Release the hand lever (item 22 page 11) on the central part of the
console.
• Lift or put down the console to bring it to the desired position, then
block by tightening the hand lever.
6•6 STARTING AND STOPPING THE
ENGINE
6•6•1 STARTING THE ENGINE
WARNING !
Before starting the engine, read the safety
instructions (pages 3 and 4).
• Sit on the driver’s seat.
• Move the cutter switch and PTO switch to the “off” position
(H124DN - H124DX).
• Put the parking brake on.
• Move the throttle hand-lever to middle position. Do not press on the
drive pedals.
• Turn the ignition key to the contact position 1 (power on and
pre-heating).
• As soon as the pre-heating indicator light goes out, press the start
safety switch (item 2 page 11) at the same time you turn the ignition
switch to the position
.
Never keep the ignition key on ignition position more than
4 seconds.
• When the engine starts, release the key and move the throttle lever
back to the position “MINI”.
• Allow the engine to run for a few minutes before go to maximum
speed and than switching on the cutter.
• Never modify the original settings of the engine ; never speed up
the engine because it will increase the hydraulic flow
rate and may
damage the devices of the hydraulic circuit.
WARNING !
Do not rest hands or feet on moving parts.
• Exhaust fumes are toxic.
• Do not run the engine in confined areas.
6•6•2 STOPPING THE ENGINE
• Switch off the cutter if activated.
• Put the parking brake on.
• Move the throttle hand-lever to “MINI”.
• Switch off the ignition by turning the key to “0”.
WARNING ! Always remove the ignition key when
the machine is not in use or is left unattended. Use the
circuit-breaker to turn off the electric supply. Close the
hand brake.
6•7 DRIVE PEDALS
• Movement is controlled by two pedals situated to the right, of the
footboard.
• The outer pedal controls the forward gear, and the inner pedal the
reverse gear : the pedals are marked with an arrow indicating the
direction of movement of the machine (ref. 13 and 14 page 11).
• These pedals control both the speed of the mower (from 0 to
maximum speed) and the dynamic braking system.
• When the pedals are released, the mower brakes gradually before
coming to a halt.
• The stopping distance at a speed of 16 km/h is less than 3,1 m on a
dry, asphalt surface.
6• OPERATING INSTRUCTIONS
 Loading...