This document provides the instruction manual for the Euhomy Ice Maker, SKU: IM-01. It covers safety precautions, operation, installation, maintenance, and troubleshooting.
Function Description
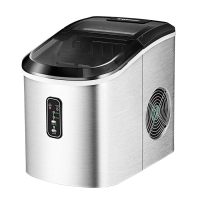
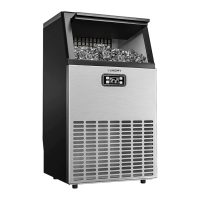
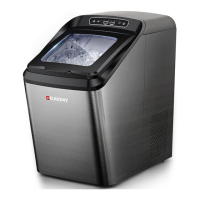
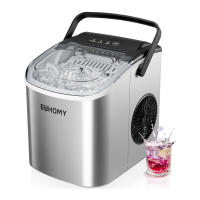
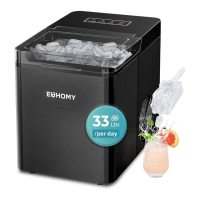
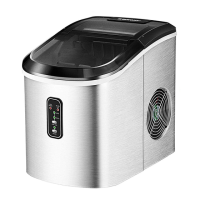
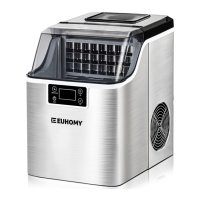
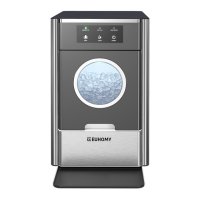
The Euhomy Ice Maker is a portable appliance designed to produce ice cubes for household use. It features a fully automatic control system with an advanced microcomputer for easy and convenient ice-making. Users can select between two ice-cube sizes with the touch of a button. The unit is equipped with warning indicators to alert users when the water tank is empty ("Add Water") or when the ice storage basket is full ("Ice Full"). Built-in safeguards automatically shut down the system to prevent accidental damage when necessary. The ice maker uses a refrigerating system to form ice on evaporator fingers, which then drop into an ice basket.
Usage Features
Before First Use:
Upon receiving the unit, remove all exterior and interior packaging, ensuring the ice basket and ice scoop are present. If any parts are missing, contact customer service. Remove any tape holding the ice scoop and ice basket. Clean the water tank and ice basket with warm, soapy water and a soft cloth. Allow the refrigerant fluid to settle for at least 1 hour before plugging the ice maker into a grounded wall outlet. The ice maker cabinet's incline should not exceed 45 degrees during transportation or use; avoid turning it upside down, as this could cause the compressor or refrigerating system to operate incorrectly. If the ice maker has been moved or transported, allow at least 2 hours for the fluids in the compressor to settle before first use. Ensure the ice maker is placed on a level, stable, and flat horizontal surface to prevent malfunction. The machine requires sufficient ventilation and should be placed away from heat sources, corrosive gases, ovens, and heaters. Maintain a clearance of 8 inches (20 cm) on all sides for proper ventilation. The recommended room temperature for operation is between 50°F and 100°F. Do not fill the water tank with hot water, as this may damage the ice maker; use only lukewarm or cold water.
Operating the Ice Maker:
Before each use, wipe the interior of the ice maker with a clean, damp cloth. Ensure the drain plug is closed. Plug the ice maker into a wall outlet; a green power indicator light will illuminate. Open the cover and remove the ice basket. Fill the water tank, making sure not to exceed the "Max Water Level" mark located at the back of the tank. Replace the ice basket and close the cover. Press the Power button; the green light will illuminate, indicating the unit is on. To select between small or large ice cubes, press the "Select" button until the desired ice size is indicated.
The ice-making cycle typically lasts between 8 to 13 minutes, depending on the selected ice size. The process begins with water flowing into a tray below the evaporator fingers, where ice forms. After 8 to 13 minutes, the ice tray tilts, draining any remaining water back into the tank. The ice cubes then drop from the evaporator fingers, and an ice shovel pushes them into the ice basket. The ice tray automatically returns to its position to start the next cycle.
When the ice basket is full, the "Ice Full" indicator will light up, and the ice maker will automatically pause the ice-making cycle. Gently remove the ice with the provided scoop. Once the basket is emptied and the cover is closed, the ice maker will automatically resume ice production. If the room temperature is below 60°F (15.6°C), selecting the "Small" ice cube size is recommended to prevent cubes from sticking together. Pressing and holding the "Select" button for 5 seconds will initiate 8 continuous cycles, even if the "Ice Full" indicator is on.
If the water tank becomes empty, the "Add Water" indicator will light up, and the ice-making cycle will stop. The Power button will flash every 5 seconds. To restart, press the Power button once, remove the ice basket, and add water to the tank. Do not overfill the water tank beyond the "Max Water Level" mark. After adding water, wait 3 minutes before pressing the Power button to restart the ice-making function.
Once ice production is complete, transfer the ice to a freezer for storage. Ice will last in the ice maker for up to 18 hours, depending on ambient temperature. To stop the ice-making cycle, press the Power button and unplug the unit. Open the cover and allow the ice maker to reach room temperature before cleaning. Direct or reflected sunlight can interfere with the infrared sensor, potentially causing the unit to continue making ice even when the basket is full; in such cases, move the ice maker to a darker location. To maintain hygiene and prevent bad-smelling ice, change the water in the tank at least every 24 hours.
Maintenance Features
General Maintenance:
The ice maker is designed for minimal cleaning and maintenance. Upon initial receipt, wipe the exterior with warm, soapy water, then with a clean, wet cloth, and finally dry with a soft cloth. This periodic cleaning helps maintain its appearance.
Cleaning and Tips:
To clean the interior, stop the ice-making cycle by pressing the Power button (the green indicator light will turn off). Unplug the ice maker from the wall outlet and allow it to reach room temperature. If the water tray is not in the vertical position behind the evaporator fingers, gently push it back to ensure all water drains into the water tank. Open the drain plug to empty any excess water. Remove the ice basket. Remove and rinse the water tube screen under running water. Clean the interior of the ice maker with a soft cloth dampened in a weak solution of warm water and white vinegar. Rinse by wiping with a clean, damp cloth. Replace the drain plug and water tube screen. Wash the ice basket and ice scoop in warm, soapy water, then rinse and dry. Clean the exterior with a soft, damp cloth, using a mild dishwashing liquid and water if needed. Do not clean the evaporator fingers.
To prevent damage to the finish, avoid using gasoline, benzine, thinner, or other solvents, as well as abrasive cleaners. Position the ice maker in the coolest area of the room, away from heat-producing appliances, heating ducts, and direct or reflected sunlight. Ensure adequate ventilation and air circulation behind the appliance. Keep ventilation openings clear of obstructions. Do not damage the refrigerant tubing when handling, moving, or using the ice maker. Never allow children to play with or operate the ice maker. Always unplug the ice maker before performing any user maintenance.