15
INSTALLATION
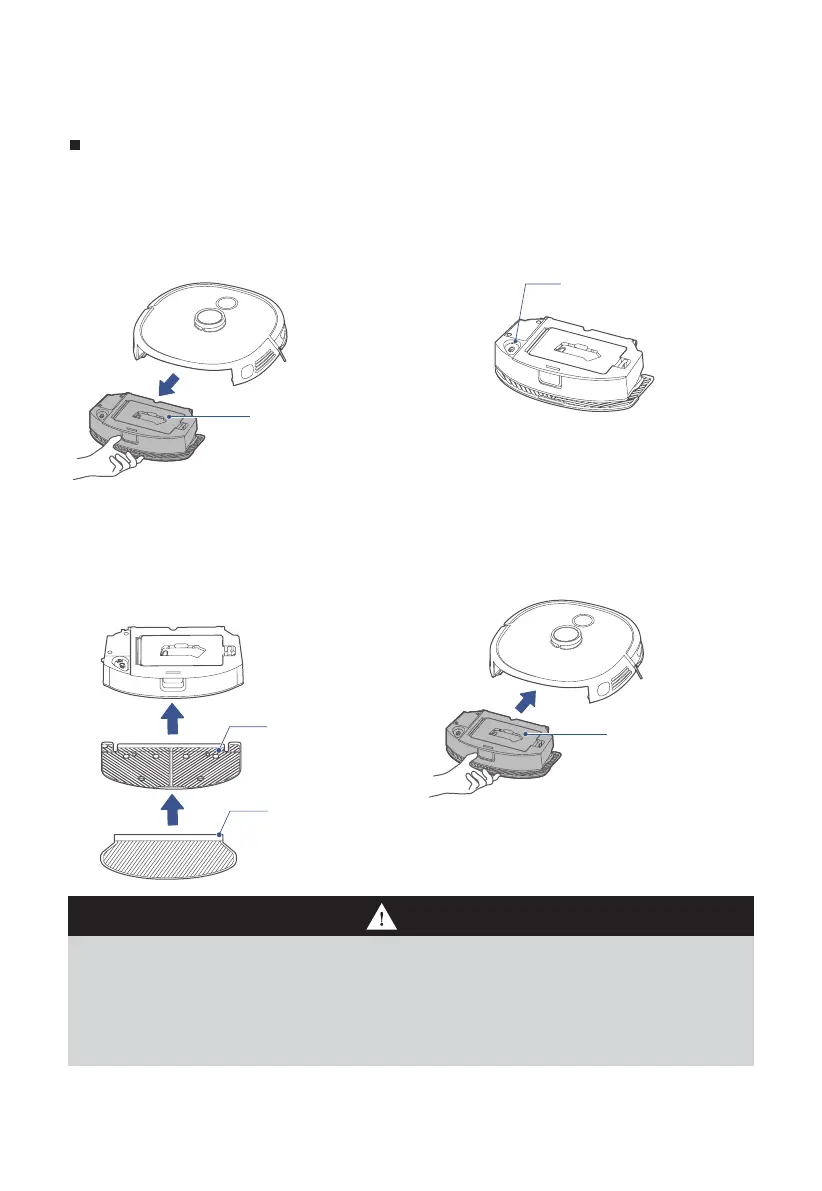
Installation of mop assembly
Installation of mop assembly (this step can be skipped, please install
when needing to mop the floor)
1. Press the water tank release
key, and remove the tank from
the main unit;
2. Remove the rubber plug from
the tank and fill water in the
tank;
Water inlet and
outlet
3. Align clips in the Mop holder to
holes in the water tank support,
and a "click"sound indicates
successful installation;
Mop
holder
Mop
4. Push the water tank in the main
unit.
Notes
Water tank
Water tank
1. To improve the mopping, recommend cleaning three times before using the mopping function;
2. The mop has been stuck to the mop holder, and it can be removed for cleaning and replacement;
3. No installation of the water tank in place may result in dropped tank;
4. Please remove the mopping plate support when the main unit is charged in the charging dock;
5. Do not fill in boiling water to prevent tank deformation at high temperature;
6. If carpets exist in the mopping environment, place roll them at the edge or set a virtual wall in the App;
7. In case of poor mopping e˜ ect or occurrence of slipping, choose a proper water volume in the App;
8. When the mopping function is not in use, keep the water tank in place and remove the mop holder.