During a Firing
Operation of the Controller During A Firing
The Genesis Spark controller eliminates much of the “babysitting” that is required with a
manual kiln. To ensure the most consistent results from one firing to the next, you should
understand how the controller operates and monitor the firing to ensure proper operation. The
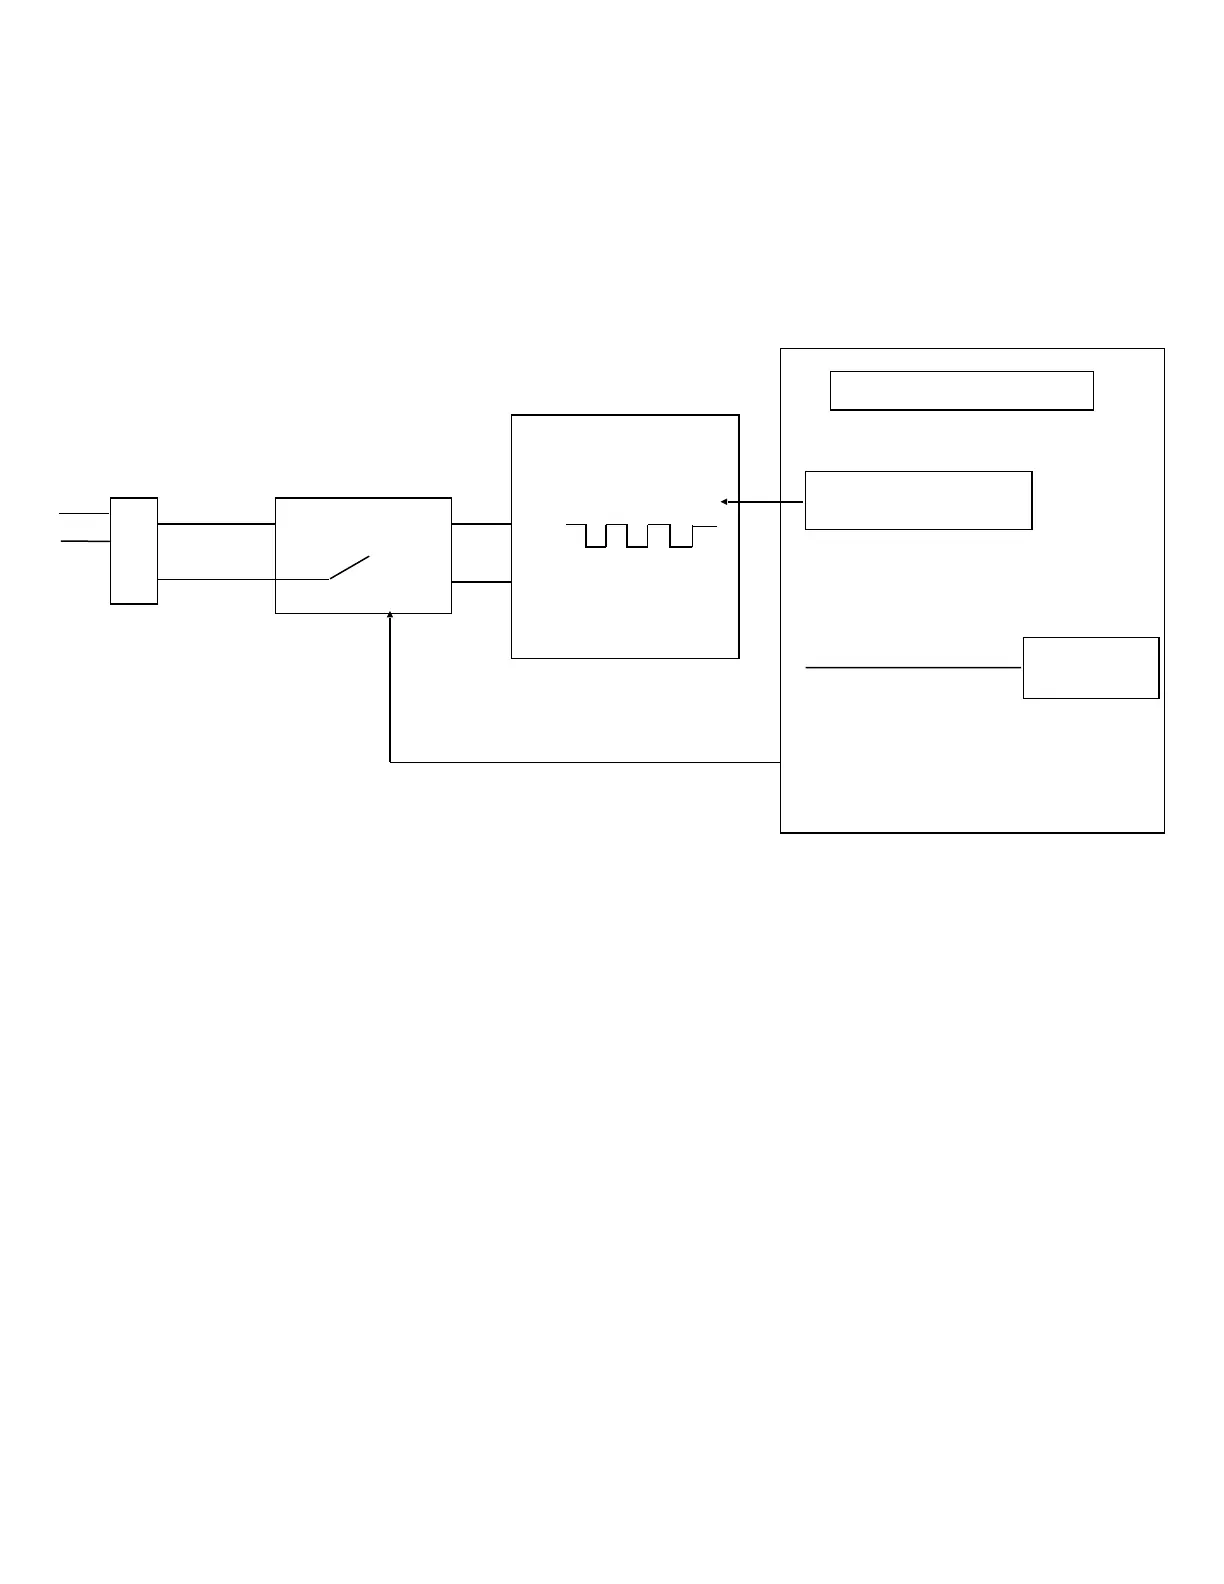
following diagram and flow chart show the basic components of a kiln’s control system.!
The diagram and flow chart show that the kiln control system, in its simplest form, works
like your thermostat at home – when the temperature is too cool the heater comes on; when
the temperature is too hot the heater turns off. The major components of the control system
are the Genesis controller, thermocouple temperature sensor, relay switch, power source, and
heating elements. The controller is the brain of the operation; the controller adjusts the
traveling set point according to your program, reads the temperature in the kiln, cycles the
relay on or off and determines when to end the program.!
The thermocouple (T/C) sensor is the first part to inspect when loading the kiln. The tip of
the T/C should protrude approximately 1- 1/2” into the firing chamber. Next, “START” is
pressed, the controller reads the kiln temperature and uses that temperature as a starting point
for a traveling set-point (also called the local set point). The displayed temperature is the
temperature inside the kiln. You should then hear the relay(s) start cycling on and off to keep
the temperature near the traveling set point. As the firing progresses the controller moves the
traveling set-point according to the programmed firing rate. The displayed temperature should
increase with the traveling set-point and the relay will be “on” longer. This sequence continues
until the final temperature is reached and the controller turns off the kiln. The display reads
“COMPLETE”.!
 Loading...