11 HOMEDEPOT.COM
Please contact 1-844-883-1872 for further assistance.
Maintenance (continued)
REASSEMBLY
NOTE: Refer to the Replacement Parts section for illustrations of part and part numbers referenced in this section.
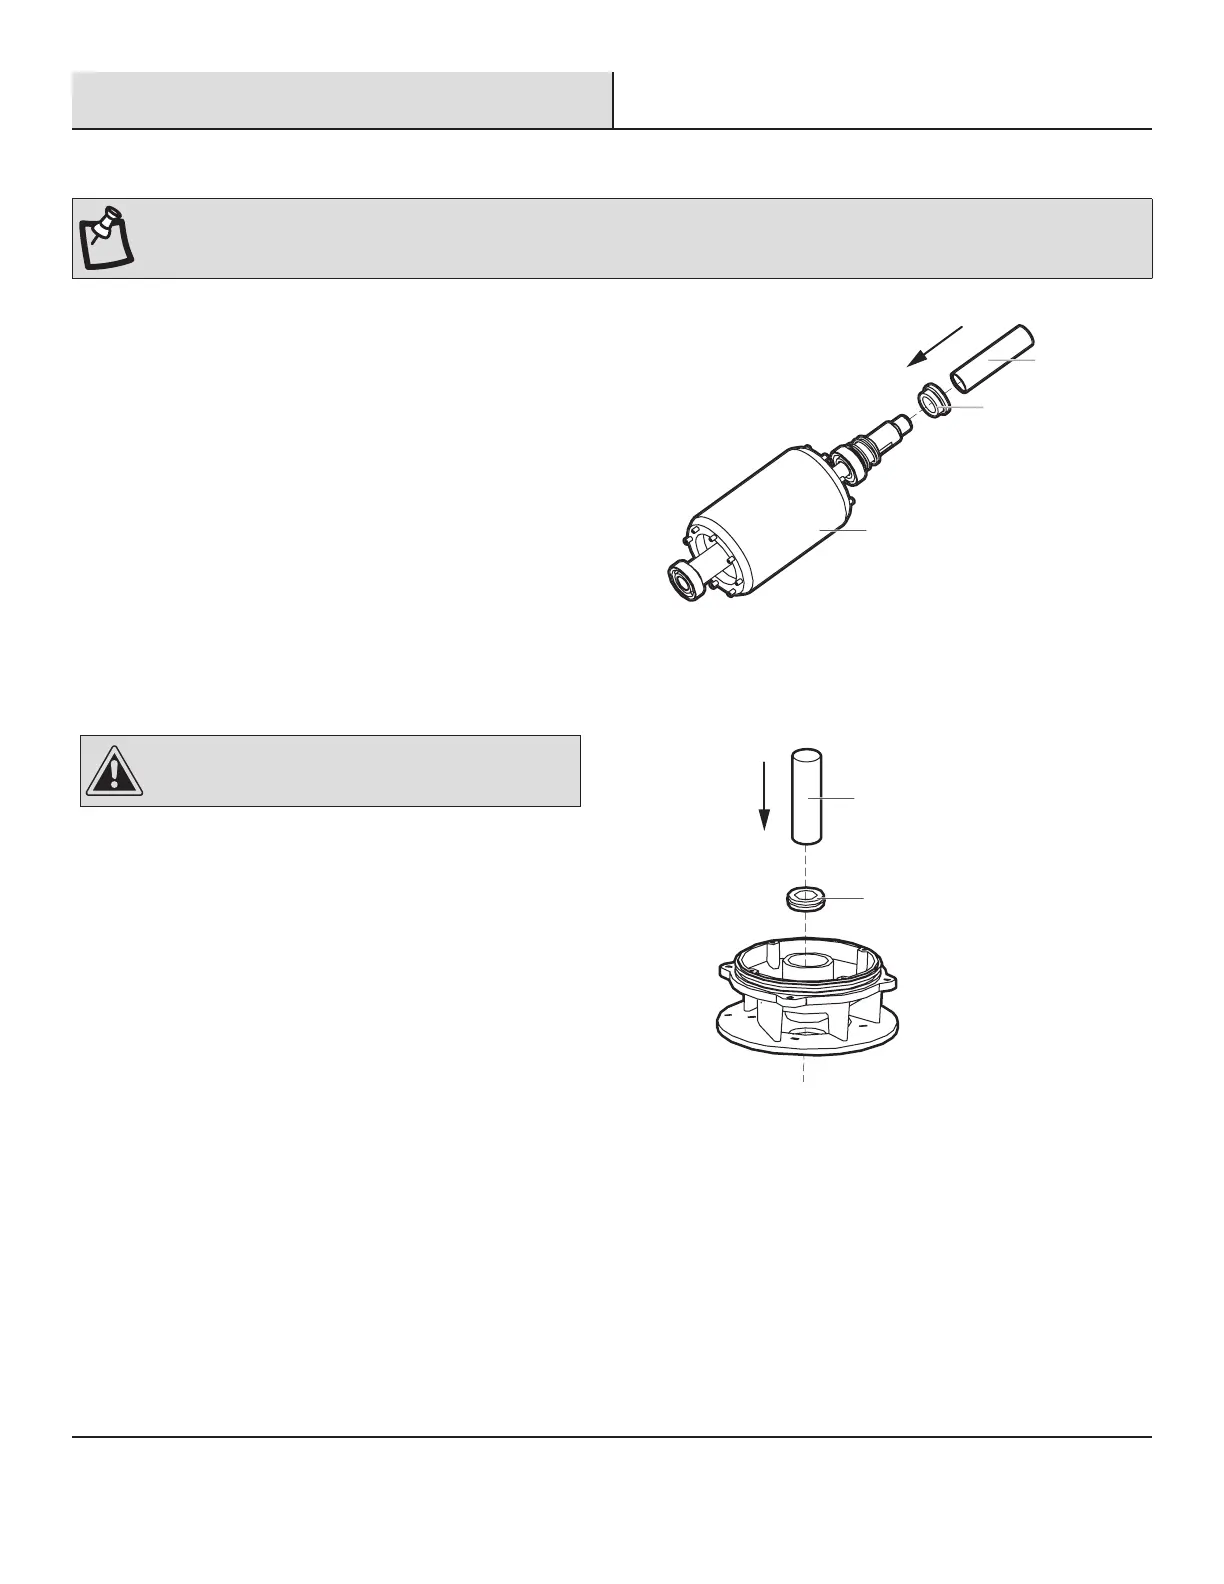
1. Assemble the bearing sleeve (9) onto the motor (10), locating
the overload as noted (or at the 11 o’clock position as viewed
from the motor end), with the four motor bolts.
2. Place the capacitor (12) into the bracket (24), if removed, and
secure with a screw.
3. Connect the lag terminal from the motor and terminal boot
(13) to the capacitor (12).
4. Place one O-ring (23) into the groove on the bearing sleeve (9),
being careful not to damage the O-ring.
5. Slide the motor housing (25) onto the bearing sleeve (9).
6. Place the O-ring (23) into the groove on the housing end (19)
and place the end piece onto the motor housing (25).
7. Place the pump support (22) onto the lower studs (26) and
lock washers (21) and hex nuts (20) onto the studs and
tighten.
CAUTION: All parts must be clean before reassembly.
Handle seal parts with extreme care. DO NOT damage
lapped surfaces.
8. To reassemble, clean the seal cavity in the bearing sleeve (9)
with oil.
9. Insert the seal retaining ring (7) along with the spring onto the
motor shaft until seated.
10. Lightly oil (do not use grease) the shaft and inner surface of
the rotating member (8b).
11. Press the rotating member with the seal pusher tool onto the
shaft and into the bearing sleeve (9) until it seats against the
shoulder of the shaft.
Rotator Assembly
Rotation
Memeber (8B)
Seal
Pusher
12. Lightly oil the stationary member of the seal (8a).
13. With the lapped surface facing the motor, press the stationary
member with the seal pusher tool into the bearing sleeve (9)
until it seats against the rotating member (8b).
Seal
Pusher
Stationary Member (8a)
Polished Face Out
14. Replace the retaining ring (7) and place the V-ring (6) onto the
shaft until seated.
15. Assemble the screen (14), volute (1), and impeller (2) as
described.