EasyManua.ls Logo

Everlast PowerMTS 251Si - User Manual

Everlast PowerMTS 251Si
72 pages
Print Icon
To Next Page IconTo Next Page
Loading...
EVERLAST
POWER MTS 251Si
Rev. 1 0 11114-16
everlastwelders.com
1-877-755-9353
Specicaons and Accessories subject to change without noce.
329 Lileeld Ave. South San Francisco, CA 94080 USA
Operators Manual for the PowerMTS 251Si
Safety, Setup and General Use Guide
A Digitally-Controlled, Multi-Process MIG/TIG/Stick Welder
SMAW
PULSE
DC
GMAW
CC
CV
IGBT
GTAW

Questions and Answers

  • C
    cherylblackSep 7, 2025
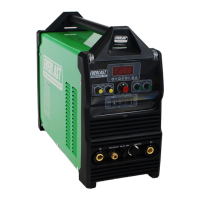
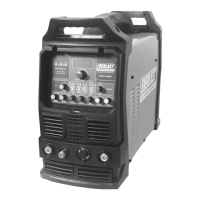
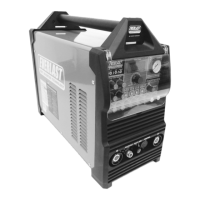
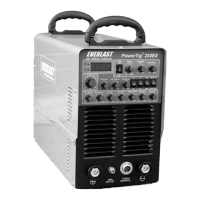
    Why is there no arc or output voltage from my Everlast PowerMTS 251Si?
    • M
      Mrs. Amanda LinSep 7, 2025
      If there is no arc or output voltage from your Everlast Welding System, ensure the work clamp is engaged in the correct connector to change polarity. Also, the control circuit could be damaged, so check the circuit.
  • C
    Chelsea EdwardsDec 1, 2025
    Why is the tungsten rapidly consumed in my Everlast PowerMTS 251Si Welding System?
    • D
      derek48Dec 1, 2025
      Rapid tungsten consumption in your Everlast Welding System can be due to several factors. Ensure adequate gas flow and check for leaks throughout the system, regulator, and tank. Verify you are using 100% Argon. Avoid green tungsten and use red thoriated or other types. Ensure correct polarity by placing the torch in the negative position. If the tungsten is contaminated and the arc turns green, adjust the stick out to a minimum of 1/8 inch. If the tungsten is melting, reduce amperage, increase tungsten size, and reduce stick-out to less than 1/4 inch. If you notice porosity or discoloration in the weld, increase the flow rate on the regulator, check for kinks in the tubing, increase post-flow time, reduce stick-out, increase cup size, or use a gas lens. Clean the metal thoroughly with an ...
  • J
    Jerry GarciaNov 19, 2025
    Why doesn't my Everlast Welding System's wire-feeder work?
    • V
      vkochNov 19, 2025
      If the wire-feeder on your Everlast Welding System isn't working, several issues could be the cause. The motor may be damaged, or the fuse might be blown, requiring a check and possible replacement. The control circuit could be damaged, necessitating a board inspection. The tensioner might be loose, or the wire could be slipping on the rollers; in this case, increase the tension and ensure the correct drive roll size and type are used, making sure the wire is properly seated in the groove. The drive roller may not fit the weld wire diameter, requiring a change of roller or wire size to match. A damaged wire spool should be replaced. A jammed gun liner should be repaired or changed; clear any wire and clean the liner with compressed air. Finally, slag or burn back may have jammed the contac...
  • M
    marshallperrySep 18, 2025
    Why does the rod stick in Stick mode on my Everlast PowerMTS 251Si Welding System?
    • A
      agreeneSep 18, 2025
      If the rod sticks in Stick mode on your Everlast Welding System, it could be due to several reasons: the arc force/Hot Start is set too low, your arc striking method is poor, you're using the wrong polarity, the amperage is too low, or you're using wet or wrong welding rods. To fix this, check the polarity and Hot Start settings. Increase arc force control/Hot Start. Change your arc striking method. Increase the amperage. Use fresh welding rods when possible.
  • S
    Shirley Glenn DDSSep 16, 2025
    Why won't my Everlast PowerMTS 251Si Welding System arc in Stick mode?
    • L
      Lisa ScottSep 16, 2025
      If your Everlast Welding System won't arc in Stick mode, check the connections. There may also be an inverter issue.
  • S
    suerhodesSep 14, 2025
    What to do if the Everlast PowerMTS 251Si power light isn't on?
    • K
      Katherine GarciaSep 14, 2025
      If your Everlast unit is switched on but the power light isn’t on, the switch may be damaged and needs replacement. Alternatively, the unit fuse may be damaged and also needs replacement. A tripped power breaker could also be the cause; try resetting it.
  • G
    gsandovalSep 12, 2025
    Why does the nozzle arc to the workpiece on my Everlast PowerMTS 251Si Welding System?
    • D
      David SmithSep 13, 2025
      If the nozzle arcs to the workpiece during welding with your Everlast Welding System, it's likely that the nozzle is plugged with spatter. Clean the nozzle and use a nozzle dip to prevent this.
  • H
    Heather SmithSep 12, 2025
    How to stop intermittent or wandering arc on my Everlast PowerMTS 251Si Welding System?
    • J
      Jennifer HigginsSep 12, 2025
      An intermittent or wandering arc with your Everlast Welding System can be caused by a work clamp that isn't secure or is damaged, or by windy conditions. Check and/or replace the work clamp, change the clamp's position, and attach it directly to the work. Also, move out of the wind.
  • M
    morganwatsonSep 9, 2025
    Why does the wire burn back and seize in the tip of my Everlast PowerMTS 251Si Welding System?
    • D
      David LeonardSep 9, 2025
      If the wire burns back and seizes in the tip of your Everlast Welding System, it could be due to the wrong contact tip size or too much burn back time set. To fix this, match the tip size to the wire diameter and reduce the burn back time. If using aluminum, use a tip designed for aluminum or one size larger than the wire.
  • T
    Tracy CarrollAug 22, 2025
    What to do if my Everlast Welding System stops and the warning light is on?
    • D
      Daniel HarveyAug 22, 2025
      If your Everlast Welding System stops welding, the warning light is on, and the wire continues to feed without an arc, it means the self-protection feature has engaged. Check for over-voltage, over-current, over-temperature, lower-voltage, and over-temperature conditions. If the unit has overheated, allow it to cool. If it's an over-current issue, use a shorter wire stick out or smaller diameter wire, or reduce power settings with large diameter wires. Check the power plug for problems. If the over-current trips easily, the resistor value may be too low. (Contact Everlast if the over-current is tripping regularly with normal settings.)

Summary

Safety Precautions

Personal Protective Equipment (PPE) Requirements

Details necessary PPE like safety glasses, hearing protection, flame-proof clothing, boots, and gloves.

Electrical Safety and Fire Prevention

Covers electrical shock prevention, fire hazards, and safe equipment handling and maintenance.

Section 2 Setup Guide and Component Identification

CONNECTIONS AND POLARITY

Illustrates how to connect MIG, Spool Gun, TIG, and Stick torches and defines polarity.

Front Panel Layout and Controls

Identifies and labels all controls, displays, and connectors on the welder's front panel.

Front Panel Component Descriptions

Detailed explanation of each control, display, and indicator on the front panel.

Side View of the Welder

Illustrates and labels the components visible on the side panel of the welder.

Side Panel Components Explained

Details the wire spool carrier, polarity buss bar, and wire feed assembly functions.

Rear Panel Layout

Identifies and labels all components on the rear panel of the welder.

Rear Panel Components Explained

Explains the function of each rear panel component: gas supply, power switch, input cable, fuse, fans, ground bolt.

Section 3 Basic Theory and Function

PULSE MIG OPERATION

Introduces pulse MIG welding, its types, and the theory behind its operation.

PULSE MIG OPERATION (Continued)

Covers MIG Gas selection for pulse welding and introduces pulse worksheets for recording settings.

STICK OPERATION

Explains stick welding starting methods and general operation procedures.

STICK OPERATION (Continued)

Explains the 2T and 4T torch operation modes and their effect on the weld cycle.

Basic TIG Operation

Introduces TIG welding, its setup, and basic principles for achieving good welds.

Basic TIG Operation (Continued)

Covers TIG filler rod manipulation techniques, practice, and achieving comfortable dexterity.

Section 4 Troubleshooting Guide

Error Codes

Lists error codes displayed by the welder, their meanings, and potential causes.

Everlast PowerMTS 251Si Specifications

General IconGeneral
Input PhaseSingle Phase
Output Current Range10-250 A
Duty Cycle60% at 250 A
TIG Lift ArcYes
Hot StartYes
Arc ForceYes
Voltage DisplayYes
Amperage DisplayYes
Protection ClassIP21S
Input Frequency50/60 Hz
Output Power7.5 kW
Welding ProcessesMIG, TIG
Weight69 lbs (31.3 kg)

Related product manuals