16
www.evolutionpowertools.com
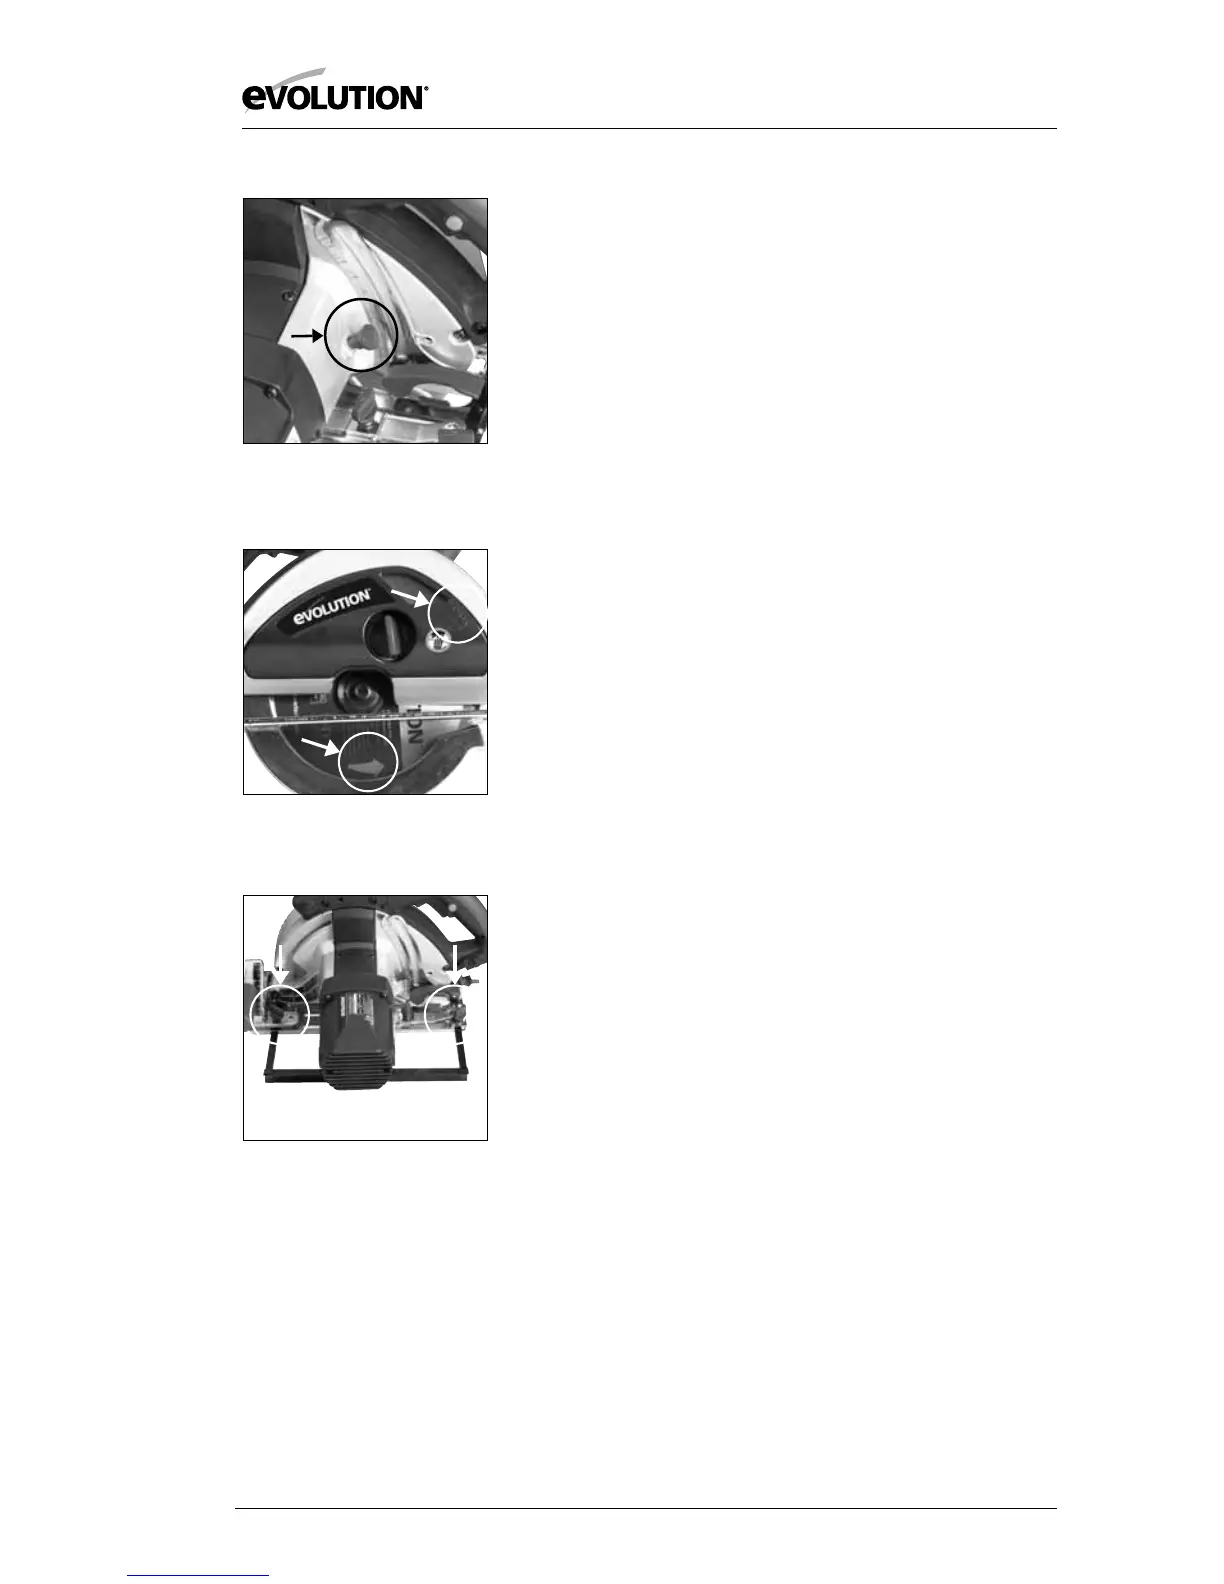
• Pressthearborlockbuttontolockthearbor.(Fig. 4)
• Unscrewthearborboltusingthewrench.
Note: The arbor bolt has a right hand thread.
• Removethesawblade,leavingtheinnerbladeflangeinits
service position.
• Thoroughlycleaninnerandouterbladedriveflangesand
blade mounting surface before installing a new blade.
• Ensurethatthedirectionofrotationarrowsprintedonthe
blade match the direction of rotation arrow found on the
chip collector. (Fig. 5)
• Reinstalltheouterdriveflangeandthearborbolt.
• Engagethearborlockandtightenthearborboltsecurely
using the wrench.
• Replacethechipcollectorandsecurelytightenthethumbscrew.
• Checkthatthearborlockisfullyreleasedbymanually
rotating the blade.
• Replacethewrenchandsecureitintothebaseplateusing
the thumb screw.
• Replacetheparalleledgeguideifrequired.
Parallel Edge Guide
A parallel guide (for help when rip cutting) can be fitted to the
base plate of the machine. The guide’s arms should be inserted
into the rectangular slots in the turned up edges of the base
plate, and slid under the locking thumb screws. (Fig. 6)
Note: The parallel edge guide can be fitted to either side of
the base plate and should only be fitted and adjusted with the
machine disconnected from the power supply.
Adjust the parallel edge guide so that it is at the required
distance from the blade and tighten the two thumb screws.
Check that the parallel edge guide is parallel to the saw blade.
Fig. 5
Fig. 6
Fig. 4