45˚ Bevel Stop Adjustment
• Loosen the bevel lock handle and tilt the cutting head
completely to the left until it rests against the 45˚ stop.
• Use a set square to see if it at 45 degrees to the Rotary table
(avoid the TCT tips).
• If the saw blade is not in exact alignment adjustment is
necessary.
• Return the cutting head to its upright position.
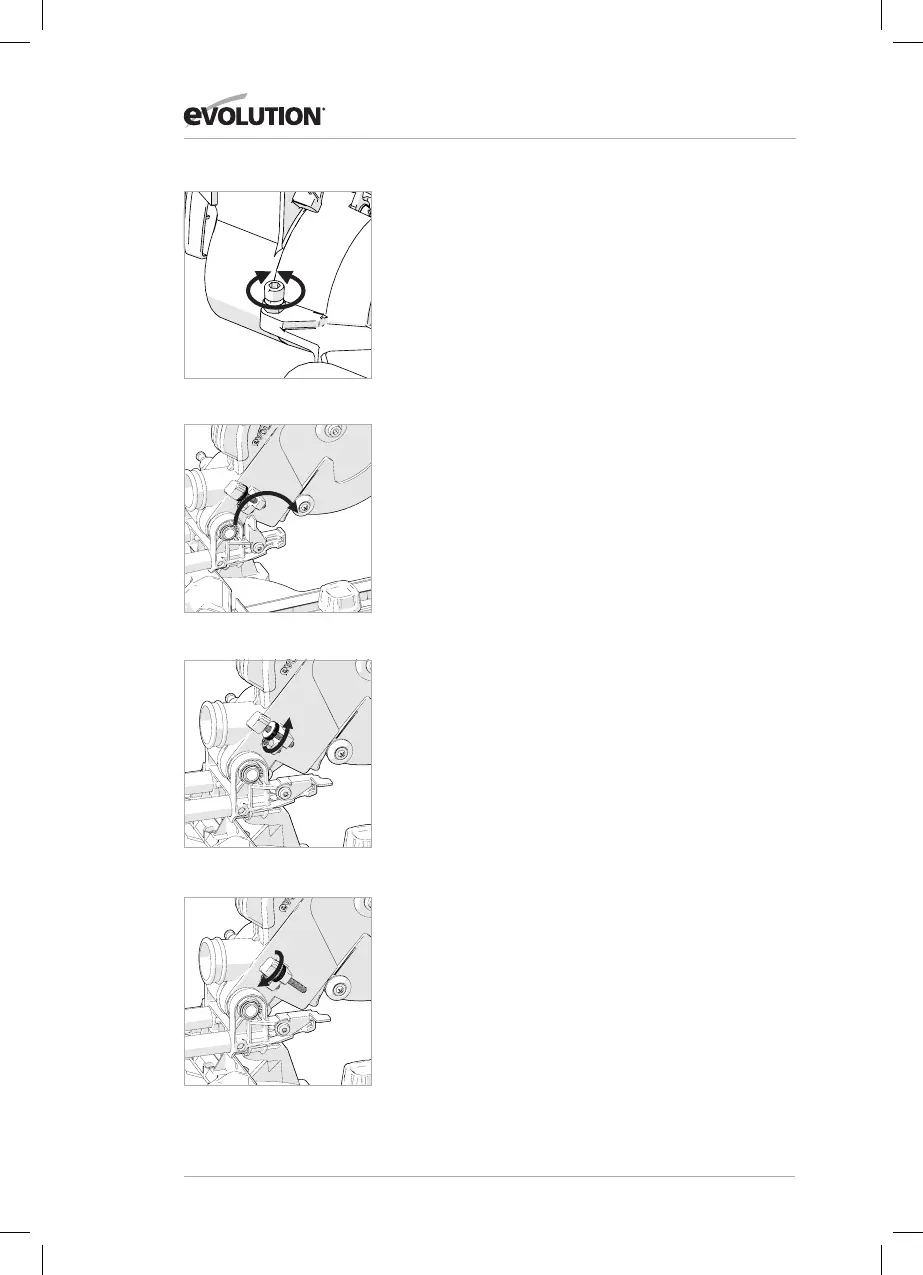
• Loosen the locknut on the 45˚ Bevel adjustment screw.
• Use a Hex Key to adjust the adjustment screw in or out as
required. (Fig. 25)
• Tilt the cutting head to the 45˚ setting and recheck for
alignment with the set square. Repeat the above steps until
the correct angular alignment is achieved.
• Tighten the adjustment screw locknut securely once
alignment is achieved.
THE DEPTH STOP (Fig. 26)
Use of the depth stop allows the operator to cut slots in a
work-piece. The downward travel of the cutting head can
be limited so that the saw blade does not completely cut
through the work-piece.
Note: When using the depth stop it is advisable that the
depth of cut is checked using a scrap piece of timber to
ensure that the slot is cut correctly. By making a cut in the
work-piece, and then repeating the cut but with the work-
piece slightly repositioned to the left or right, it is possible to
perform trenching cuts.
To use the depth stop:
• Deploy the depth stop ‘stop plate’ (Fig. 26a) by rotating it
forward from its storage position alongside the machine
through approximately 150 degrees to its service position.
• Loosen the knurled locking nut. (Fig. 26b)
• Adjust the thumb - screw (Fig. 26c) to limit the cutting
heads travel to the required depth.
• Once set to the desired depth, tighten the knurled locking
nut (Fig.26b) against the retaining bracket to lock the
depth stop and ensure that there is no movement.
• When cutting is complete either re-adjust the depth stop
or return the ‘stop plate’ to its storage position.
• Check that the cutting head can be locked in the down
position by the head latching pin.
Fig. 25
Fig. 26a
Fig. 26b
Fig. 26c
20
www.evolutionpowertools.com