+1.317.845.5710
+5255.56080817
+44.1438.310163
USA (Corporate Headquarters)
Mexico
Europe/Middle East/Asia
33
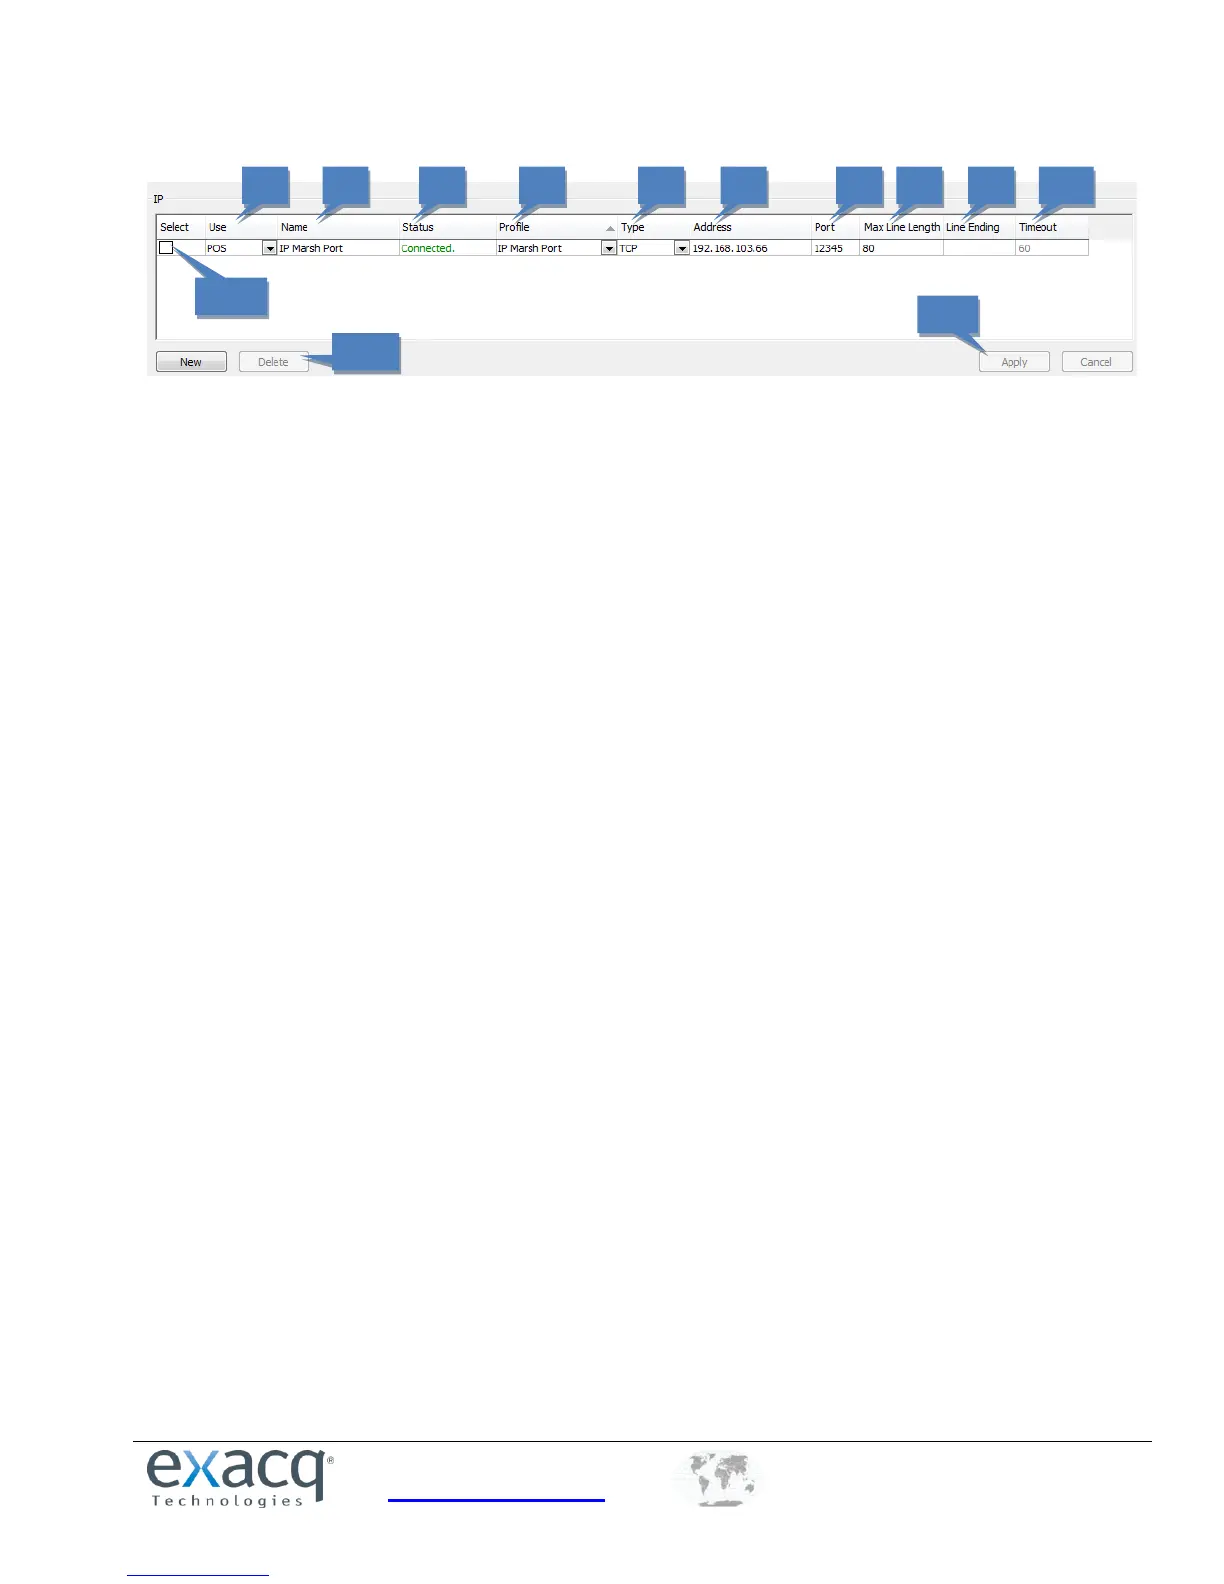
For serial over IP, you must add the port by clicking New; the system does not automatically detect and list IP serial ports.
You can configure the following settings on each port:
1. Select the intended use of the port (unused, POS, ATM, or Access Control).
2. Enter a unique and descriptive name for the port that will appear to client and Live view users.
3. The Status column displays whether the port is currently connected.
4. Select a profile from the drop-down list. Profiles, which are created on the Serial Profiles page, are used to filter
an incoming serial string to isolate useful information.
5. Select the transport type as defined by the source device manufacturer’s documentation.
6. Enter the IP address of the source device.
7. Enter the TCP port of the source device as defined by the device manufacturer’s documentation.
8. Enter the maximum number of characters per line sent by the source device. If you are unsure of the correct
value, use the default setting of 80. Setting this number too low could result in missing characters at the end of
certain lines.
9. Line Ending is the number of characters received before an end-of-line character is inserted automatically. This
prevents lines from becoming extremely large.
10. Timeout is the number of seconds after which an end-of-line character is entered if a serial device has not sent
text. This is useful if the serial data does not have an end-of-line character but it hasn’t reached the number of
characters entered in Line Ending.
11. To delete an IP port, choose its Select checkbox (9a) and click Delete (9b).
12. When you are finished, save the settings by clicking the Apply button at the bottom of the page.