• the
13
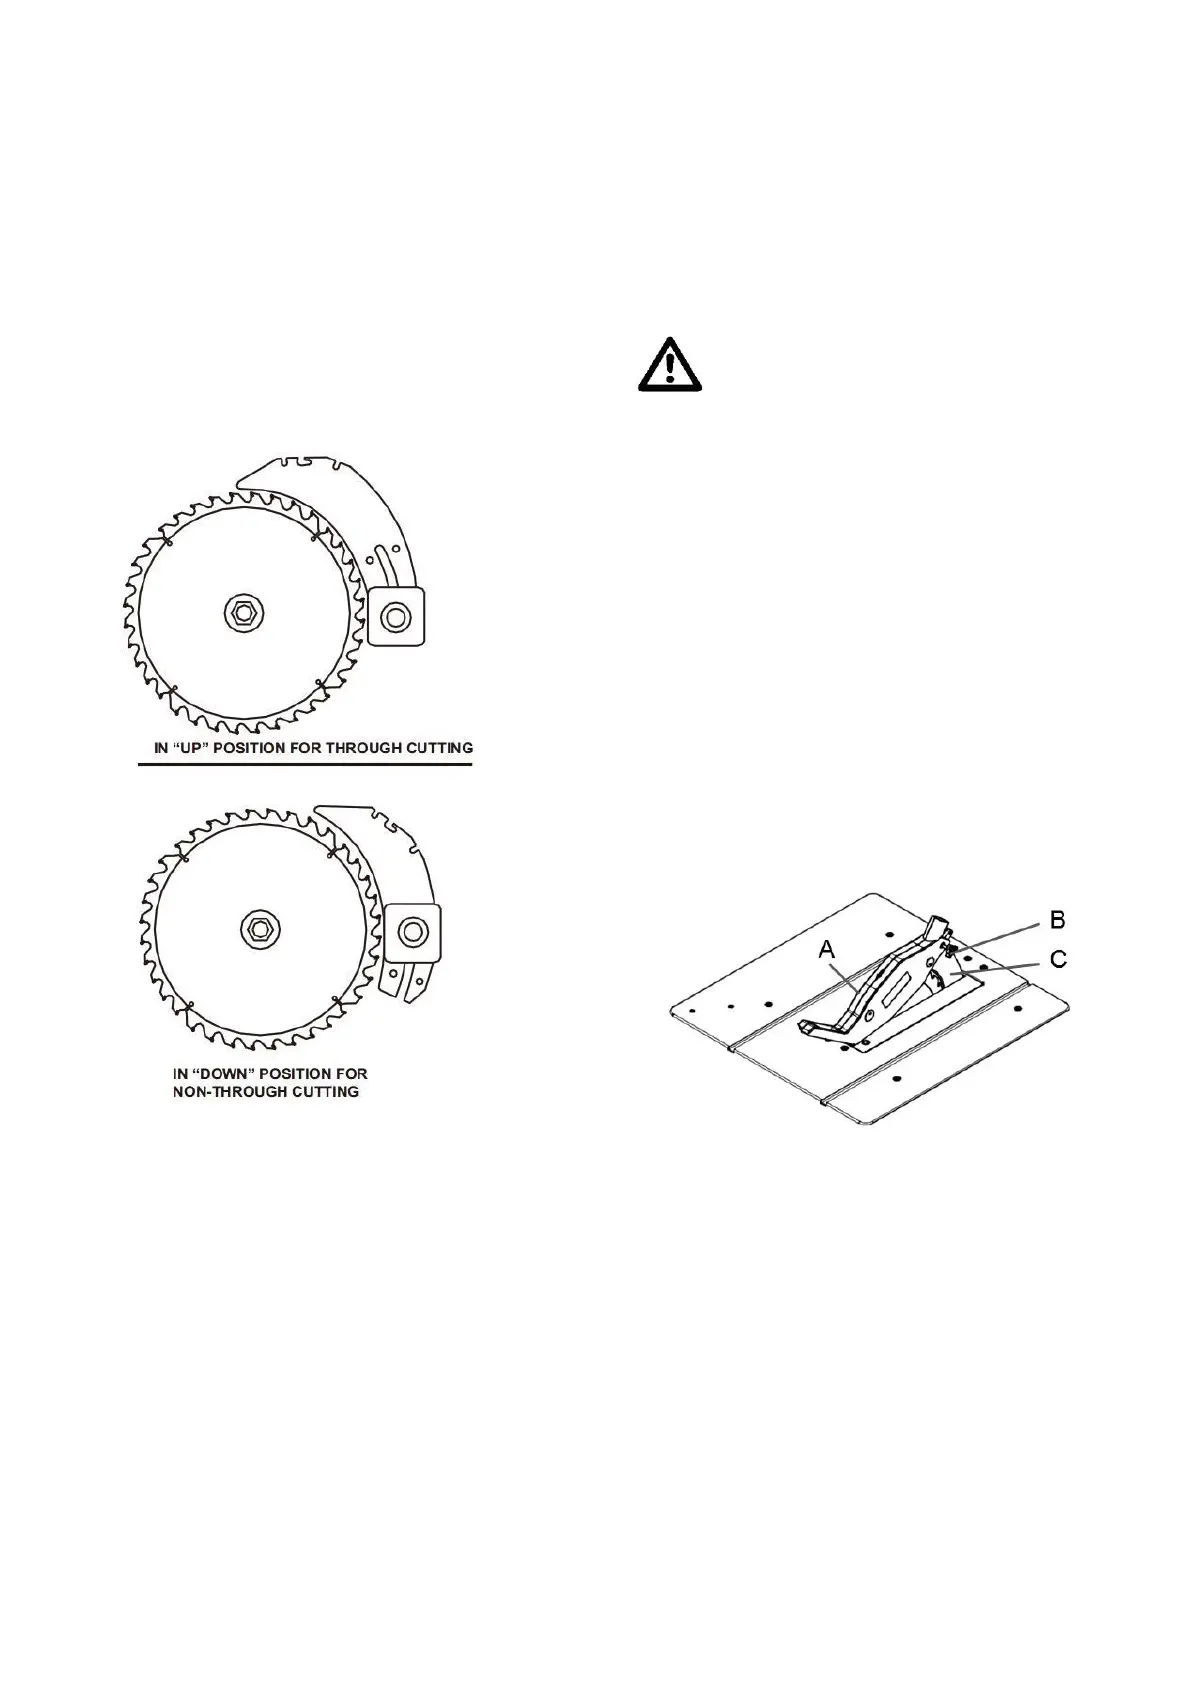
• Unlock the release lever by pulling it up. Grasp
riving knife and pull it towards the right side of
the saw to release the riving knife from the
spring-loaded riving clamp.
• Pull the riving knife up until the internal pins are
engaged and the riving knife is above the saw
blade.
• Lock the release lever by pushing the lever
down.
• Reinstall the table insert.
To place in riving knife “down” position for
all non-through cutting:
• Remove the table insert.
• Raise the saw blade by turning the height/
bevel adjusting handwheel clockwise. • Unlock
the screw by wrench anticlockwise.
• Grasp the riving knife and pull it towards the
right side of the saw to release the riving knife
from the spring-loaded riving clamp.
• Push the riving knife down until it is below the
saw blade.
• Pull the riving knife up until the internal pins are
engaged and the riving knife is above the saw
blade.
• Lock the screw by wrench clockwise. Reinstall
the table insert.
To install the blade guard and anti-kickback
pawls
WARNING!
Replace dull or damaged anti-kickback pawls.
Dull or damaged pawls may not stop a kickback,
increasing the risk of serious personal injury.
Anti-kickback pawls should only be installed for
through cuts.
• Unplug the saw.
• Raise the saw blade by turning the
height/bevel adjusting handwheel clockwise.
• Place riving knife in “up” position.
• Reinstall the table insert.
To install the blade guard: Mount the saw
blade guard(A) together with the bolt(B) on top
of the riving knife(C), so that the bolt is firmly
seated in the slot of the riving knife( C ).
Do not screw in the bolt(B) too tightly; the saw
blade guard(A) must move freely. Plug the
suction hose on to the suction adapted and the
connecting piece of the saw blade guard(A).
Connect a suitable splint collector onto the
suction adapter. Dis-assembly is performed in
reverse order. Caution! The saw blade
guard(A) must be lowered onto the workpiece
before starting the sawing operation.