• • the
14
Assembling the table extension • Use the
screws, nuts and washers to fasten the table
width extensions loosely to the saw table.
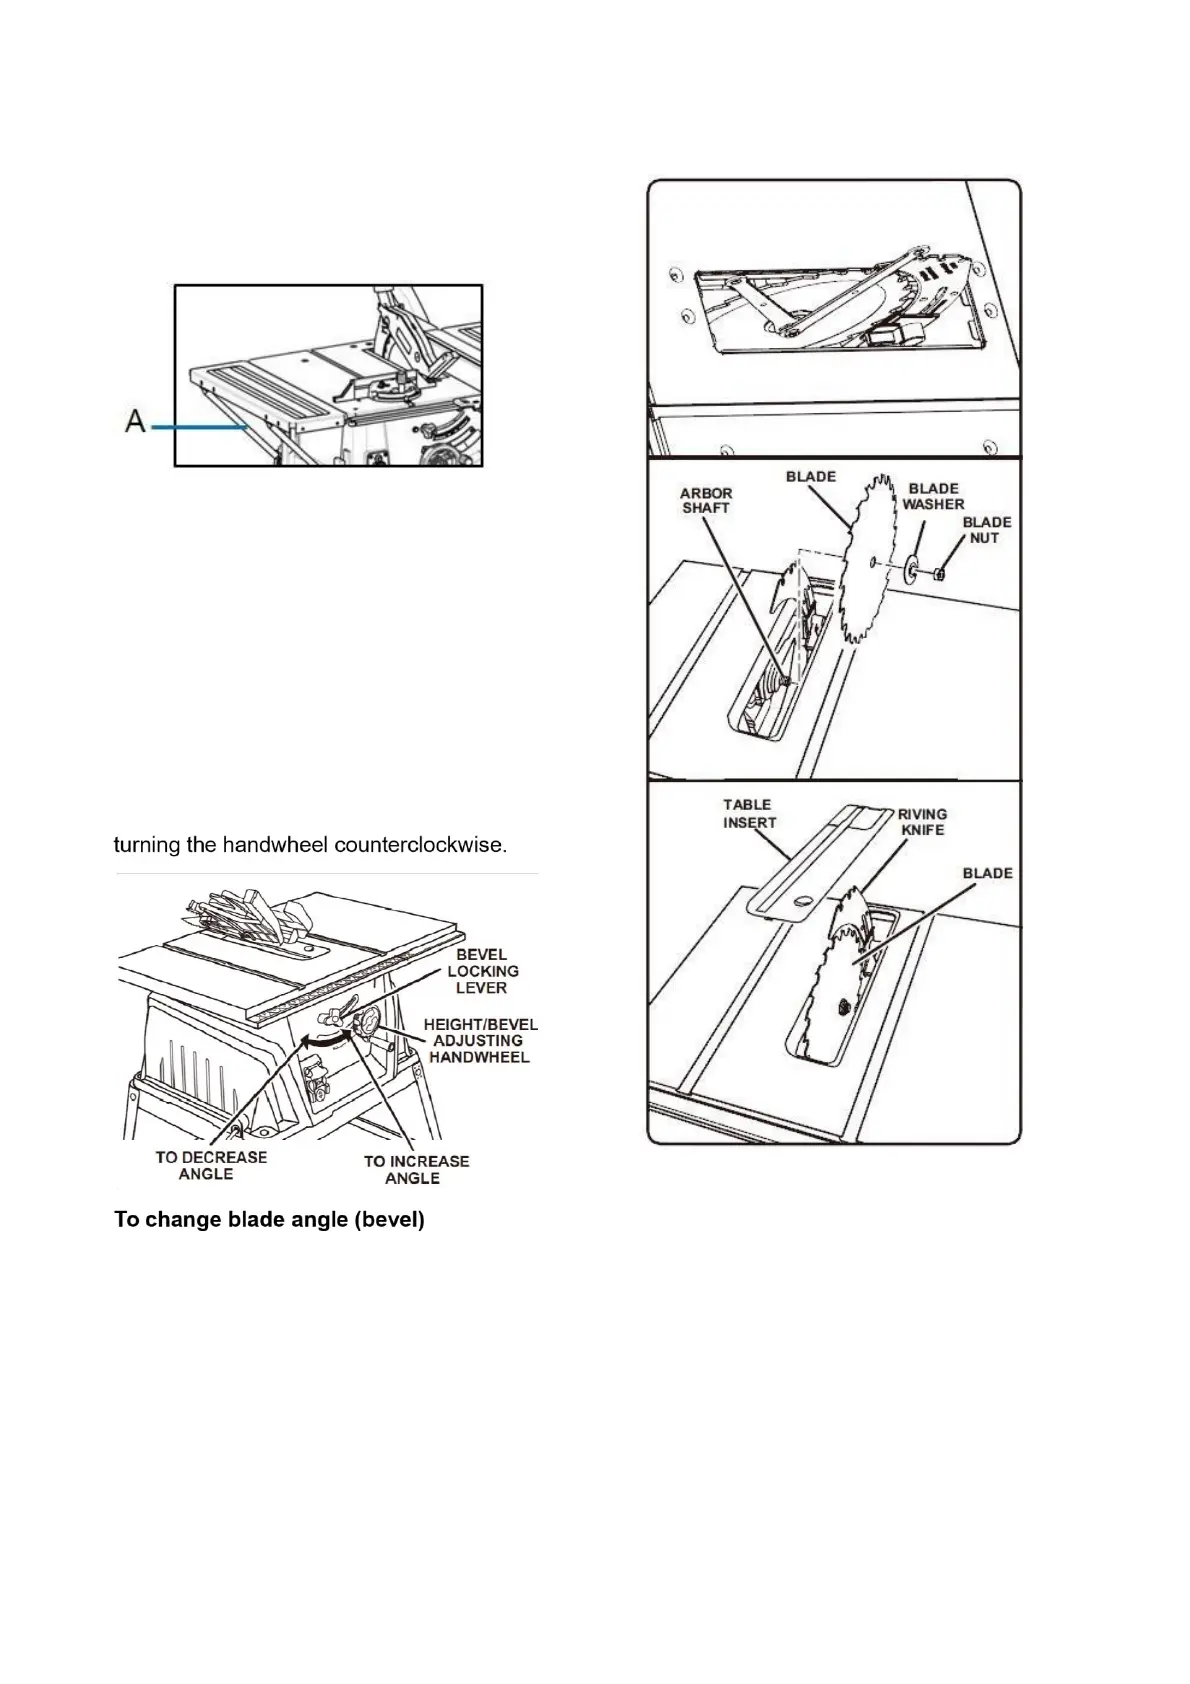
Screw supports (A) loosely onto the saw
housing and onto the table width extensions.
• Align the table width extensions level with the
saw table. • Finally, tighten all screws.
To change blade depth
The blade depth should be set so that the outer
points of the blade are higher than the workpiece
by approximately 1/8 in. to 1/4 in. but the lowest
points (gullets) are below the top surface.
• Turn the bevel lock lever to the right.
• Raise the blade by turning the height/bevel
adjusting handwheel clockwise or lower it by
This table saw has a rack and pinion bevel
control that allows you to make angled cuts from
90° to 45°.
NOTE: A 90° cut has a 0° bevel and a 45° cut
has a 45° bevel.
• Unplug the saw.
• Loosen bevel locking knob. Move the height
adjusting handwheel to the right to bevel to a
45° angle. Then tighten bevel locking knob.
To replace the blade
• Unplug the saw.
• Remove the blade guard and anti-kickback
pawls.
• Lower the saw blade and remove the table
insert.
• Make sure the bevel locking lever is locked.
• Raise the saw blade to full height.
• Insert the closed-end blade wrench on the
blade washer.
• Insert the closed-end blade wrench over the
blade nut. Holding both wrenches firmly, pull
the closed end wrench (right side) forward