8
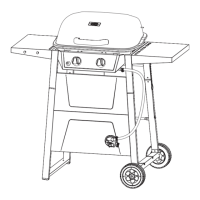
Assembly Instructions
Do not return to place of purchase
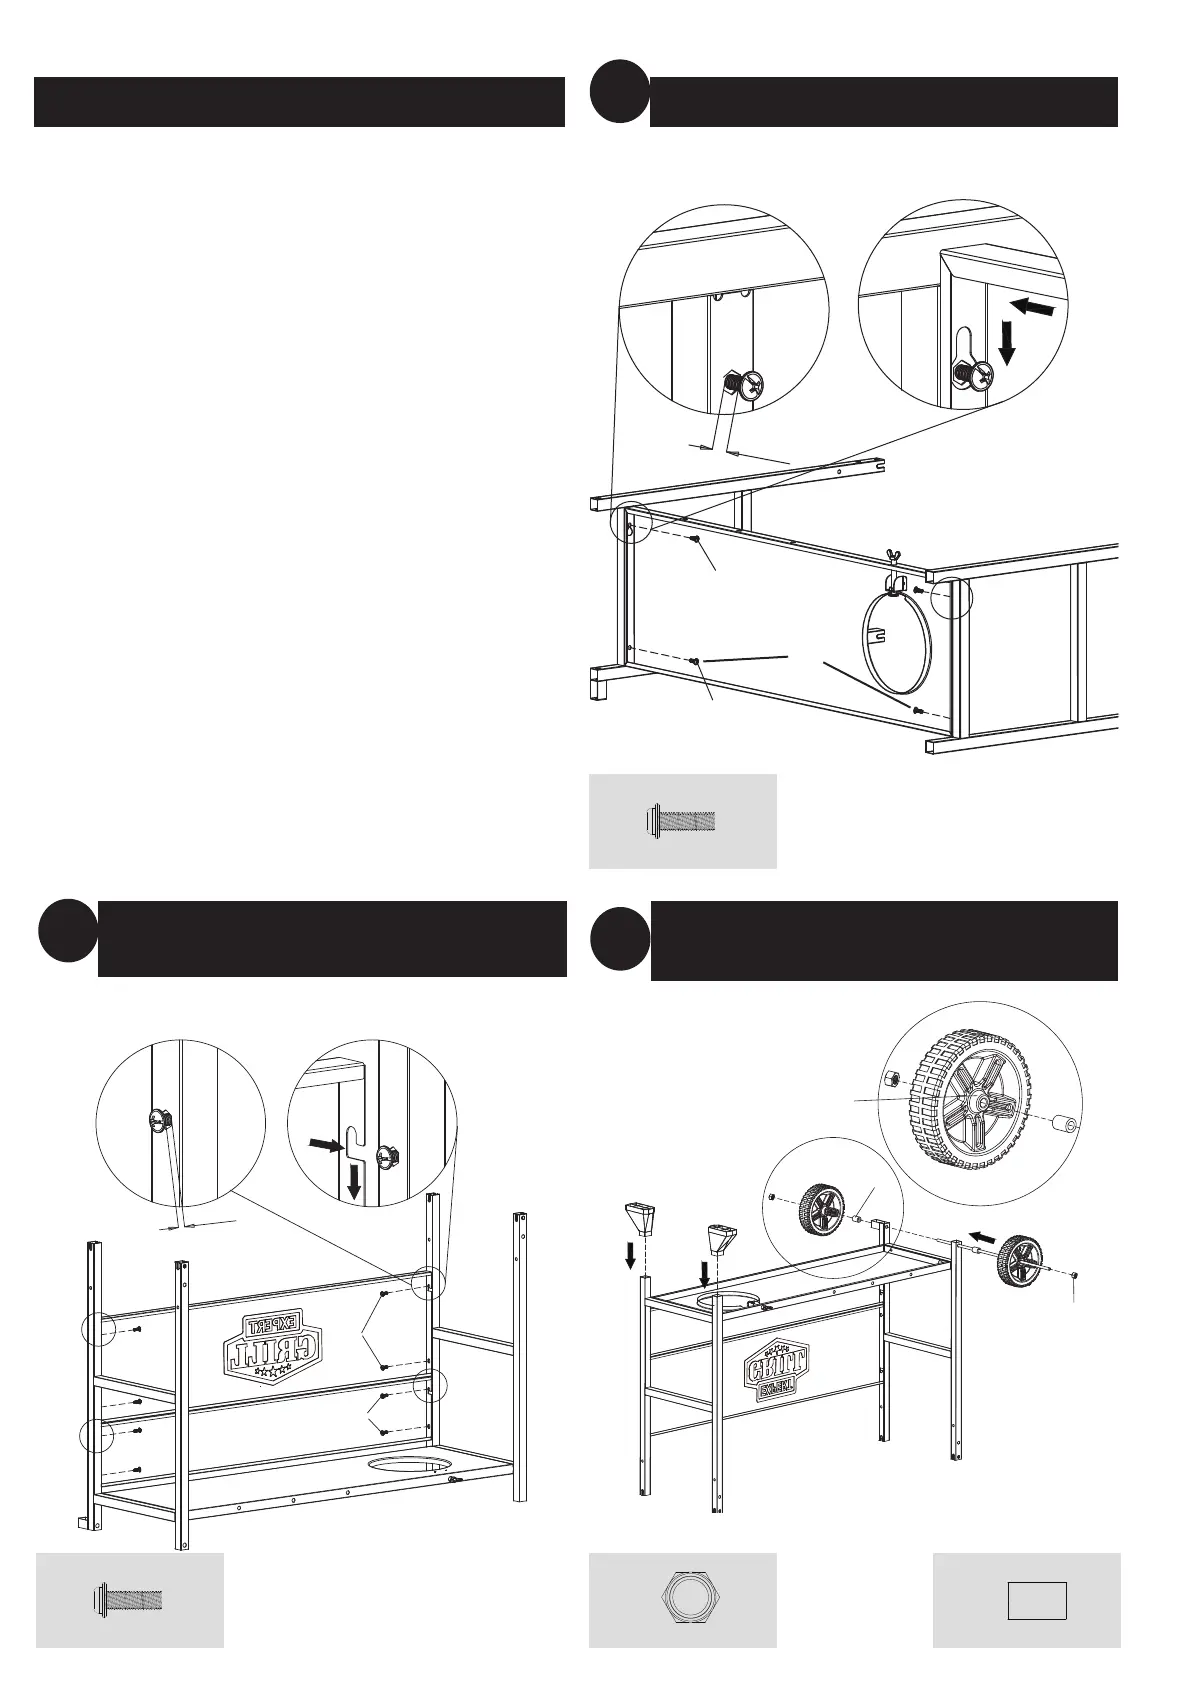
Attach Upper Front Panel and Lower Front Panel
2
Attach Left Leg, Right Leg and Bottom Shelf
1
Please have your Owner’s Manual and model number available
for reference.
Note: The model number is printed on a label which can be
found on the bottom shelf.
Assembly Tips:
1. Select an area where you will assemble this product.
To protect components, choose a smooth surface that’s
free of cracks or openings.
2. Spread out all parts.
3. Tighten all hardware connections by hand first. Then,
before completing each step, go back and fully tighten
all hardware. Be careful not to over-tighten. That could
damage surfaces or strip threads.
4. For best results, complete each step in the order
presented.
To complete assembly you will need:
• PROPANE: (1) Leak detection solution (instructions on
how to make the solution are included in the “Operating
Instructions” section of this manual) (not included).
• PROPANE: (1) Precision-filled LP gas grill tank with
Acme Type 1 external threaded valve connection
(standard grill size) (not included).
Typical assembly is approximately 30 minutes.
W CAUTION: Two (2) people are required for assembly.
Attach Foot, Axle and Wheel
Note: Please ensure to follow the labeled screw sequence in this step.
Note: Leave 5mm of bolt threads exposed.
Note: Please attach the lower front panel first. This is very important.
Note: Leave 5mm of bolt threads exposed.
A
A
1 2
A
x 4
F
E
x 2
F
x 2
3
E
Facing In
A
x 8
A
A
1 2
5mm
5mm
3
 Loading...