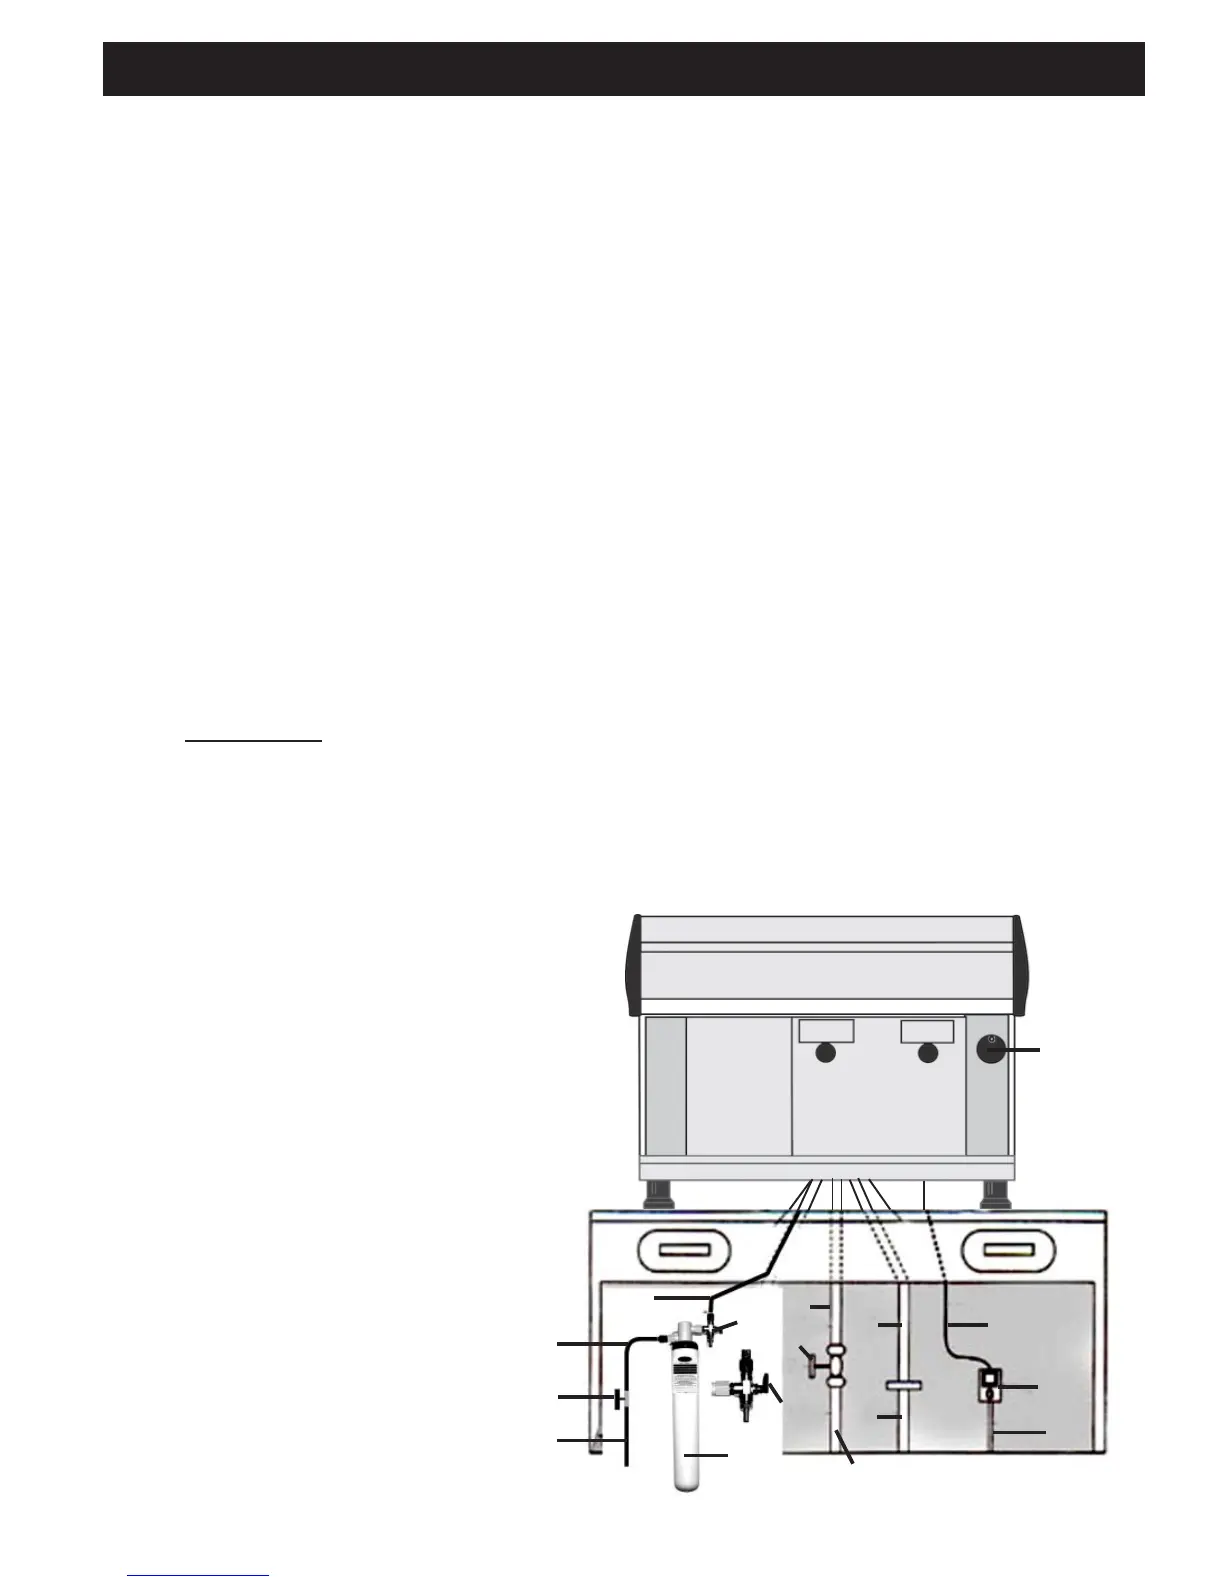
FIG 1.
5
6
4
1
2
37
8
9
12
11
10
13
14
15
16
17
18
7.1 Precautions for installation
The manufacturer has obviously taken every possible precaution to guarantee user safety, but the different
installation and/or transport conditions could give rise to uncontrollable or unpredictable conditions; so it is
always necessary to assess hidden hazards and to consider the following suggestions:
- The packing elements (cardboard, cellophane,metal staples, etc.) can cut, wound or cause
accidents if not handled
carefully or if used incorrectly; do not leave them accessible to children or unsuitable people.
- Any fault or defect should be promptly notified to the personnel who are qualified and authorized to
carry out installation and maintenance.
- An earthing connection is mandatory as is the system´s conformity with the regulations in force in
the country of installation. The manufacturer accepts no responsibility for accidents due to non-
compliance with the regulations.
- The use of extensions or flying connections is prohibited. The working environment is heavily
exposed to water and damp which prevent the natural conditions for insulating the system.
- The machine must only be installed by authorized, qualified personnel.
- Check the condition of the components and, should defects or faults arise, stop the installation and ask
for their replacement.
- Ensure that the power supply voltage (see rating plate) is the same as that of the mains supply network
to be used in the place of installation.
- The customer must provide for the machine´s power supply, protecting the line with a suitable safety
cut-out (life-saver).
- It is important to place the machine on a flat surface! Adjust the machine feets and check with a
spirit level.
Fig. 1 Installation
1 - Mains electric power supply.
2 - Mains line switch.
3 - Power supply cord.
4 - Main switch.
0-off
1-power supply to controls
5 - Water inlet union.
6 - Drain tray
7 - Drain pipe
8 - Main drain pipe
9 - Water mains tap
10 - Water mains supply line
11 - Hose from water mains to descaling filter
12 - Descaling filter
13 - Hose from descaling filter to water inlet
14- Filter head
15- Tap drift (position up)
16- Pipe from gas tap to gas regulator
17- Gas supply pipe
18- Gas tap
7.
7. Installation - Location - Start up Crema Compact and Digital