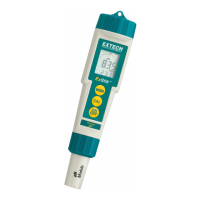
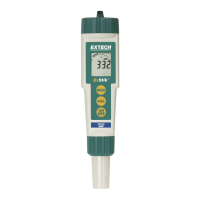
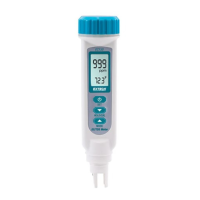
The ExStik®II EC400 is a versatile handheld meter designed for measuring Conductivity, Total Dissolved Solids (TDS), Salinity, and Temperature. Its dynamic cell-constant technology allows for a wide range of measurements with a single electrode, making it a comprehensive tool for various applications.
Function Description
The primary function of the ExStik®II EC400 is to provide accurate measurements of water quality parameters. It operates in four main modes: Conductivity (µS/cm), TDS (ppm or mg/L), Salinity (ppm S or ppt), and Temperature (°C or °F). The meter automatically ranges to the appropriate scale for the measurement, simplifying operation.
Usage Features
Getting Started and Basic Operation:
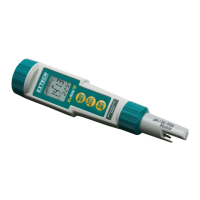
To begin, remove the cap from the bottom of the ExStik®II to expose the conductivity electrode. Before initial use or after storage, it's recommended to rinse the electrode with deionized water and dry it. For optimal accuracy, calibrate the meter for conductivity using a standard solution that matches the expected range of your sample. When calibrating, it's best to start with low conductivity value standards and progress to high value standards. Always store the electrode dry.
To turn the meter on or off, press the ON/OFF key. Upon power-up, the display will show "8888" followed by "SELF CAL" during the turn-on diagnostics. The auto power-off feature conserves battery life by shutting down the meter after 10 minutes of inactivity.
Measurement Procedure:
For Conductivity, TDS, or Salinity measurements, place the test sample in a sample cup with enough depth (at least 2.5cm) to fully cover the electrode. Stir the solution to remove any air bubbles. Insert the electrode into the sample, ensuring it is completely submerged. Slowly stir the solution with the electrode to dislodge any remaining air bubbles. The meter will then auto-range and display the reading.
Changing Measurement Function:
The meter can be set to measure Conductivity, TDS, or Salinity. To switch between modes, press and hold the MODE/HOLD button for 2 seconds. The display will scroll through the available units: µS (Conductivity), ppm (TDS), mg/l (TDS), and ppm S (Salinity). Release the MODE/HOLD button when the desired units are displayed. Note that the "HOLD" function must be off when changing the measurement function. If "HOLD" is displayed, briefly press MODE/HOLD to turn it off.
TDS Compensation Ratio:
The TDS value is derived by multiplying a conductivity reading by a user-selectable ratio factor, which can range from 0.4 to 1.0. This ratio varies by application, but common settings are between 0.5 and 0.7. In Salinity mode, the ratio is automatically set between 0.4 and 0.6. To change the ratio in TDS mode (ppm or mg/l), press and release the CAL/RECALL button twice. The stored ratio will appear on the display. Use the MODE/HOLD button to adjust the ratio in 0.1 steps. Once the desired ratio is shown, press and release CAL/RECALL to store the value and return to normal mode. If no buttons are pressed for 5 seconds, the meter will automatically return to measurement mode.
Storing and Recalling Readings:
The meter can store up to 25 tagged (numbered) readings. To store a reading, press the MODE/HOLD button. The storage location number will appear on the lower display, and the main display will show the stored reading. The meter will enter "HOLD" mode, indicated by the "HOLD" icon. To exit HOLD mode and return to normal operation, press MODE/HOLD again. If more than 25 readings are stored, the oldest readings (starting with number 1) will be overwritten.
To recall stored readings, press CAL/RECALL, then MODE/HOLD. A location number (1 through 25) will briefly appear, followed by the stored value. The displayed units will flash, indicating that the storage recall mode is active. The last stored reading is displayed first. Pressing MODE/HOLD will scroll through the stored readings one at a time. To exit storage recall mode, press CAL/RECALL; the meter will display "End" and return to normal operation.
Clearing Stored Memory:
To clear all stored readings, turn the unit on, then press and hold ON/OFF for 4 seconds. "clr" will briefly appear on the display to confirm that the memory has been cleared.
Changing Temperature Units:
To switch between Celsius (°C) and Fahrenheit (°F), turn the unit off. Press and hold the CAL/RECALL button, then momentarily press the ON/OFF button while still holding CAL/RECALL. Release CAL/RECALL when "SELF CAL" appears on the display. The unit will power on with the temperature displayed in the new units.
Data Hold Mode:
To freeze a reading on the display, press the MODE/HOLD button. The meter will enter "HOLD" mode, and the "HOLD" indicator will appear. This action also stores the reading. Press MODE/HOLD again to return to normal operation.
Auto Power Off Disable:
The auto power-off feature can be disabled. To do so, turn the unit on, quickly press CAL/RECALL once, then immediately and simultaneously press MODE/HOLD and ON/OFF for approximately 2 seconds until "oFF" briefly appears. To re-engage this feature, turn the unit off with the ON/OFF button; it will be active the next time the unit is powered up.
Low Battery Indication:
When the batteries are low, the "BAT" icon will appear on the display, indicating that replacement is needed.
Measurement and Display Considerations:
If the display appears frozen, the Data Hold mode may have been accidentally activated. Press MODE/HOLD again or turn the meter off and on to resolve this. For maximum accuracy, allow sufficient time for the probe's temperature to stabilize with the sample's temperature before calibrating. A stable temperature reading on the display indicates this.
Reset Calibration Data:
To clear all calibration data from the meter, which may be necessary when using new calibration solutions or if accuracy is in question: turn off the meter, then press and hold the CAL/RECALL and MODE/HOLD buttons. While holding these, momentarily press the ON/OFF button. As soon as the display comes on, release all three buttons. The display will show "dFLt rSt" (default reset), confirming that all calibration data has been erased. If this message does not appear, retry the procedure. After resetting, proceed with the calibration routine.
Calibration - Conductivity:
Meter accuracy should be verified periodically, with monthly checks recommended for normal use. Calibration requires a conductivity standardizing solution. The meter can be calibrated in any or all of its three ranges using 84µS/cm, 1413µS/cm, or 12.88mS/cm (12,880µS/cm) solutions for automatic recognition. Other calibration values are not permitted. Calibration is always performed in conductivity mode, which also calibrates salinity and TDS values.
To calibrate:
- Fill a sample cup with the standardizing solution.
- Turn the meter ON and insert the electrode into the solution. Tap or move the electrode to dislodge any air bubbles.
- Press and hold the CAL/RECALL button (approximately 2 seconds) until "CAL" appears in the lower (temp) display. The main display will start flashing.
- The meter will automatically recognize and calibrate to the standardizing solution. The display will briefly indicate "SA", "End", and then return to the measurement mode. "SA" will not appear if calibration fails.
- The "range calibrated" symbol (L, M, or H) will appear on the display for each range calibrated during that power-on cycle.
Each time calibration mode is entered, all calibration symbols are cleared, but only the data for the currently calibrated range is replaced. The other two ranges retain their existing calibration data, but their symbols are removed. For all three range calibration symbols to appear, calibration of all three ranges must be performed within one power-on period. The meter supports 1, 2, or 3-point calibration; for multi-point calibration, the lowest value standard should be used first for best accuracy.
Maintenance Features
Battery Replacement:
To replace the batteries, twist off the battery compartment cap. Holding the battery housing with a finger, pull out the battery carrier using the two small tabs. Replace the four (4) CR2032 Lithium Ion Batteries, observing polarity. Then, replace the battery compartment cap. Used batteries and end-of-life instruments should be disposed of at appropriate collection sites, not in household waste.
Electrode Replacement:
To remove an electrode, unscrew and completely remove the electrode collar by turning it counter-clockwise. Gently rock the electrode from side to side, pulling it downwards until it disconnects from the meter. To attach an electrode, carefully plug it into the meter socket, noting that the connector is keyed for proper connection. Tighten the electrode collar firmly to ensure a good seal, as a rubber gasket seals the electrode with the meter.
Cleaning Recommendations:
When cleaning the probe, avoid scratching or damaging the platinized electrode surfaces.
- Water soluble substances: Rinse with deionized water, scrubbing gently with a soft brush if needed, then dry.
- Grease & Oil: Use warm water and household detergent. Soak or scrub with a soft brush for a maximum of 10 minutes, then rinse thoroughly with DI water and dry.
- Heavy grease & Oil: Use alcohol. Soak for a maximum of 5 minutes, scrub with a soft brush, then rinse thoroughly with DI water and dry.
- Lime and hydroxide coatings: Use 10% acetic acid. Soak until the coating dissolves (maximum 5 minutes), then rinse thoroughly with DI water and dry.
Troubleshooting:
- Reading is frozen: The unit is in "HOLD" mode. Press MODE/HOLD to exit.
- "BAT" message: Batteries are low. Replace batteries.
- Unit will not calibrate in conductivity mode: Contaminated conductivity standards. Use fresh standards.
- Unit will not calibrate in conductivity mode: Dirty probe. Clean the conductivity probe.
- Unit will not calibrate in conductivity mode: Damaged conductivity probe. Replace electrode.
- Unit will not calibrate in conductivity mode: Trapped air bubbles. Tap or stir to release air bubbles.
- Unit will not turn on: Batteries are low or dead. Replace batteries.
- Unit will not turn on: Batteries installed with incorrect polarity. Replace batteries, observing polarity.
- Unit will not respond to any key presses: Internal fault. Perform a hard reboot: Remove batteries, hold the ON/OFF switch down for 5 seconds, then replace batteries.
Always store the electrode dry in its storage cap and rinse it with de-ionized water between measurements to prevent cross-contamination. Double rinsing is recommended for high accuracy. Avoid touching the inner surfaces of the conductivity electrodes, as this can damage the platinized electrodes and reduce the probe's lifespan.