SECTION 2 - LIGHTING and OPERATIONS
Warning – Never leave products that are in use unsupervised and always turn
products off at the end of service.
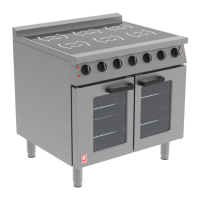
LIGHTING THE OVEN
Note
The gas control valve is fitted with a safety interlock. Therefore, a period of 3 minutes will elapse before it is
possible to re-light after complete shut-down.
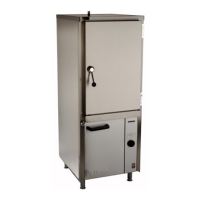
1. Turn thermostat knob and power switch to OFF and close oven doors.
2. Push in and turn burner control knob to pilot position then push in fully and hold while repeatedly
pressing and releasing igniter button until pilot lights. Check pilot is lit by using the base mirror.
3. Keep control knob pressed in fully for a further 20 seconds before release. Pilot should remain lit but if it
goes out; push in and turn burner control knob to OFF position and wait for three minutes. (Repeat from
Step 2).
4. Push in and turn burner control knob to main burner position.
5. Set thermostat to desired setting and turn power switch to ON. Oven fan will turn on and oven burner will
now light.
Turning the Oven OFF
For Short Periods
Turn the thermostat to the OFF position. This will leave only the pilot alight.
For Longer Periods
1. Turn thermostat to OFF position.
2. Push in and turn burner control knob to OFF position.
3. Switch power I/O switch to OFF, or the fan will remain on.
This will turn both pilot and main burner OFF. To re-light, follow lighting instructions.
Timer
The timer knob is marked in minutes and should be set to required cooking time when food is placed in the oven.
It should be turned fully clockwise then back to desired time.
When set time has elapsed, the warning buzzer will continuously ring until operator switches it OFF.
The timer does not switch off oven but provides an audible warning when cooking cycle is complete.
Oven Light
This illuminates oven from rear via push-button switch on control panel.
Pre-heating Time
Allow at least 45 mins from switching on a cold oven, irrespective of temperature setting. Insert the food as
quickly as possible, and close the doors firmly.