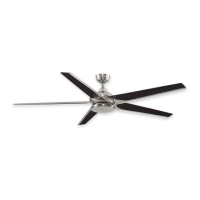
This document describes the Fanimation Aire Duo Ceiling Fan (Model #LP8066). It is a ceiling fan designed for residential use, offering both air circulation and an integrated light kit. The manual provides instructions for assembly, installation, operation, and maintenance, along with important safety information and warranty details.
Function Description:
The Fanimation Aire Duo Ceiling Fan serves to circulate air within a room, providing a cooling effect in warmer seasons and assisting with heat distribution in colder seasons. It also includes an integrated light kit to provide illumination. The fan is controlled by a hand-held remote, allowing for adjustment of fan speed, light output, and direction of rotation.
Important Technical Specifications:
- Model Number: LP8066** (the asterisks indicate a finish code, which needs to be inserted based on the specific fan model).
- Net Weight: 15.43 lbs (7.0 kg).
- Electrical Requirements: 120 volts AC, 60 Hz, 15 Amp Circuit.
- Outlet Box Support: Must be a fan-rated outlet box capable of reliably supporting at least 35 lbs (15.88 kg).
- Wire Size (A.W.G.): 14 A.W.G. for installed wire lengths up to 50 ft, and 12 A.W.G. for 50-100 ft.
- Blade Clearance: Minimum of 7 feet from the floor to the fan blades.
- Mounting Location: Recommended in the middle of the room, at least 7 feet from the floor to the blade, and 18 inches from the wall to the blade. Optimal airflow is achieved with 8-9 feet from floor to blade.
- Mounting Options: Intended for standard and angled mounting only. Closemount and flushmount options are not available. For angled ceilings, the angle can be no more than 19°.
- Remote Control: Hand-held remote (Model TR500S) with 32 different code combinations to prevent interference. Requires a 23A/12V battery (included).
- Speed Control: Suitable for use with solid-state speed controls, but explicitly warns against using a variable (Rheostat) wall controller or dimmer switch, as this could damage the fan's remote control unit.
- Location: Suitable for use in dry locations only.
Usage Features:
- Energy Efficient Use:
- Summer Season: Operate in counter-clockwise direction for a wind-chill effect, making the room feel cooler. Lower speeds consume less energy.
- Winter Season: Reverse the motor to operate in clockwise direction at low speed. This creates an updraft, forcing warm air near the ceiling down into the occupied space, which can lead to energy and dollar savings when adjusting the thermostat.
- Occupancy: Turn off the fan when the room is unoccupied, as ceiling fans cool people, not rooms.
- Remote Control Operation:
- Power On/Off: A dedicated button to turn the fan off.
- Fan Speed Adjustment: Buttons to increase or decrease fan speed. An indicator LED light shows the current fan speed.
- Light Control: Buttons to turn the light on/off and to increase or decrease the light output level.
- Sleep Timer: Allows setting the fan and light to turn off automatically after 1 hour, 3 hours, or 6 hours.
- Reverse Switch: A physical switch on top of the motor assembly allows changing the direction of blade rotation (counter-clockwise for summer, clockwise for winter). The fan must be turned off and blades stopped before changing the switch position.
- Remote Code Setting: The remote and receiver have dip switches to set a unique code, preventing interference with other remote units. Factory setting is all "up," but this position is not recommended.
Maintenance Features:
- Periodic Cleaning: The only maintenance required is periodic cleaning.
- Cleaning Materials: Use only a soft brush or lint-free cloth to avoid scratching the finish. Abrasive cleaning agents are not required and should be avoided.
- Water Usage: Do not use water when cleaning the ceiling fan, as it could damage the motor or finish and create the possibility of electrical shock.
- Blade Cleaning: Periodic light dusting of the blades is recommended, preferably with a feather duster. Avoid using water, cleansers, or harsh rags on the blades, as they can warp and ruin the finish.
- Screw Tightness: All set screws must be checked and retightened as necessary before installation and periodically thereafter to prevent fan wobble.
- Battery Replacement: Remove the battery from the hand-held remote if the fan is not used for long periods to prevent damage to the transmitter.