Maintenance
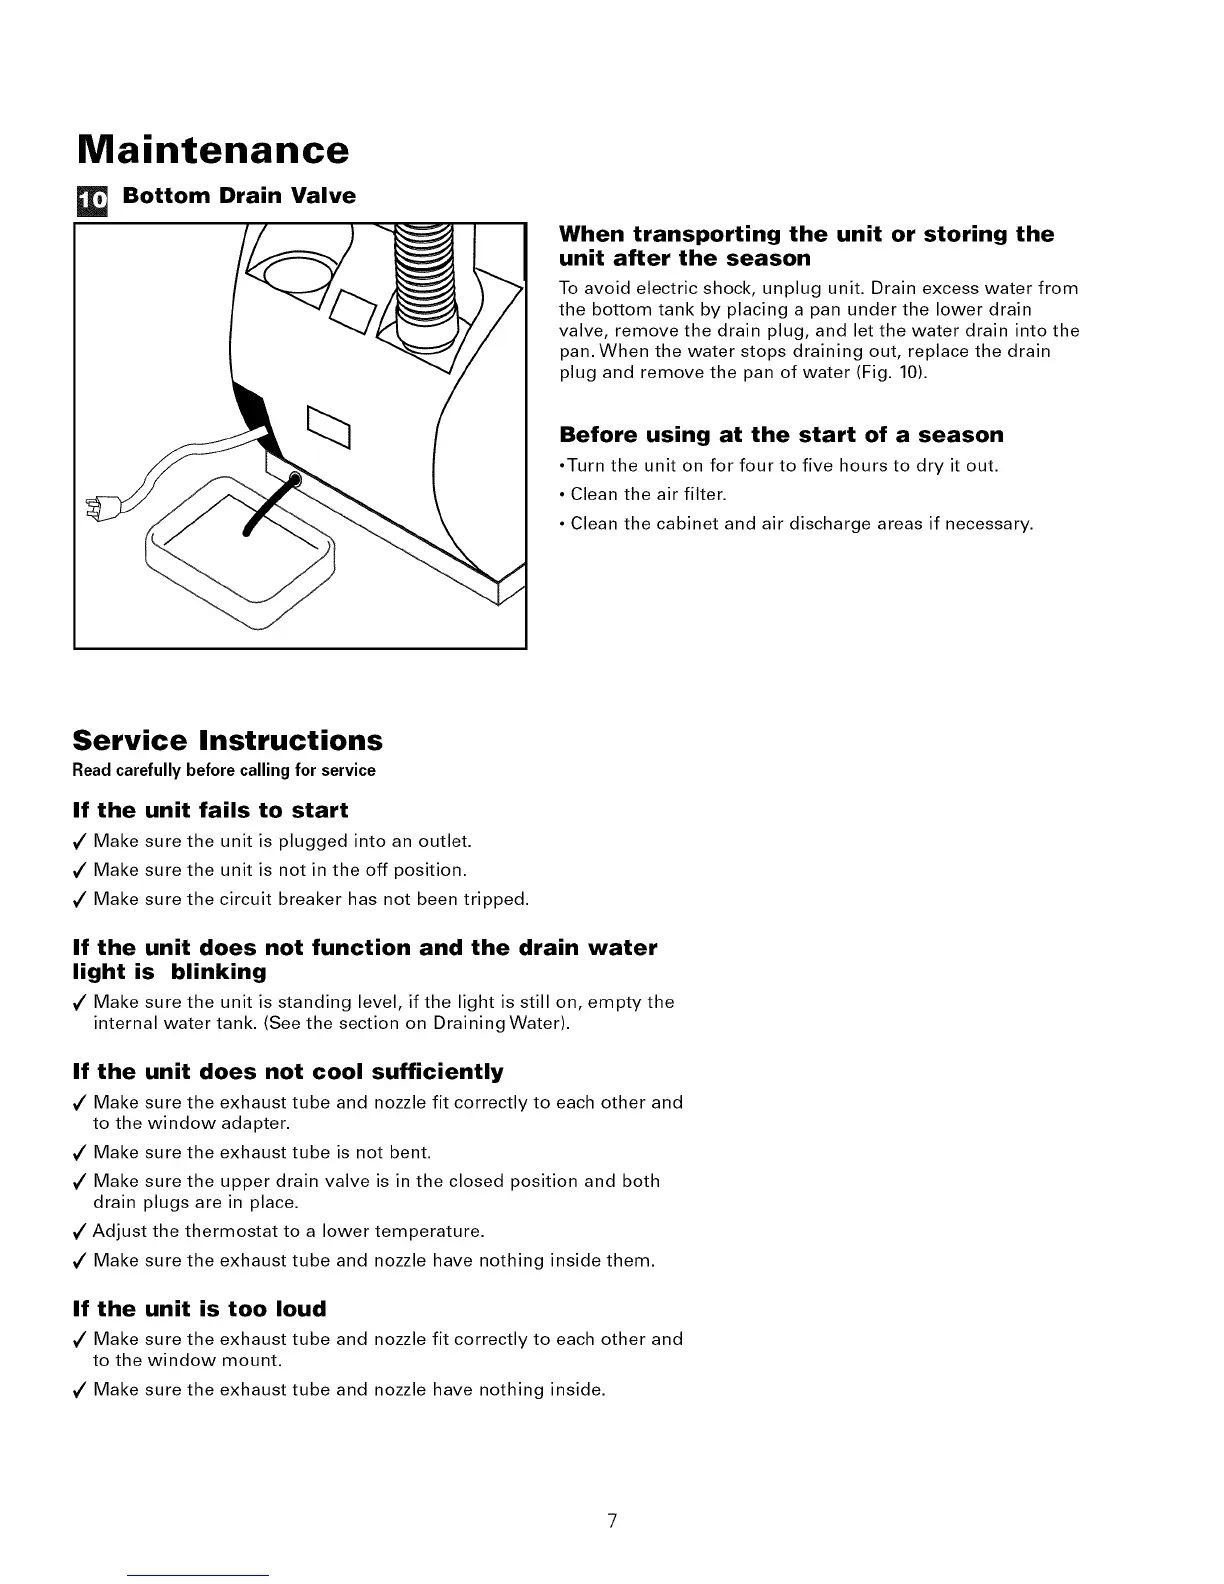
Bottom Drain Valve
When transporting the unit or storing the
unit after the season
To avoid electric shock, unplug unit. Drain excess water from
the bottom tank by placing a pan under the lower drain
valve, remove the drain plug, and let the water drain into the
pan. When the water stops draining out, replace the drain
plug and remove the pan of water (Fig. 10).
Before using at the start of a season
•Turn the unit on for four to five hours to dry it out.
• Clean the air filter.
• Clean the cabinet and air discharge areas if necessary.
Service Instructions
Read carefully before calling for service
If the unit fails to start
7" Make sure the unit is plugged into an outlet.
7" Make sure the unit is not in the off position.
7" Make sure the circuit breaker has not been tripped.
If the unit does not function and the drain water
light is blinking
7" Make sure the unit is standing level, if the light is still on, empty the
internal water tank. (See the section on DrainingWater).
If the unit does not cool sufficiently
7" Make sure the exhaust tube and nozzle fit correctly to each other and
to the window adapter.
7" Make sure the exhaust tube is not bent.
7" Make sure the upper drain valve is in the closed position and both
drain plugs are in place.
7" Adjust the thermostat to a lower temperature.
7" Make sure the exhaust tube and nozzle have nothing inside them.
If the unit is too loud
7" Make sure the exhaust tube and nozzle fit correctly to each other and
to the window mount.
7" Make sure the exhaust tube and nozzle have nothing inside.